


21
Before You Start Playing
Before You
Start Playing
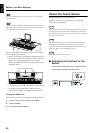
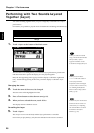
Connecting a Microphone
You can connect a microphone into the Mic In jack, and enjoy
karaoke with the KR-7/5.
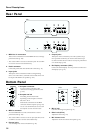
fig.00-10
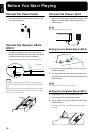
1. Connect a microphone (sold separately) to the Mic In
jack on the lower-right area of the instrument.
2. Rotate the [Mic Volume] knob in front of the Mic In
jack to adjust the volume level for the microphone.
3. Rotate the [Mic Echo] knob to adjust the echo level
(KR-5).
The KR-7 does not feature an [Mic Echo] knob. When
you want to adjust the mic echo on the KR-7, refer to
“Adjusting the Echo (Echo)” (p. 38).
Some Notes on Using a Microphone
• Be careful of high volume levels when using mikes late
at night or early in the morning.
• When connecting a microphone to the KR-7, be sure to
lower the volume. If the volume control is too high when
the microphone is plugged in, noise may be produced by
the speakers.
• Howling could be produced depending on the location
of microphones relative to speakers. This can be
remedied by:
- Changing the orientation of the microphone.
- Relocating microphone at a greater distance from
speakers.
- Lowering volume levels.
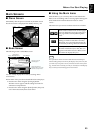
Connecting an External
Display (KR-7)
You can connect a computer monitor or other such external
display to the instrument, and display scores and lyrics on
the larger screen, and display whatever images as you like.
For more about the external display settings, refer to
“Changing the Settings for Showing Images with the
External Display (External Display) (KR-7)” (p. 153). For
more on displaying images, refer to “Selecting Images To Be
Shown on the KR-7 and External Displays (User Image
Display) (KR-7)” (p. 154).
Displays That Can Be Connected to This Instrument
In general, a great many of the VGA monitors and multiscan
monitors that are available on the market are compatible
with this instrument. However, before you connect any
monitor, make sure it meets the following specifications:
• Resolution 640 x 480 pixels
• Horizontal scan frequency 31.5 kHz
• Vertical scan frequency 60 Hz
• Connector 3-row, 15-pin D-Sub type
• Signal Analog
NOTE
Confirm that the display to be used is compatible with the
frequencies mentioned above. Using a display that is not compatible
with the above frequencies may result in incorrect image output
when images move, and in certain cases may even damage the
display.
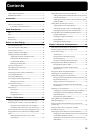
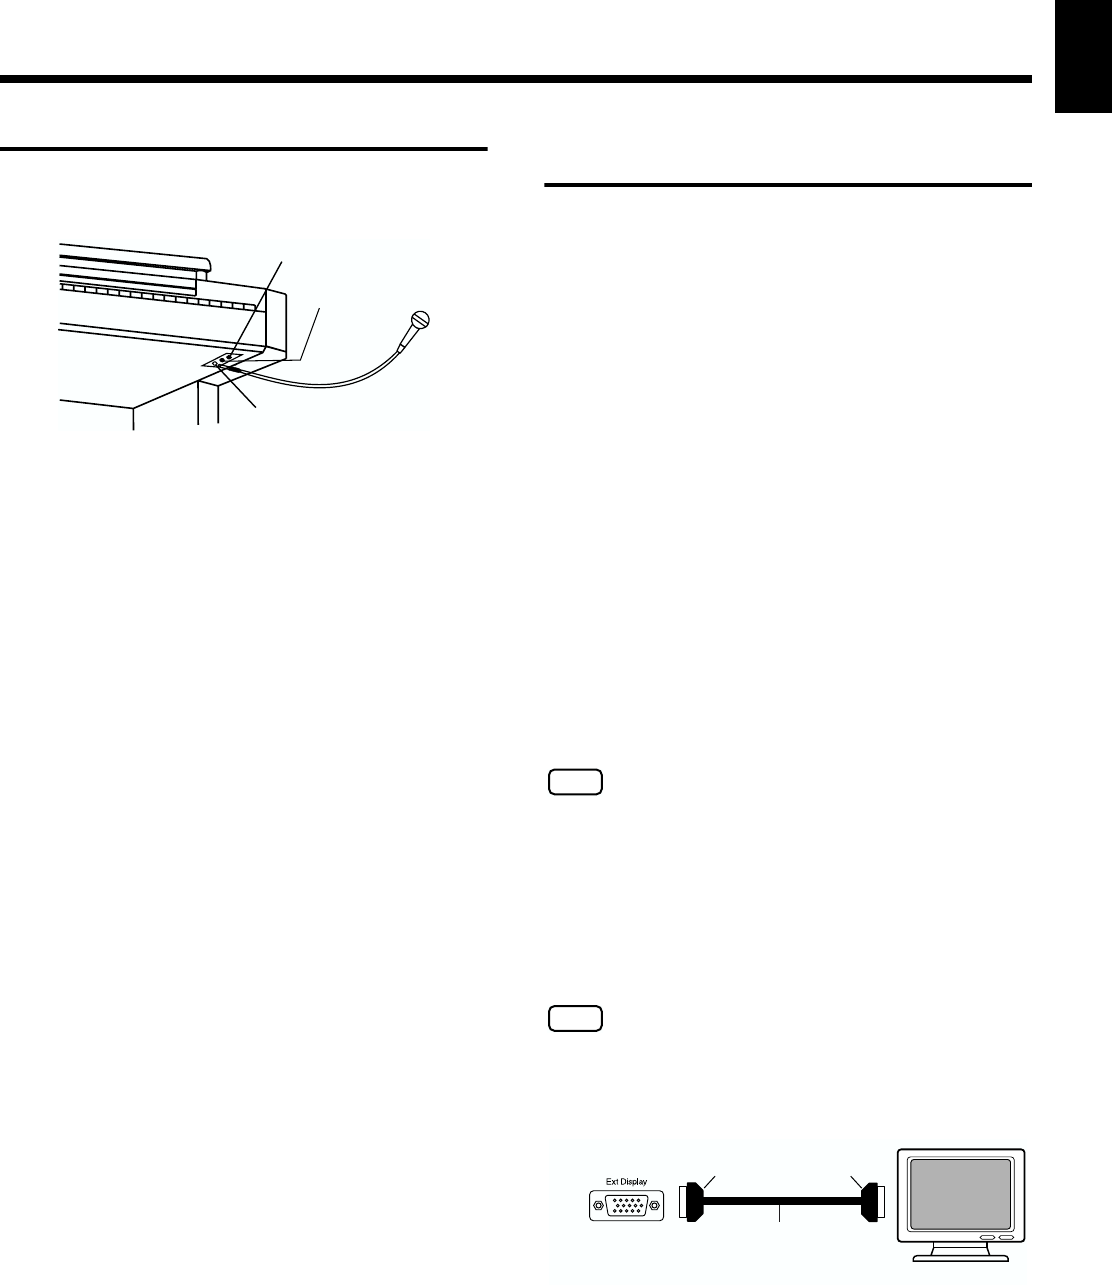
■ Making the Connections
NOTE
To prevent malfunction and/or damage to speakers or other devices,
always turn down the volume, and turn off the power on all devices
before making any connections.
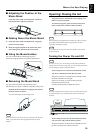
1. Turn off the power to the KR-7 and the display to be
connected.
2. Use display cable (sold separately) to connect the
display to the Ext Display connector on the KR-7.
3. Switch on the KR-7.
4. Switch on the connected display.
Mic In jack
Mic Echo knob
(KR-5)
Mic Volume knob
External Display
KR-7 Rear
Ext Display Connector
D-sub 15 pin
(Mini)
D-sub 15 pin
(Mini)
Display Cable
(Sold separately)