Introduction
Welcome to the most exciting home karaoke unit ever created! In addition to your main Tiger Karaoke unit, also included
with this purchase are:
AC power cord
USB cable
CD Rom
Microphone
Tiger Karaoke is not only special on account of its superior sound quality, but also because you are able to download your
favorite songs off the Tiger Karaoke website right into your new player! You can update your player any time you wish
with as many new songs as you wish!
Playing the Demo Songs
Your Tiger Karaoke player comes with 6 demo songs. These songs are shortened versions of the original. To play the
songs, use the song select / buttons to select the song you want to play. Then press the Play/Pause button to start
the song. When you transfer songs you have purchased from the Tiger Karaoke website to your player, the demo songs
will no longer be available.
You can download the full length version of these six demo songs plus two other songs for free.
Quickstart
STEP 1: UNPACKING AND FIRST CONNECTIONS
Unpack your Tiger Karaoke player from its packing box.
Place your Tiger Karaoke player within 6 feet of your computer.
Connect the supplied power cable into
the power entry jack on the rear of your
Tiger Karaoke player.
Connect the other end of the power
cable to an AC receptacle.
Push the power button to turn on your
Tiger Karaoke player.
32
If you connect your player to your USB port before installing the software, follow the Windows prompts to install a
new USB device. Then insert your ‘Tiger Karaoke Assistant’ CD and follow the directions on screen.
STEP 3: CONNECTING TO THE TIGER KARAOKE WEBSITE FOR DOWNLOADING SONGS
Start the ‘Tiger Karaoke Assistant’ application by double clicking on its icon.
Check the top left hand corner of ‘Tiger Karaoke Assistant’ to make sure there is an
‘Tiger Karaoke Access Code’.
If there is no access code, plug in your Tiger Karaoke player to your USB port on you computer. When the
application is open, click the button ‘TigerKaraoke.com Home Page’.
When you click this button it will connect to the dedicated website where you can purchase and download your
favorite songs.
To connect to the Internet it will use your computer's default Internet connection settings.
STEP 4: LOGGING IN AT THE TIGER KARAOKE WEBSITE
When your web browser displays the Tiger Karaoke website click on the ‘login’ button.
When your browser loads the login page click the ‘Create Account’ button.
Follow the directions on the screen to set up an account for downloading songs.
During login, the website will prompt you for your Access Code. You can find your access code by looking at the
top left hand corner of your PC Application.
STEP 5: PURCHASING, DOWNLOADING AND TRANSFERRING SONGS
Now that you are registered you can purchase songs from the website. For help, click the
‘question mark’ button
in the top right hand corner of the website.
After purchasing songs on the website open the ‘Tiger Karaoke Assistant’ application (if it is not already running).
With your Tiger Karaoke player still connected to your USB port, click the button ‘Update Song List from Net’
on the ‘Tiger Karaoke Assistant’ application . Clicking this button will download all the songs
you’ve purchased from the ‘TigerKaraoke.com’ website and store them on your computer.
Select the songs you want to download to your device by clicking on a song to highlight it.
When a song is highlighted click the ‘arrow’
button to move the selected song to the ‘Transfer Songs to
Player window’.
When you’ve selected the songs you want to transfer, click the ‘Transfer Songs to Player’ button. Clicking this
button will transfer the songs you’ve selected to your Tiger Karaoke player. Your computer will prompt you when it
is done transferring.
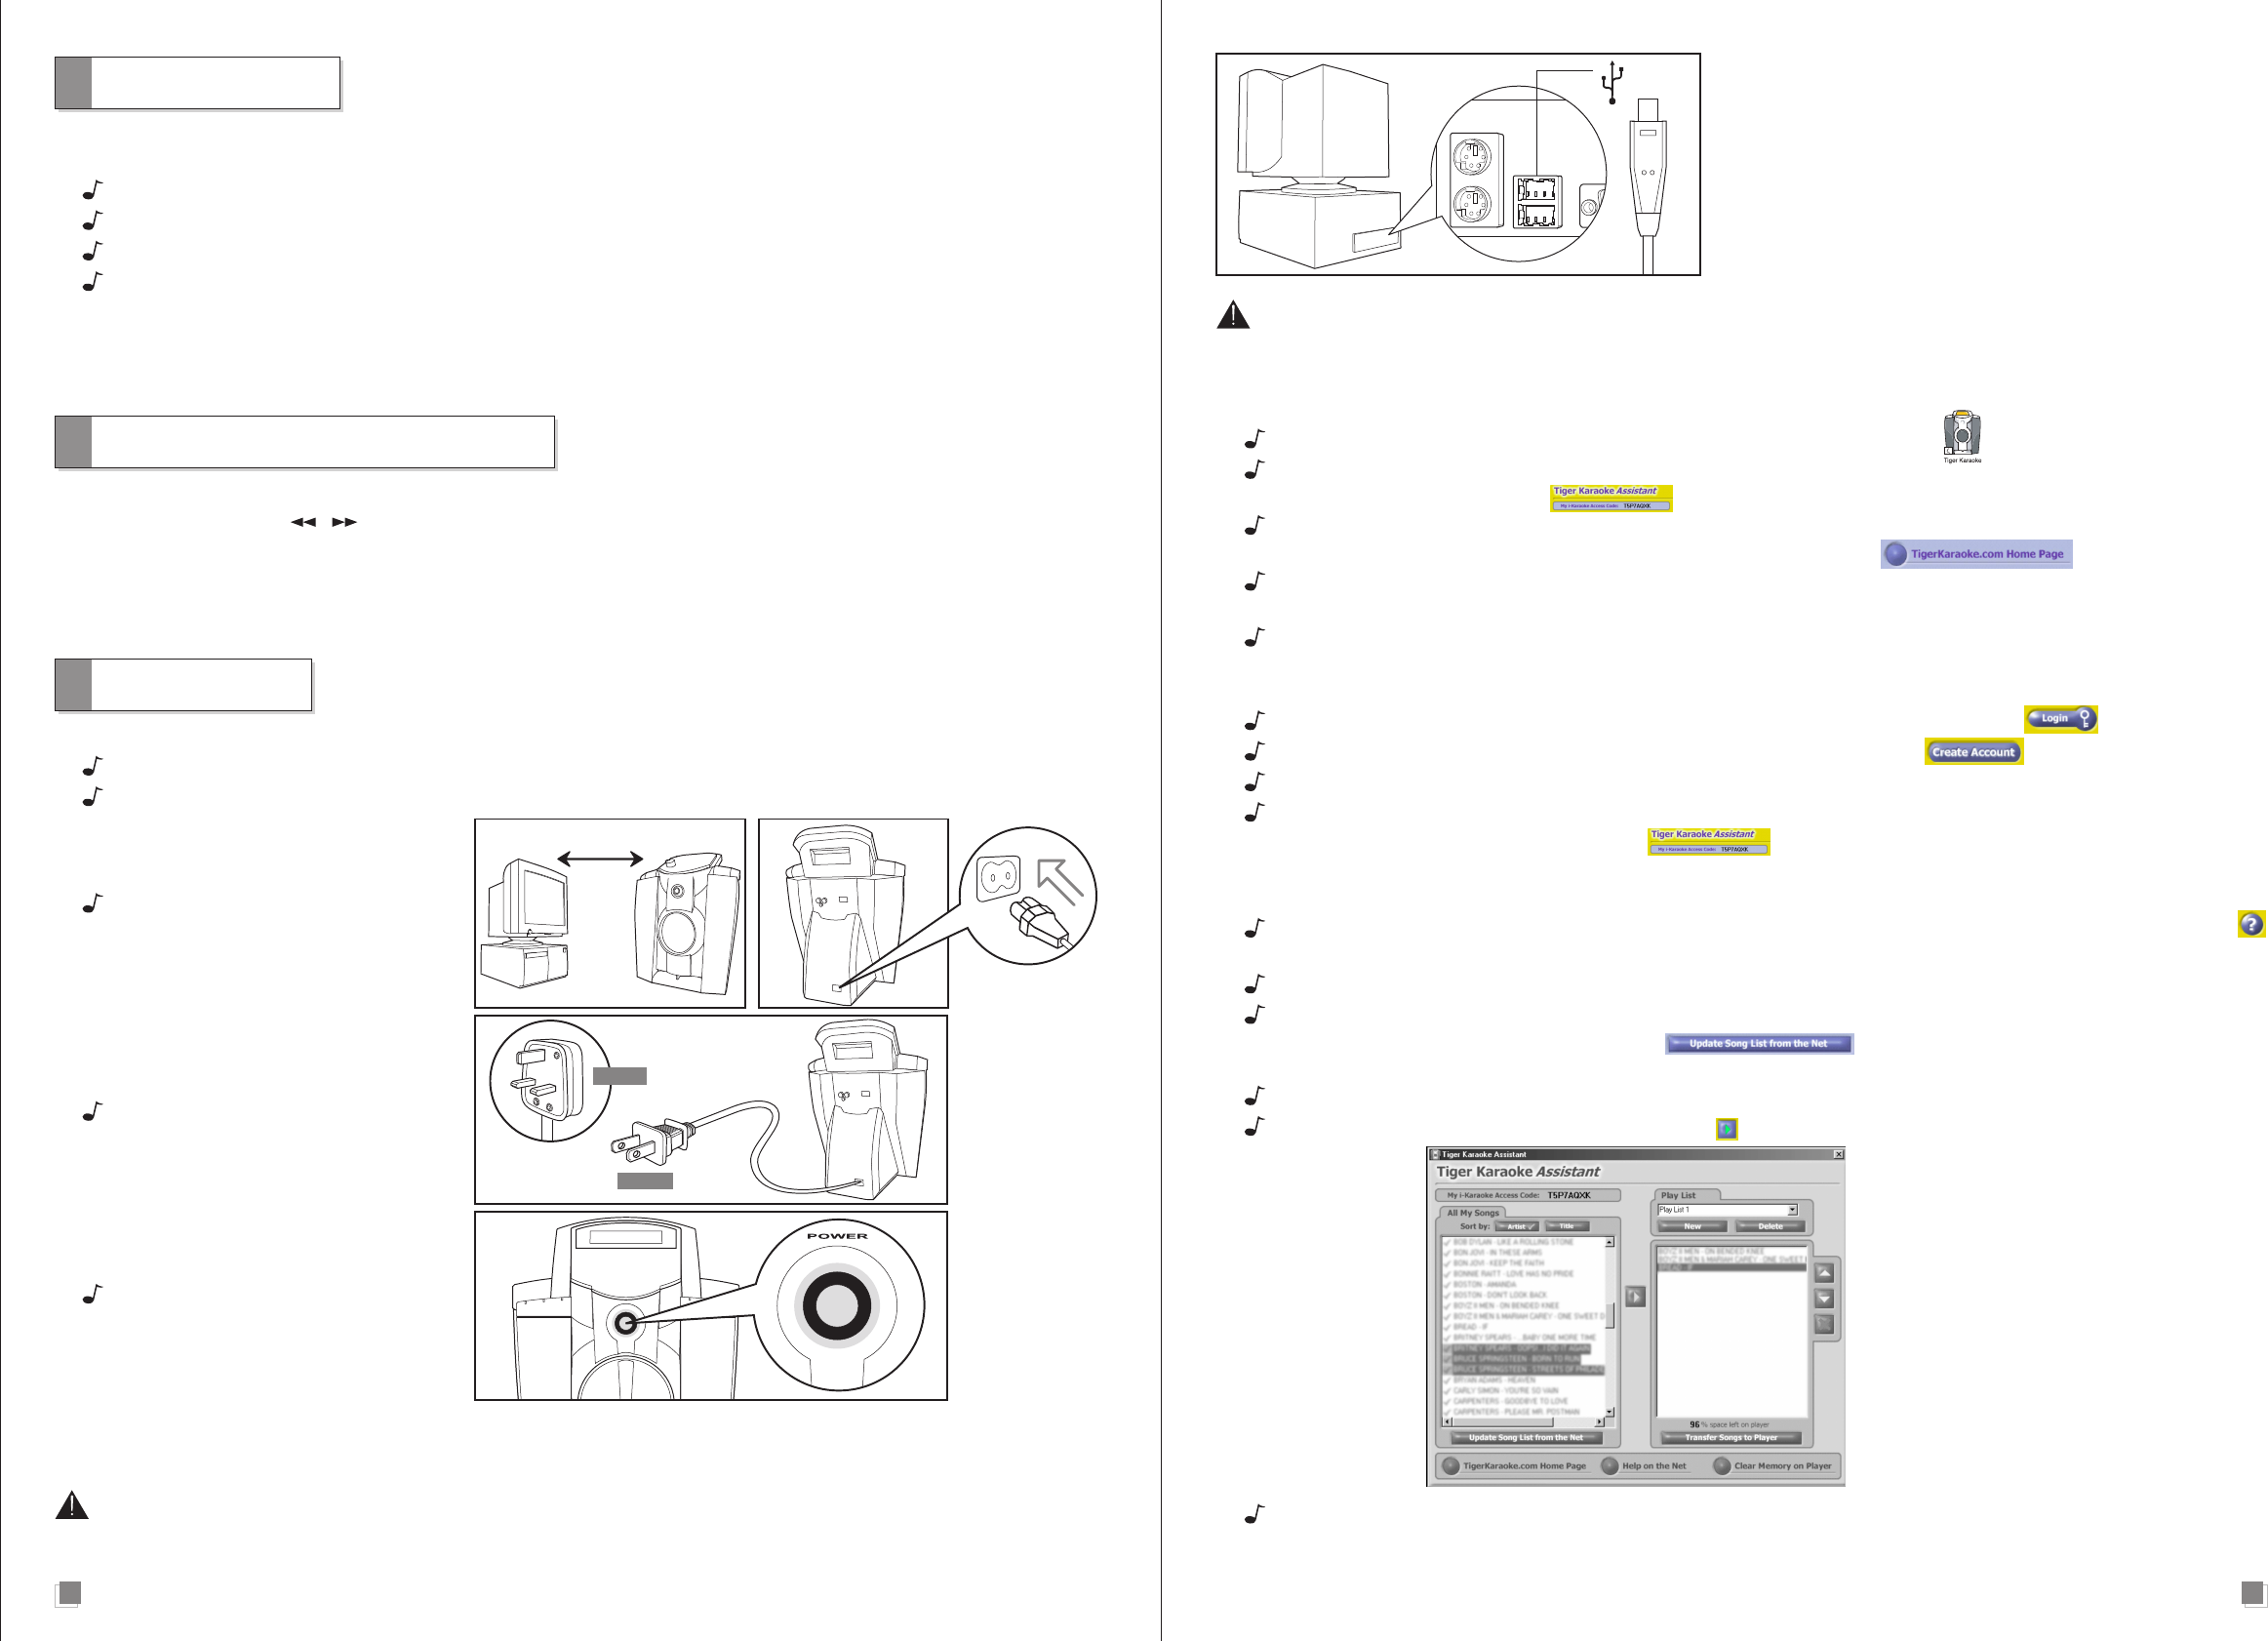
Connect the other end of the USB cable into the USB port on
your computer.
STEP 2: LOADING SOFTWARE
With your computer turned on and running Windows 98SE, Millennium or 2000, insert the Tiger Karaoke Assistant CD-ROM
and follow the install procedures on screen.
If you are not prompted to install the software, select ‘Explore’ by right clicking on ‘My Computer’. Locate your CD-
ROM drive that contains the Tiger Karaoke Assistant and open the ‘setup’ file. After you have completed the Installation
connect the supplied USB cable into the USB entry jack on the rear of your Tiger Karaoke player.
USB Port
6 Feet Max
For US
For UK


