5
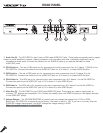
REAR PANEL
1
4
2
6 7
5
3
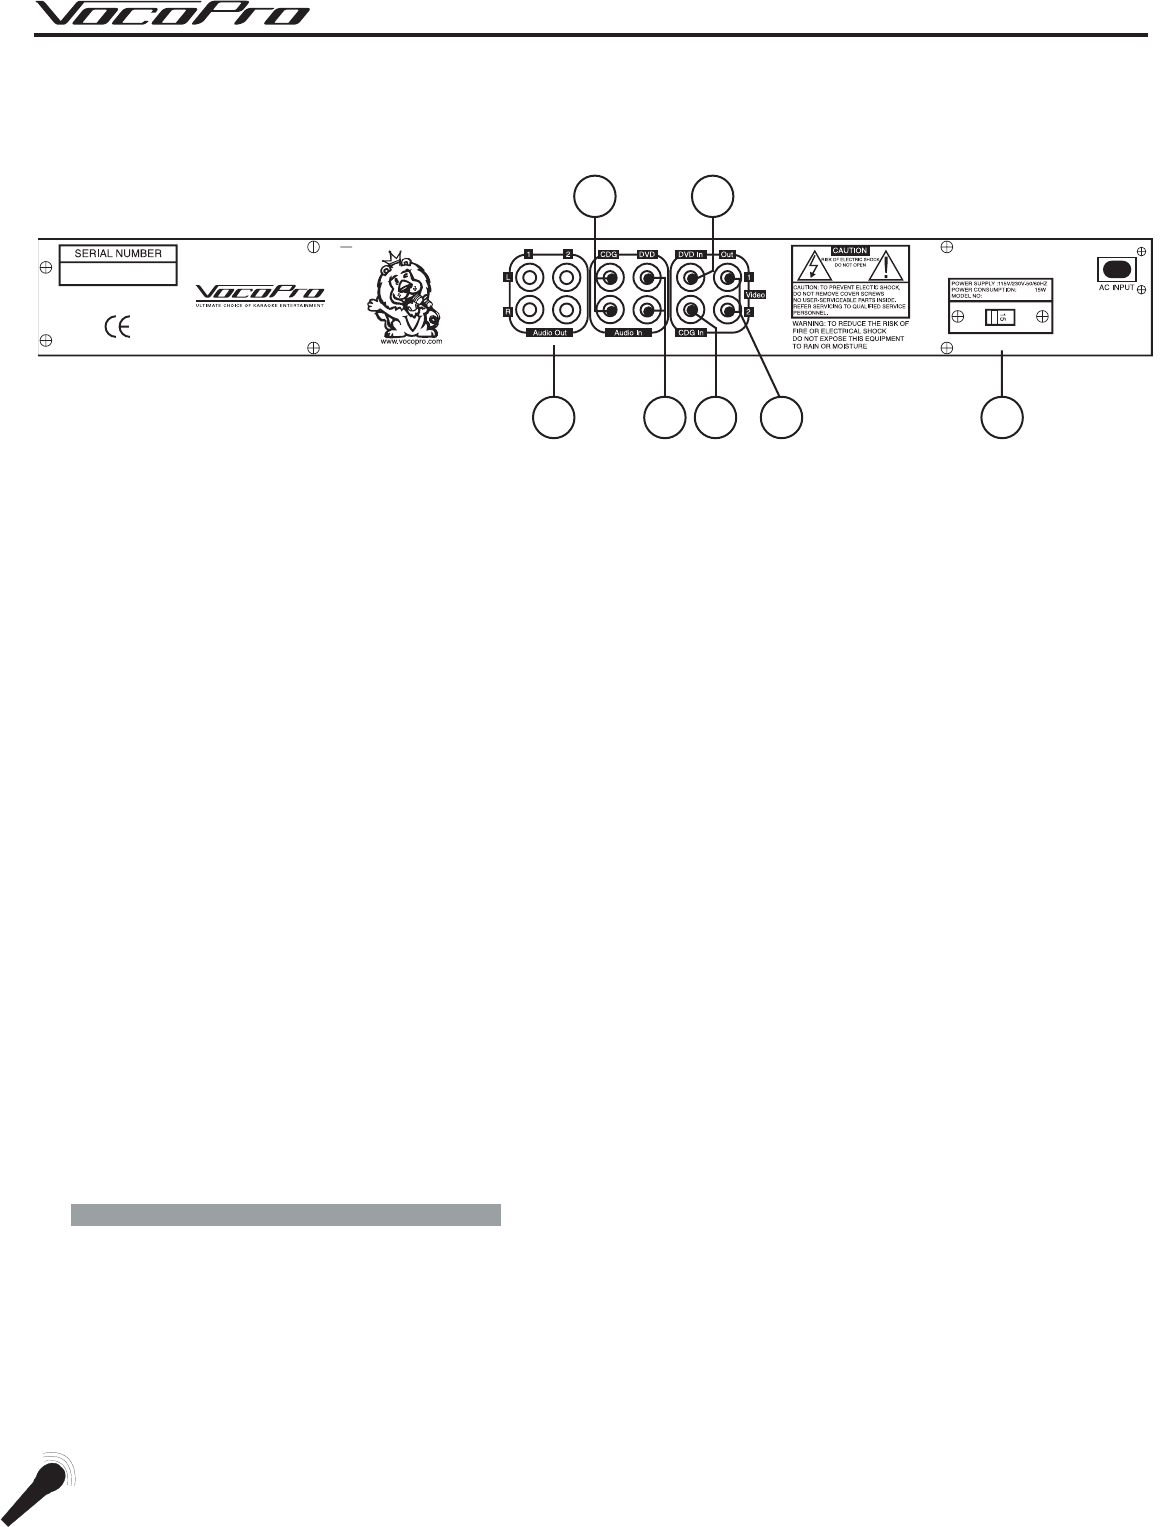
1. Audio Out (2) - The DA-1000 Pro has 2 sets of RCA style AUDIO OUT jacks. These jacks are typically used to supply
output to power amplifiers, however, effects processors, key controllers and other compatible equipment may be
connected to these jacks. Connect the cables from the AUDIO IN jacks of you external device(s) to these
AUDIO OUT jacks.
2. CD+G Audio In – This set of RCA jacks are for connecting the audio component from A/V device 1 (CD+G) to the
DA-1000 Pro. Connect the cables from the AUDIO OUT jacks on A/V device 1 to these AUDIO IN jacks.
3. DVD Audio In – This set of RCA jacks are for connecting the audio component from A/V device 2 to the
DA-1000 Pro. Connect the cables from the AUDIO OUT jacks on A/V device 2 to these AUDIO IN jacks.
4. CD+G Video In - This RCA jack is for connecting the video component from A/V device 1 to the DA-1000 Pro.
Connect the cable from the VIDEO OUT jack on A/V device 1 to this VIDEO IN jack.
5. DVD Video In - This RCA jack is for connecting the video component from A/V device 2 to the DA-1000 Pro.
Connect the cable from the VIDEO OUT jack on A/V device 2 to this VIDEO IN jack.
6. Video Out (2) - The DA-1000 Pro has 2 RCA style VIDEO OUT jacks. These jacks are used to supply video to
monitors, TFT displays and compatible TV’s. Connect the cable(s) from the VIDEO IN jack(s) on the display device(s)
to the VIDEO OUT jack(s).
7. Voltage Selector - The VOLTAGE SELECTOR is a switch that can change the voltage from 115V to 230V.
Before your DA-1000 Pro is shipped from the factory, the switch is set to 115V. If you live in a country that has
230-240V voltage requirements, you MUST change the voltage setting to 230V.
Note: Compatible fuse(s) 0.1 A and 0.05 A.


