


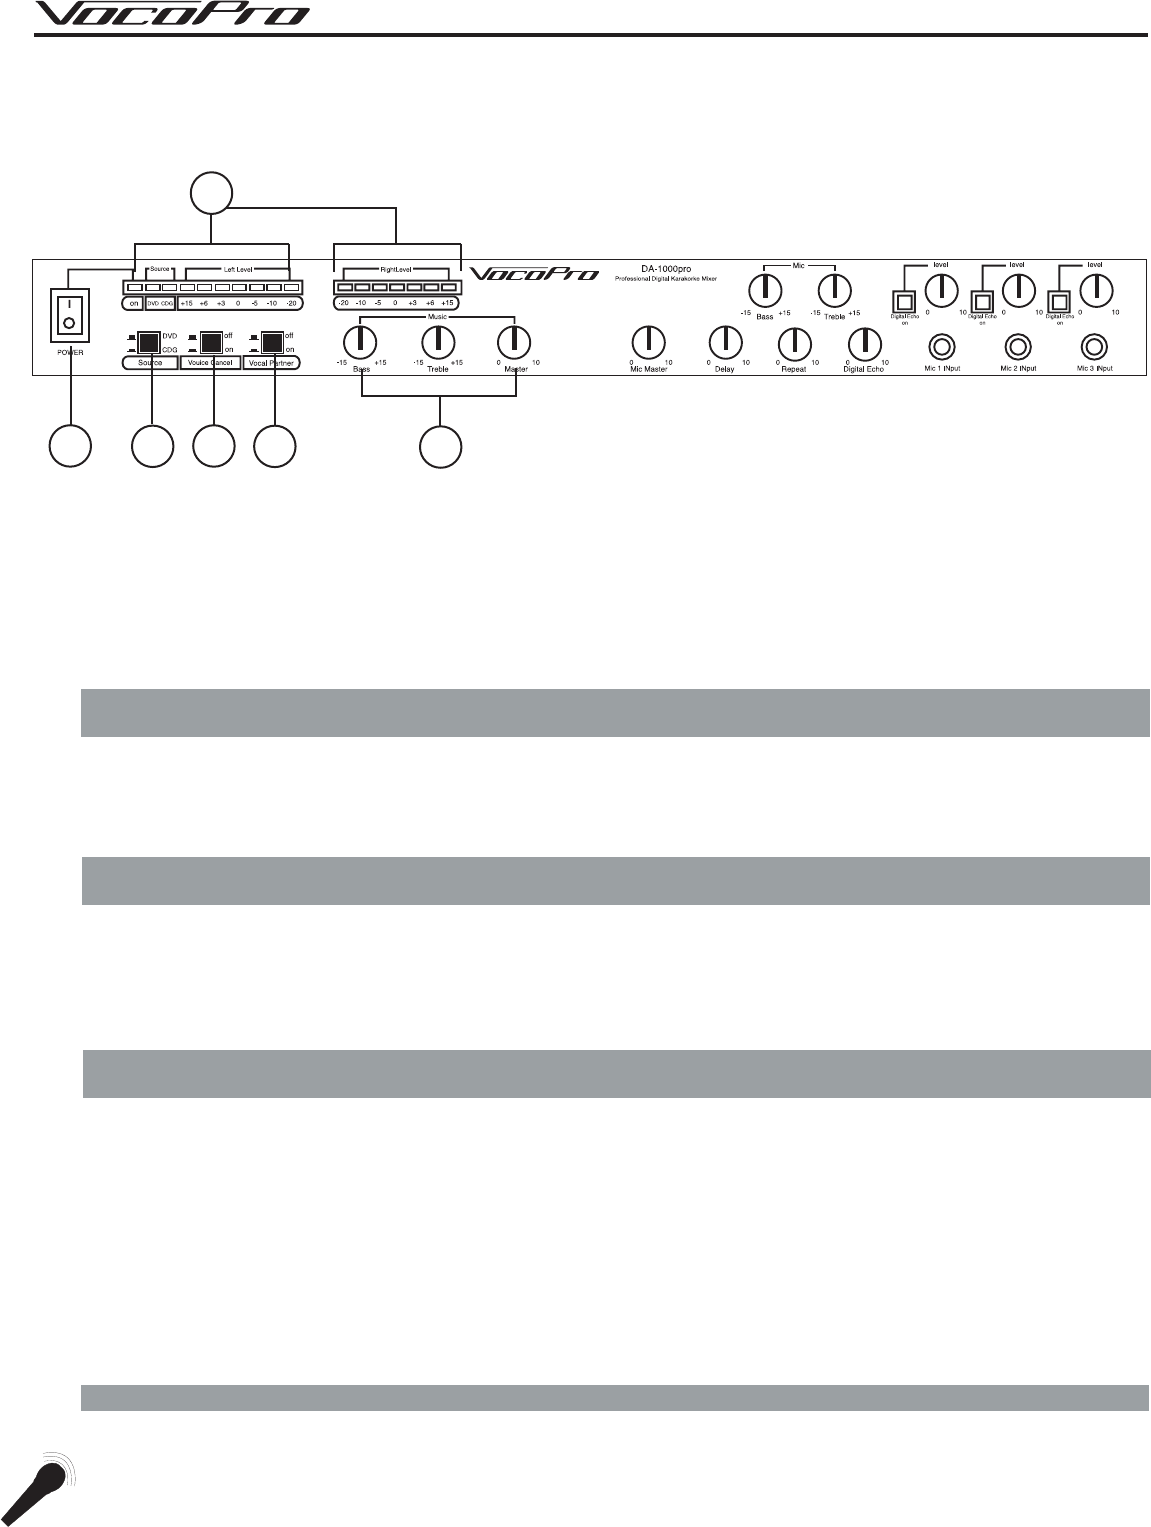
3
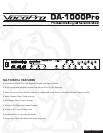
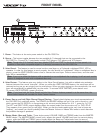
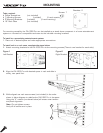
FRONT PANEL
1
2
3
4
5
6
1. Power - This button is the main power switch to the DA-1000 Pro.
2. Source - This button toggles between the two available A/V channels that can be connected to the
DA-1000 Pro. Common A/V peripherals include CD+G players, DVD players and VCD players.
Note: Though the A/V channels have been labeled “CD+G” and “DVD” on the front and rear panels, it is
possible to have other compatible digital A/V device(s) connected to the DA-1000 Pro.
3. Voice Cancel - This feature is used to cancel out the vocal layer on a 2-channel multiplexed CD+G, VCD or
cassette. In order for this feature to work properly, the disc should be “multiplexed”. When a multiplexed disc is
playing, press the VOICE CANCEL button once to remove the vocal layer. Press a second time, and the vocal
layer will be reestablished.
Note: If you try to utilize this feature while a standard or non-multiplexed disc is playing, it will not work as this
feature is designed to work with multiplexed discs only.
4. Voice Partner - This feature acts very similar to the Voice Cancel feature, but with an added voice activation
feature that acts like a vocal “auto-pilot”. When you utilize the VOICE PARTNER feature, the vocal layer will be
removed as long as you are singing into the microphone. When you stop singing into the microphone, the vocal
layer will automatically be added back into the music. To activate VOICE PARTNER, press button once.
To remove VOICE PARTNER, press a 2nd time.
Note: If you have both the Voice Cancel and the Voice Partner buttons pressed in at the same time, the
Voice Cancel feature will override the Voice Partner feature.
5. Power, Source and Left/Right Channel Output Displays - These lighted displays are visual representations of
the DA-1000 Pro’s real-time activity. The POWER and SOURCE displays tell you if the unit is turned on, and
which source the DA-1000 Pro is recognizing as it’s current source (amber for A/V 1, green for A/V 2).
The LEFT and RIGHT LEVEL output displays reflect the output levels from the source unit i.e. DVD, CD+G.
They measure from green (low) to red (high). When you see the levels reaching the red, that is known as
“peaking”, and means you should probably lower the Master Volume or Master Mic levels to avoid distortion
and possible damage to speakers.
6. Master Music, Bass and Treble - These knobs control VOLUME, BASS and TREBLE levels from the MASTER
MUSIC device. The MASTER MUSIC control knob, adjusts the overall VOLUME level from the current playing
source, while the BASS and TREBLE control knobs adjust the Bass and Treble levels from the source.
Note: Microphone levels are not adjusted with these knobs as they have their own separate controls