


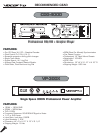

If you purchased the DA-1000 Pro, it is likely you have other Karaoke equipment, such as a CD+G player, Mic’s etc,
and know your connectivity options. If you do not, and this is your 1st piece of gear for your Karaoke system, we
have provided a connectivity diagram and step by step instruction set for you below.
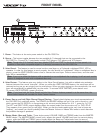
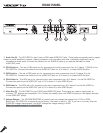
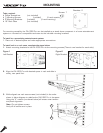
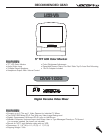
Step 1 – Connecting A/V device(s):
The DA-1000 Pro has two A/V channels for external devices to provide audio and video. These devices can be
CD+G, DVD and/or VCD players. Each A/V channel has a set of L/R AUDIO IN jacks and a VIDEO IN jack.
For each external A/V device, connect a stereo RCA cable from the L/R AUDIO OUT jacks to a L/R AUDIO IN
jacks on the DA-1000 Pro. Then connect an RCA video cable from a VIDEO OUT jack on the A/V device to the
VIDEO IN jack on the DA-1000 Pro.
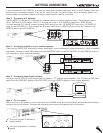
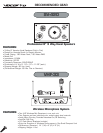
Step 2 – Connecting amplifiers and/or outboard devices:
There are two AUDIO OUT channels for power amplifier(s), sound processor(s), effects board(s) or other compatible
equipment. Connect a stereo RCA cable from the AUDIO OUT jacks on the DA-1000 Pro to the AUDIO IN jacks on
your amplifier or other outboard device(s).
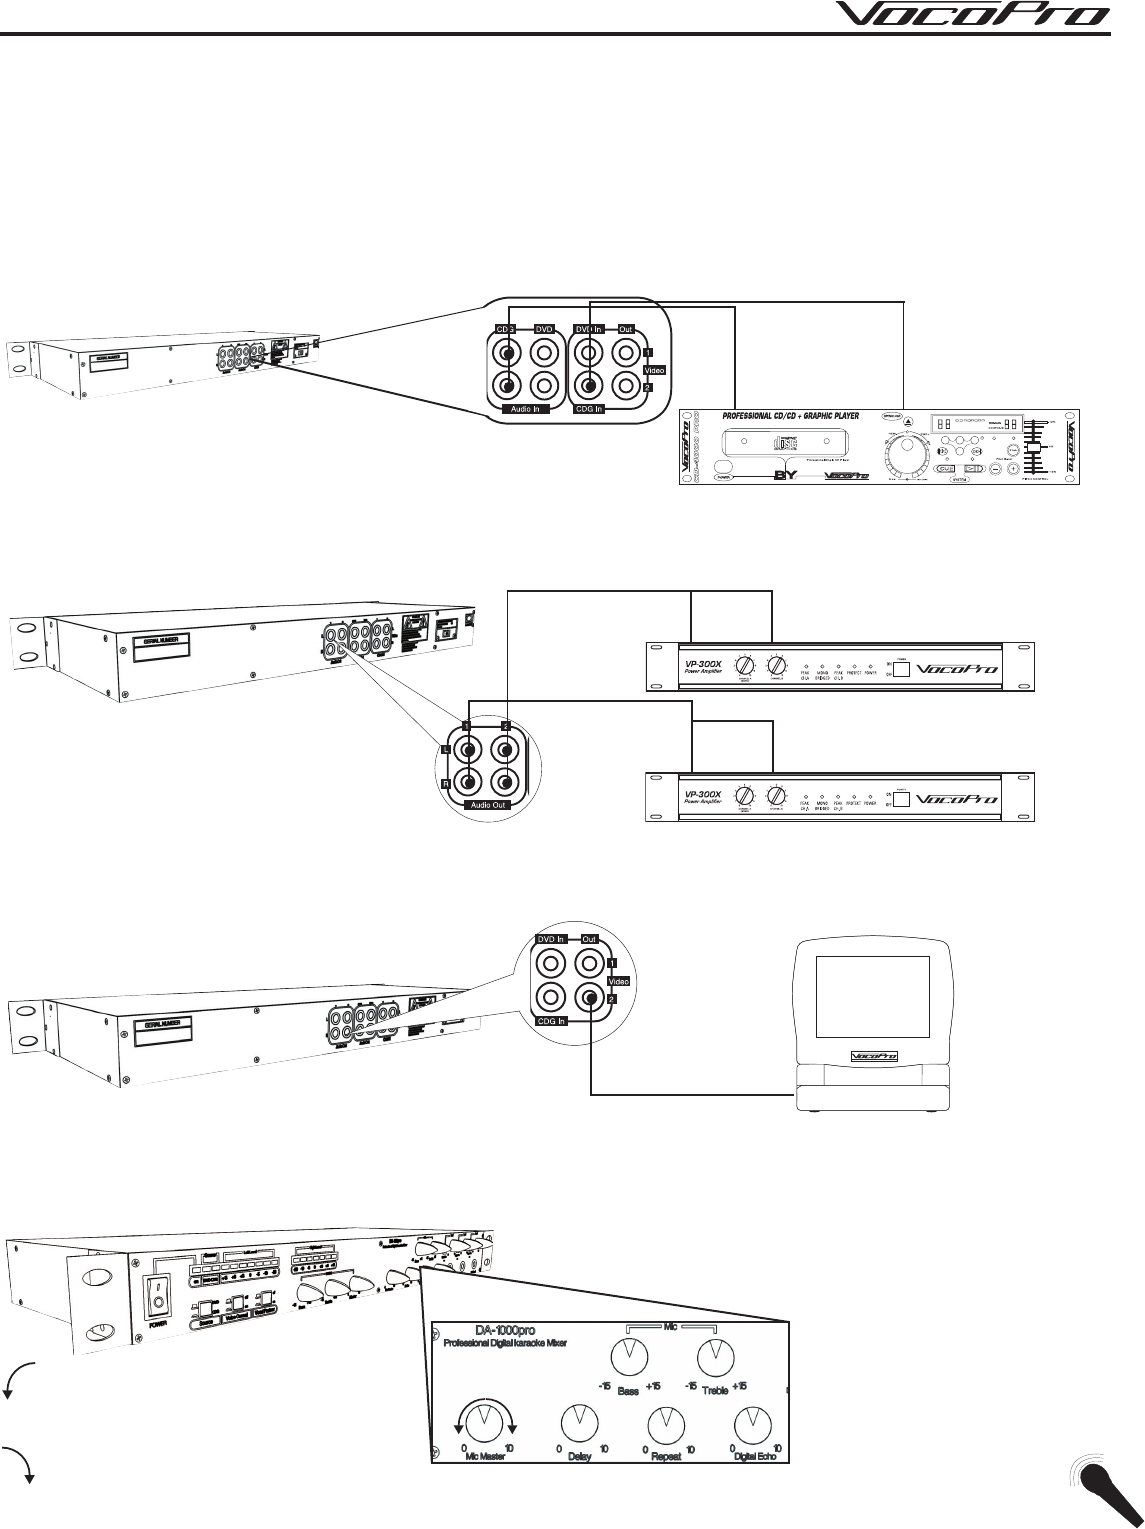
Step 3 – Connecting video display device(s):
For video, the DA-1000 Pro can output video to monitors, TFT displays and compatible TV’s. Connect an RCA video
cable from the VIDEO OUT jack(s) on the DA-1000 Pro to the VIDEO IN jack(s) on your display device(s).
Step 4 – Turn on power:
Before turning on the power to units, make sure the VOLUME knobs are turned down to prevent accidental blaring
and then turn up as desired. Continue with checking sound levels until satisfied with all the levels.
8
GETTING CONNECTED
Turn knob counter clock-wise to
reduce level(s)
Turn knob clock-wise to increase
level(s)
Audio out
Audio in
Video out
Video in
Audio out
CH. A
CH. B
CH. A
CH. B
Audio out
Video out
Video in