Connecting the Clavinova Directly to the Internet
Operations in the Special Website
CVP-405/403/401 Owner’s Manual
180
6 To execute the setting, press the [3
ππ
ππ
] (ENTER) button. To cancel,
press the [3
††
††
] (CANCEL) button.
7 To actually apply all settings changed in the Internet Settings display,
press the [7
ππ
ππ
††
††
] (SAVE) button.
To cancel, press the [8
π†
] (CANCEL) button.
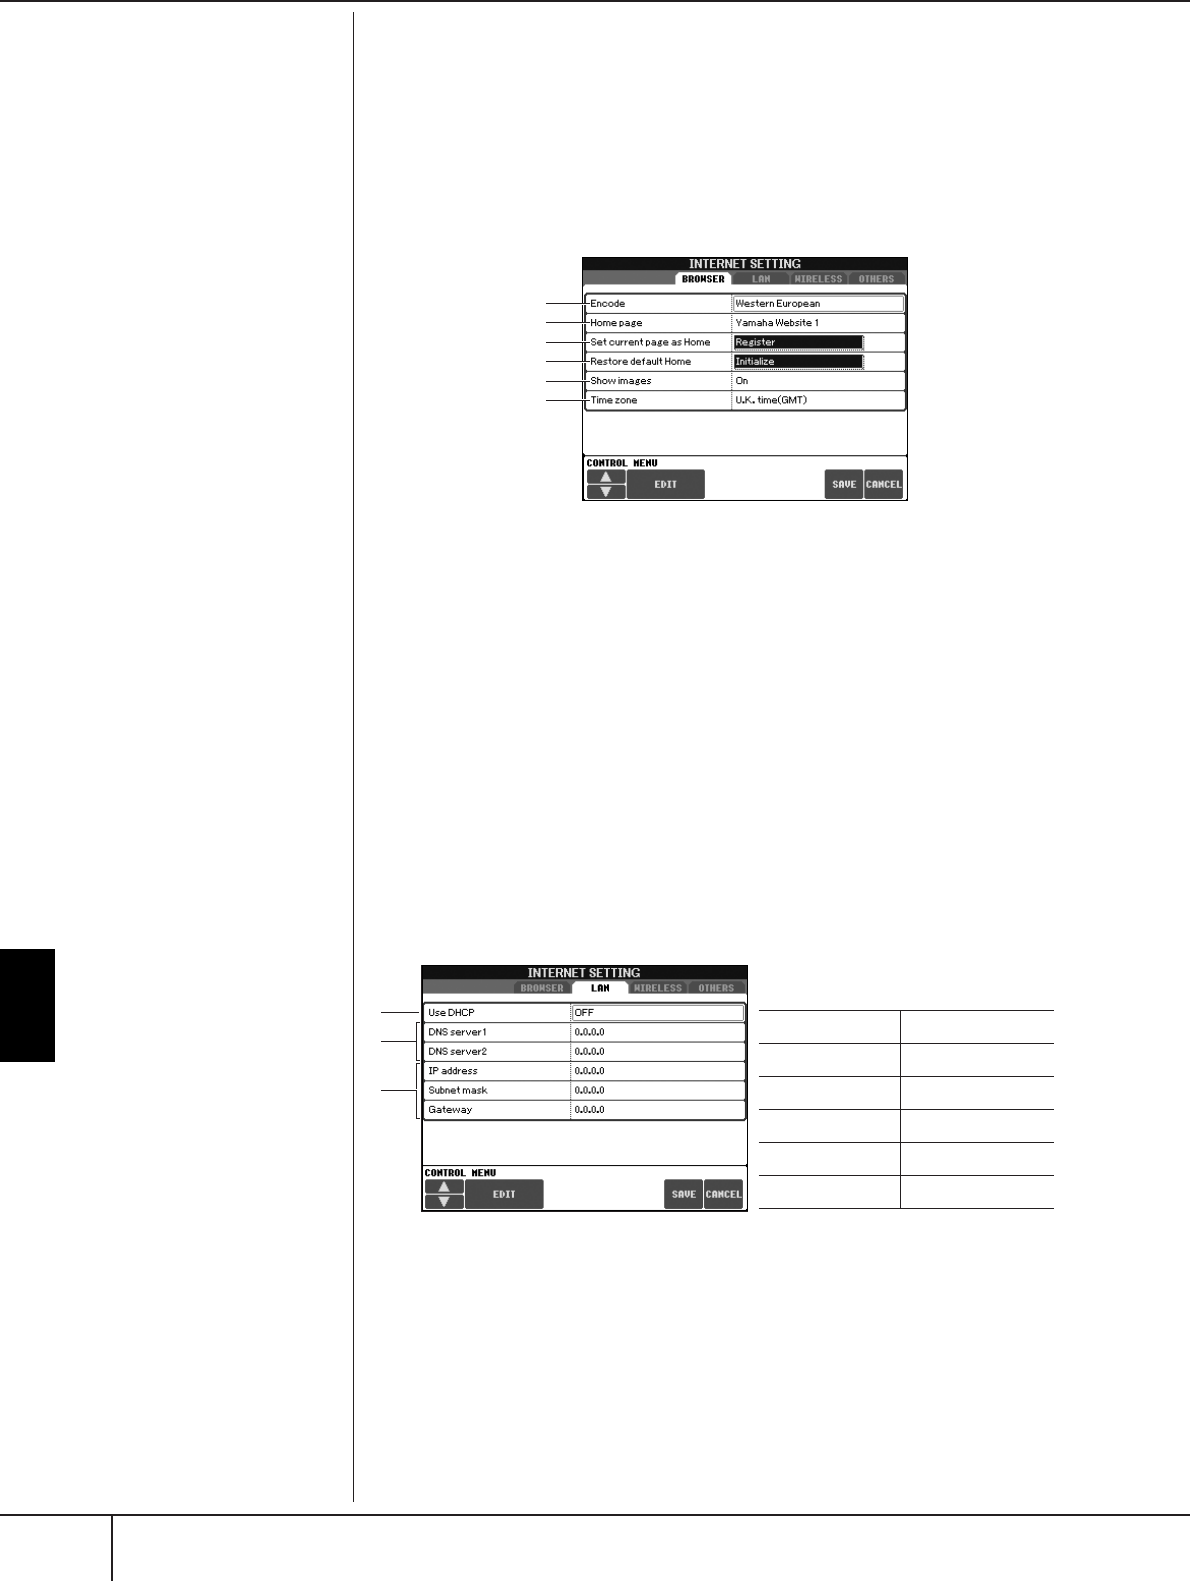
Browser
LAN
Both the wired LAN and wireless LAN need to be set in this display.
1
2
3
4
5
6
1 Encode
Selects the character code encoding for the browser.
2 Home Page
Shows and allows editing of the web page which is set as the home page.
3 Set current page as Home
For details, refer to “Changing the Home Page” on page 182.
4 Restore Default Home
Restores the home page setting.
5 Show images
Image data and pictures in the web page are shown in the browser when this is set
to on. Image data is not shown when this is set to off.
6 Time zone
This determines the time zone setting for the browser.
1
2
3
Make a written note of the settings here,
in case you have to enter them again.
Use DHCP
DNS server1
DNS server2
IP address
Subnet mask
Gateway
1 Use DHCP
Determines whether or not DHCP is used. If your router is compatible with DHCP,
select “ON.”
2 DNS server 1/DNS server 2
These determine the addresses of the primary and secondary DNS servers. These
settings must be made when “Use DHCP” above is set to “ON (set DNS manu-
ally)” or “OFF.”
3 IP address/Subnet mask/Gateway
These settings are available only when DHCP is not used. The settings here are: IP
address, subnet mask, and gateway server address. These settings must be made
when “Use DHCP” above is set to “OFF.”


