


10
Song Recording
Song recording lets you record data, produced as the drum kit is
played, to the sequencer in real-time (one track at a time). All MIDI
channels (1-16) are recorded simultaneously. Also, data produced
by a MIDI keyboard connected to the MIDI IN jack can be re-
corded as well as sequencer data received via the MIDI IN/TO
HOST jacks.
According to the recorded sequencer data (performance informa-
tion), drum kits and voices can be changed during song playback.
The songs that are recorded can be played back and edited in the
same manner as preset songs (No. 1-48) with the Song Job mode.
■ Song Record Settings
• Select the Song
1.
Press the [PLAY] button to enter the Drum Kit Play mode,
set the User Song number (No. 96-127) that you want to
record to.
* Only User Songs (No. 96-127) can be used for recording.
Preset Songs (No. 1-95) cannot be used for recording.
• Set the Recording Conditions (Record Standby)
2.
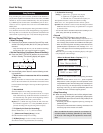
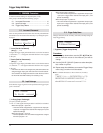
Press the [SHIFT]+[START/S] buttons, the record mode
will be in standby. The following display will appear.
y Q (Quantize Accuracy)
[Range] ƒ quarter note, ƒ3 quarter note (triplet)
© eighth note, ©3 eighth note (triplet)
˙ sixteenth note, ˙3 sixteenth note (triplet), no
The Quantize function* can be used when recording.
When set to “no”, the Quantize function will not operate.
Quantize: This function is used to correct the timing of recorded
MIDI note data. The accuracy of quantization is assigned
by the note value.
*You can also use the Quantize function after recording is com-
plete. (Song Job mode [5. Quantize] P. 25)
• Record
4.
Press the [START/S] button to start recording.
* If the Utility mode’s [3-4. MIDI Control] (P. 33) is set to “on”,
the recording operation can be started with a system real
time message (start) received via the MIDI IN/TO HOST jacks.
* When the track assigned for recording contains data and the
[START/S] button is pressed, the error message “Data not
Empty” will appear and the recording operation will not be
carried out.
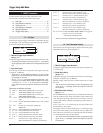
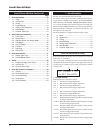
While the song is recording, the following display will appear
(only displayed, cannot change).
About the Song
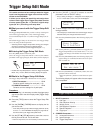
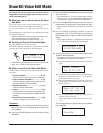
3.
Use the display shown above to set the following record-
ing conditions.
q M (the number of measures that will be recorded)
[Range] 1-999
Assigns the number of measures that will be recorded. When
there is data in the other track, the number of measures in that
track will decide the length of the song and this length cannot
be changed.
w Record Mode
Select the method of recording from the following.
Overwrite (Ovr): The record operation will be in a repeat
mode. When the song reaches the end of the last measure, it
will automatically start again from the beginning and new
data will be added to the track’s previous data.
Replace (Rpl): When the song reaches the end of the mea-
sure number assigned in “M” or the [START/S] button is
pressed, recording will stop (the song will not repeat).
e TR (Specify the Track for Recording)
Selects which track (“1” or “2”) will be recorded.
r q (Metronome Tempo) [Range] 30-300
Sets the metronome tempo for recording
t B (Beat) [Range] 1/4-8/4, 1/8-16/8, 1/16-16/16
Sets the beat of the song (metronome) for recording.
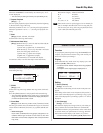
REC M= 32=Rp1†=1
ƒ=120 B= 4/4Q=©
r y
q w e
t
•Next to “M=” the measure number currently being recorded is
displayed.
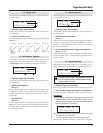
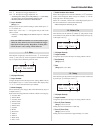
• When the Record mode is set to “Ovr”, press the [SAVE/
ENT] button to “Undo” (do again) the record operation. Press
the [SAVE/ENT] button while recording to start recording from
the top of the song. The data previously recorded from the
beginning of the song, up until the [SAVE/ENT] button was
pressed, will revert to the data originally present.
• Stop Recording
5.
When the song reaches the end of the assigned mea-
sure number, recording will automatically stop and the
DTXPRESS will return to the Drum Kit Play mode (Drum
Kit & Song display).
* Recording can also be stopped anytime by pressing the
[START/S] button.
* If the power is switched off while recording, all the data in the
User Song may be lost. Please use caution.
Data recorded in the tracks cannot be overwritten. To
record new data, use the Song Job mode’s [6. Clear Track]
(P. 26) or [8. Clear Song] (P. 26) operations to erase track
data.
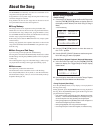
• When the Record Mode = Replace (“Rpl”)
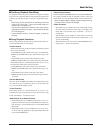
• When the Record Mode = Overwrite (“Ovr”)
REC M= 5=Rp†=1
Now Recording.
REC M= 5=Ovr†=1
UNDO press ENT