


100 PF-500
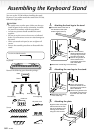
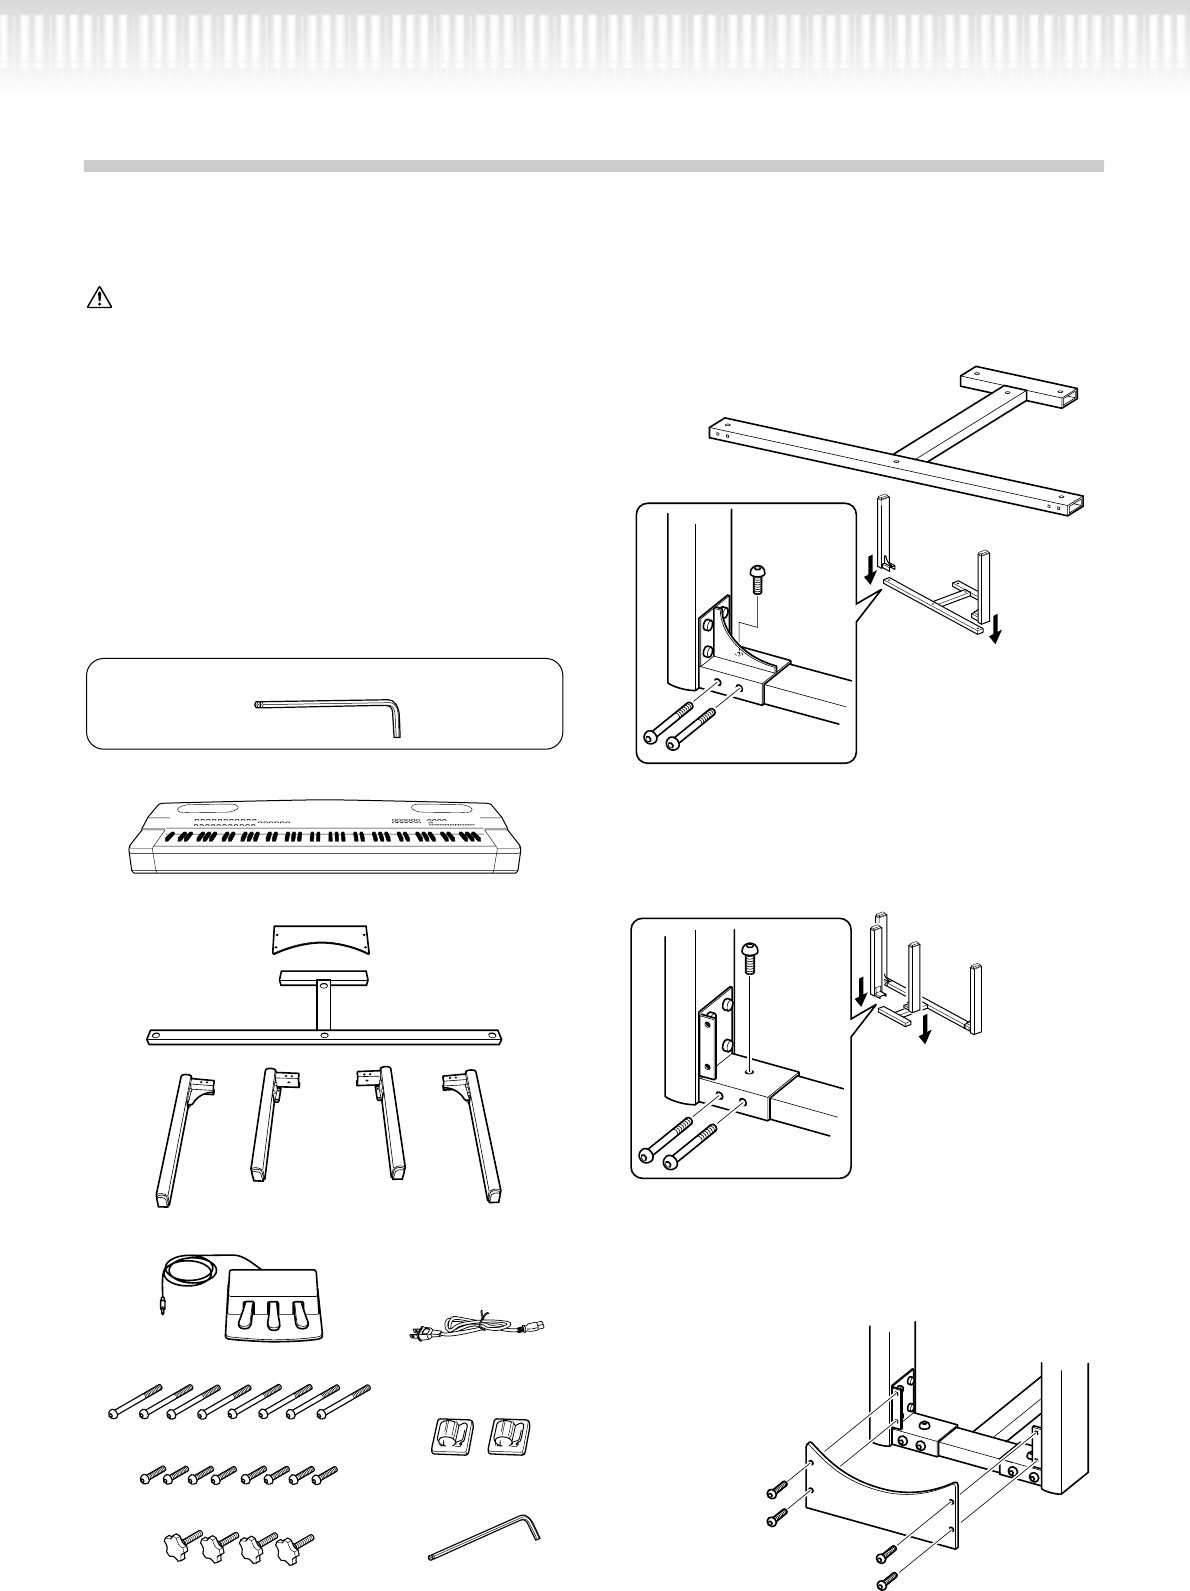
Assembling the Keyboard Stand
You can use the PF-500 without installing the stand.
However, if you wish to attach the stand to the PF-500,
follow the steps below.
CAUTION
• Be careful not to confuse parts. Make sure that you
install all parts in the correct orientation. Assemble
the stand in accordance with the steps below.
• At least two persons should assemble the stand
together.
• Be sure to use the correct-size screws, as indicated
below. Use of incorrect screws can cause damages to
the stand.
• When you attach each part, be sure to tighten all
screws.
• Reverse the assembly procedure to disassemble the
stand.
Keyboard
Remove the following parts from the package.
Screws
1.
Attaching the front legs to the stand.
2. Attaching the rear legs to the stand.
3. Attaching the plate.
Use the included wrench.
Plate
Stand
Front left leg Front right leg
Rear left leg Rear right leg
Pedal unit
AC power cord
Long screws (6x65mm) x 8
Short screws (6x20mm) x 8
Cap bolts x 4
Cord holders x 2
Wrench x 1
2
3
1 Place the stand on the floor so
that the bottom side (with
smaller holes) faces up.
4 Attach the front left leg in the same way.
2 Use a short screw to
attach the bracket of the
front right leg to the bot-
tom side of the stand.
3 Use two long screws to
fix the bracket of the
front right leg to the front
side of the stand.
1
2
1 Use a short screw to
attach the bracket of the
rear left leg to the bottom
side of the stand.
2 Use two long screws to fix
the bracket of the rear left
leg to the rear side of the
stand.
3 Attach the rear right leg
in the same way.
Align the holes on the plate
with the holes of the rear
side of the bracket on the
rear legs, then fix them
using four short screws.