


PM1D V2 System Software Installation Guide
8
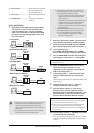
Direct installation
If you can access the Internet directly from your computer,
follow the steps below to install the software. See page 10 if you
access the Internet from a different computer.
1 Start the computer and check to see if the
following steps are complete.
• Connecting the computer and the CS1D using a D-sub
9-pin cross-cable
• Accessing the Internet from the computer
• Backing up the data in the user memories in the CS1D
(See the CS1D Owner’s Manual.)
• Updating the firmware of each component and the
CS1D screen software to V2
2 Power-on the PW1D, and when the opening
screen appears in the CS1D’s display, press and
hold down the left/right switches located below
the track pad.
Continue holding down the switches until the display
indicates MEMORY INITIALIZATION.
3 Click the AUTHORIZE/DE-AUTHORIZE button.
The display will indicate “Authorization/De-authorization
preparation was completed.”
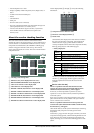
4 Insert the included CD-ROM into the CD-ROM
drive.
5 Locate the Upgrade folder on the CD-ROM, then
copy the folder onto the hard disk.
Do not run the installer directly from the CD-ROM drive.
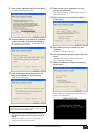
6 Double-click “PM1DUpgrade.exe” in the Upgrade
folder.
The installer window opens.
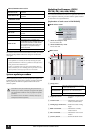
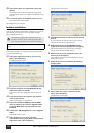
7 Select [Authorize], then click [Next].
The following window opens.
8 Select [Get access key from authentication server],
then click [Next].
The following window opens.
The installation procedure will initialize data in the user
memories in the CS1D. Be sure to back up important data
using memory card. (Refer to the CS1D Owner’s Manual.)
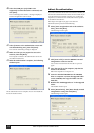
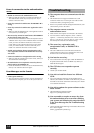
NOTE: If an error message appears, refer to the Error Message list on
page 13.