38
Getting Started
Main Page Sequence
38
Reference
Creating Waypoints
Additional Options For Creating Waypoints
Waypoints may also be created by manually entering position coordinates through the Points tab of
the Main Menu. This method can be useful for creating a waypoint at a specifi c latitude/longitude posi-
tion from a chart or other source. Entering coordinates into the MFD while it is set to a datum different
from in which the coordinates were created may result in an incorrect waypoint location. When entering a
waypoint manually, be sure that the MFD is set to the same position format (pg. 70) and map datum (pg.
71) as the paper chart or coordinate’s source.
To create a new waypoint by manually entering location coordinates:
1. Hold ADJ/MENU for two seconds to display the Main Menu. Highlight the ‘Points’ tab. You may also
MARK your current location using the steps on page 36, then proceed to step 3.
2. Highlight the ‘New Waypoint’ button and press ENTER. The waypoint ‘Review’ page appears, with the next
available waypoint number and the receiver’s last know position as the default name and position.
3. Use the ARROW KEYPAD to highlight the position fi eld and press ENTER. Use the ARROW KEYPAD or
DATA ENTRY keys to enter the desired position coordinates and press ENTER when fi nished.
4. To change the name, symbol, or enter comments, depth, or water temp, highlight the appropriate fi eld and
press ENTER. Make your changes and press ENTER when fi nished.
5. Use the ARROW KEYPAD to highlight ‘OK’ and press ENTER to save the waypoint.
Two additional options are available on the waypoint ‘Review’ page: Add To Route and Move Wpt
(Waypoint).
• Add to Route— Adds the new waypoint to the end of a route.
• Move Wpt— Allows you to move or project the waypoint to a new location on the map display.
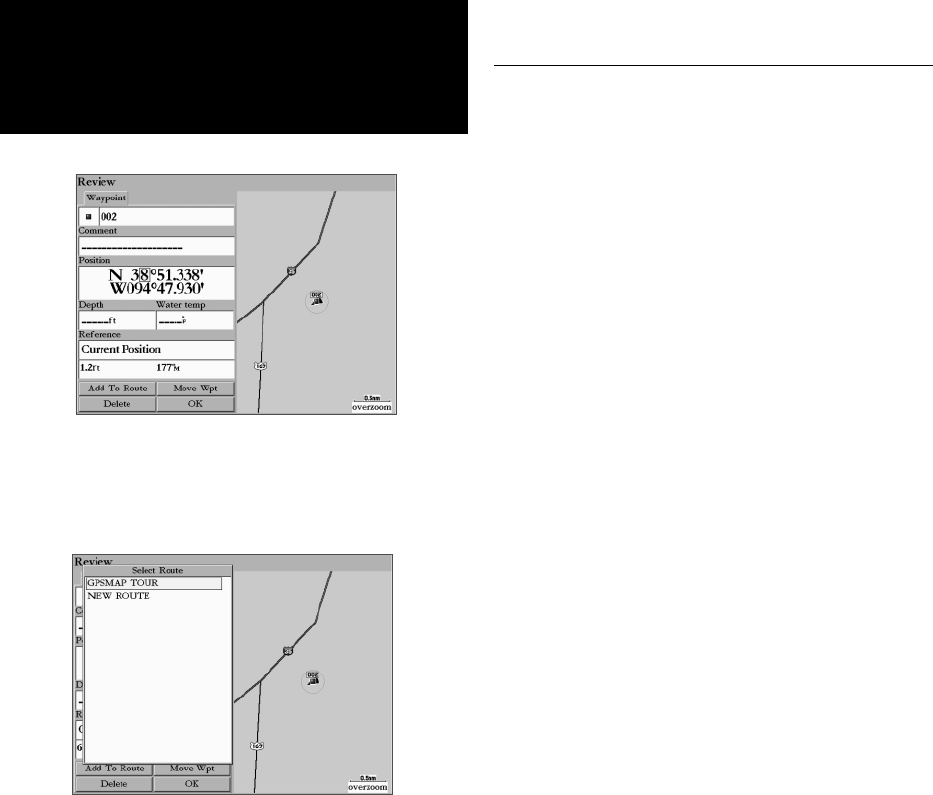
To add a new waypoint to a route:
1. Select ‘Add To Route’ button.
2. The ‘Select Route’ screen appears. Highlight the desired route or select ‘New Route’ and press ENTER.
3. With ‘OK’ highlighted, press ENTER to save the waypoint.
For more on using Routes, see page 48. For instructions on the ‘Move Wpt’ option, see page 40.
Highlight the position fi eld and
use the ARROW KEYPAD to enter
the desired position coordinates.
Choose the Route you wish to add the
waypoint to.


