35
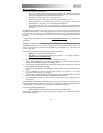
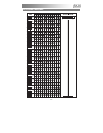
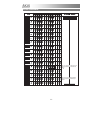
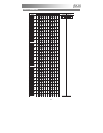
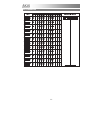
Basic EVI Fingerings
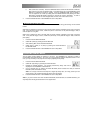
Here are a few fingerings to get you started:
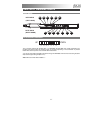
y Place your left thumb between two OCTAVE SHIFT ROLLERS. C is played by touching only
Keys 3 and 4. (Note that Keys 3 and 4 are normally held down at all times so because there are
no “valve” keys held down, this is considered the “open” fingering.)
y Now touch your left index finger to Key 1 and you have a G.
y Use the three right hand “valve” Keys 8, 9, and 10 to “finger downwards” from C or G.
y When fingering down from C, proceed until you get to Ab. To go from Ab to G, touch your left
index finger to Key 1 and release your right hand fingers at the same time.
y Now proceed to finger down to C#. To go from C# down to C, release your left index finger and
all your right hand fingers and roll your left thumb to the next OCTAVE SHIFT ROLLER all at the
same time.
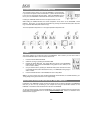
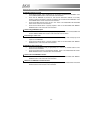
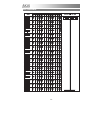
All fingerings are the same for every octave, though you will have to move along the OCTAVE SHIFT
ROLLERS in different positions. Right hand fingerings are the same as a trumpet in the lower octave from
middle C up to the C on the staff (e.g., C# is always played with Keys 8, 9, 10. D is always played with Keys
8, 10, etc.). You only need to learn this one octave and you will have mastered the entire range of the
instrument!
** Special thanks to Matt Traum of Patchman Music (www.patchmanmusic.com
) for the development of
EVI fingering.
SOFTWARE UPDATING
The EWI4000s’s software is easy to upgrade. When a new version of software is available, follow these
simple steps to load the new software to the EWI4000s and take advantage of any new features and
functions we’ve added.
You will need a computer with a MIDI interface and some type of MIDI player:
y Windows: You can use Windows Media Player 10.
y Mac OS X: We recommend downloading SysEx Librarian, a free program available at
http://www.snoize.com/SysExLibrarian/
.
1. Make sure you have your MIDI interface selected in your computer’s controls.
2. Start by hooking the MIDI OUT from your computer (or MIDI interface connected to your computer) to
the MIDI IN of the EWI4000s using a standard 5-pin MIDI cable.
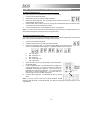
3. Press and hold the SETUP BUTTON, then press the HOLD BUTTON to scroll through the menu until
the PROGRAM / DATA DISPLAY reads “UP.”
4. Release the SETUP BUTTON. The PROGRAM / DATA DISPLAY will show the current software
version.
5. Open the EWI4000s-vX.Y.mid” file in the MIDI player software on your computer. (“X.Y” simply
denotes the software version you are uploading.)
6. When the file is finished transmitting, the EWI will update its software. When it is finished, the number
of the new software version (“XY”) will flash on the PROGRAM / DATA DISPLAY.
7. Turn the EWI4000s off. When you turn it on again, you will be ready to play the EWI4000s with the
latest software!
If the PROGRAM / DATA DISPLAY flashes “Er” during the above update procedure, this means there was
an error during the transmission of the file. In some cases – especially when using lower quality MIDI cables
or MIDI interfaces – you may need to retry the procedure a few times before it completes.
If the problem is related to the MIDI player:
y Windows Media Player users should select the option to play the MIDI file slowly.
Sysex Librarian users should set the “Pause between played messages” (in the “Preferences” window)
between 200ms and 300ms.


