


behringer.com
14 EUROGRAND EG2280USB/EG8280USB User Manual
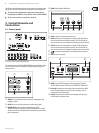
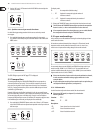
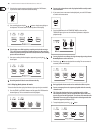
Press and hold the CLICK button while adjusting the number of beats per 4)
measure using the -/NO and +/YES button in the VALUE/SONG section.
The display reads:
04: No stressed beats (default setting)
24, 34, 44, 54, 64, 74: Quarter meter (e. g. 2/4)
38, 68, 78, 98, 128: Eighth-note meter (e. g. 3/8)
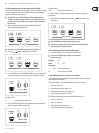
Metronome volume5.4.1
Use this function to adjust the metronome volume.
Please enter EDIT mode (see chapter 5.1) and select the ◊
following function.
Function: E5
Value: 1 . . . 20
Description:
1 . . . 20: Metronome volume (1 = low, 20 = high)
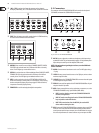
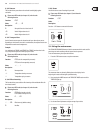
Proceed as follows for direct access to the metronome volume menu page.
Press and hold the CLICK button, then hit the MODE button in the 1)
TEMPO/EDIT MODE section.
The EDIT MODE LED lights up and the EDIT page E5 is displayed.
Music sequencer5.5
The EG2280USB/EG8280USB provides a built-in 2-track sequencer which allows
you to record and play back a piece of music . For each of the two tracks you can
select one or two sounds for recording. This means that the music sequencer can
play back up to four sounds at the same time. While playing back a music piece
you can also play on the keyboard to produce complex performances with up to
six different sounds.
What is more, you can use the music sequencer for practicing. For example,
you could record the left and right-hand parts of a piece separately on the two
tracks. During playback, switch off one track (=hand) and play the muted part
yourself. Thus, you can practice each part individually within its musical context.
+
+
Recording pieces of music5.5.1
This section describes how to record music pieces with the built-in
music sequencer.
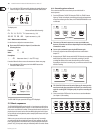
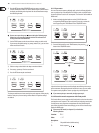
Press the REC button. The REC LED above the TRACK-1 or TRACK-2 button 1)
lights up. The dots in the display start flashing in the adjusted metronome
tempo, thus indicating the beat. Now, the EG2280USB/EG8280USB is set to
record mode.
The memory of the music sequencer can store up to 10,000 notes. ◊
However, this number can decrease depending on how much pedaling
information is stored.
You can quit record mode by pressing the REC button again.◊
If necessary, adjust the metronome tempo and meter as described in 2)
chapter 5.4.
Keep pressing the TRACK-1 button until the REC LED above the corresponding 3)
button lights up red. Now, track 1 is selected for recording. If you did a
recording take before, the last track selected will be used for recording.
Depending on which track is currently used, you will have to select the other
track for recording.
TIP: If the PLAY LED for one of the tracks lights up, this warns you that ◊
notes have already been recorded on this track. If you select this track
again for recording (REC LED lights up red), the previous recording will
be lost.
Select a sound in the TONE section. You can also use a sound combination 4)
(see chapter 4.1) for recording.