


E-24
Assembly Instructions
CAUTION
• Take particular care to avoid injury when installing legs
and pedals, and when mounting the keyboard onto the
stand.
• When assembling, make sure that the sliding keyboard
cover of the digital piano body is completely closed. If
the cover is left open during assembly, it may close
suddenly causing the fingers to be pinched between the
digital piano body and cover.
Important!
• Be sure to assemble the stand on a flat surface.
• This stand does not include any of the tools required to
assemble it. You should have a large Phillips head (+)
screwdriver on hand for assembly.
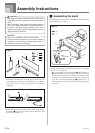
• Check the items that come with the unit to make sure that
everything shown in Figure 1 (A through I) is included.
All screws are in a plastic bag inside of the packing
cardboard.
• Before starting actual assembly of the stand, undo the clip
at location 1 (Figure 2) where the pedal cable comes out
the back of crosspiece D.
1
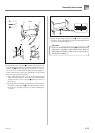
Assembling the stand
Refer to Figures 3, 4 and 5 as you assemble the stand according
to the following procedure.
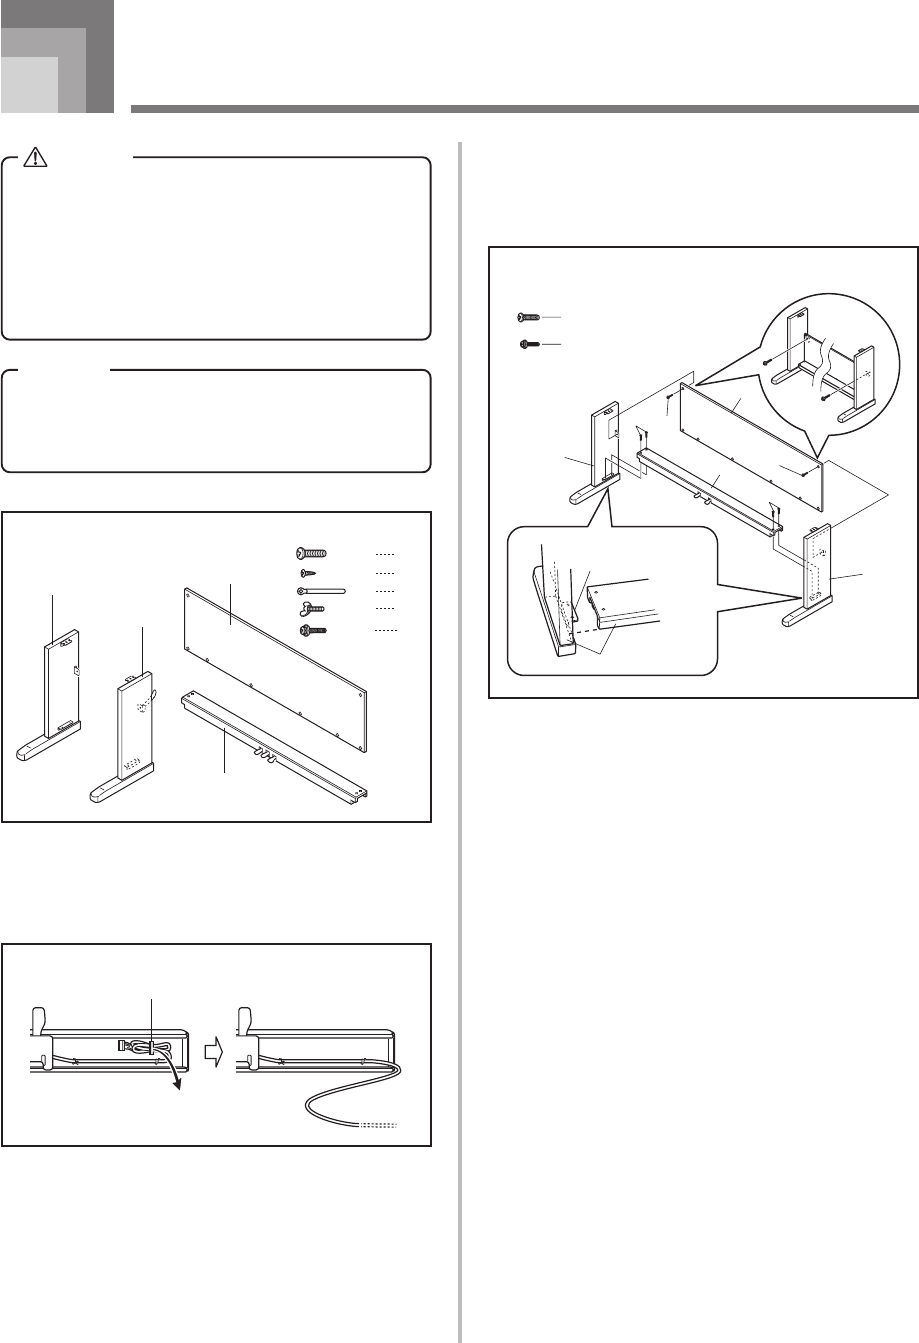
1.Attach side uprights A and B to crosspiece D using the
four E screws (Figure 3).
• When joining the two pieces marked 2, the metal pieces
3 on the insides of side uprights A and B should fit
into the slots at the ends of crosspiece D. Make sure the
metal pieces are pushed into the slots as far as they will
go. If they are not, the metal pieces 3 and the screws E
will not match up correctly, which can cause stripping of
the screws.
A
B
C
D
x4
x6
x1
x2
E
F
G
H
I
x2
Figure 1
Figure 2
1
Figure 3
3
2
A
E
E
I
I
I
D
C
E
B
Set upright
Side upright
420A-E-028A