Applying Effects to Tones
E-23
Applying Effects to Tones
This keyboard provides you with a selection of effects that
you can apply to tones.
The built-in effects include a wide variety of variations that
give you access to a selection of general digital effects.
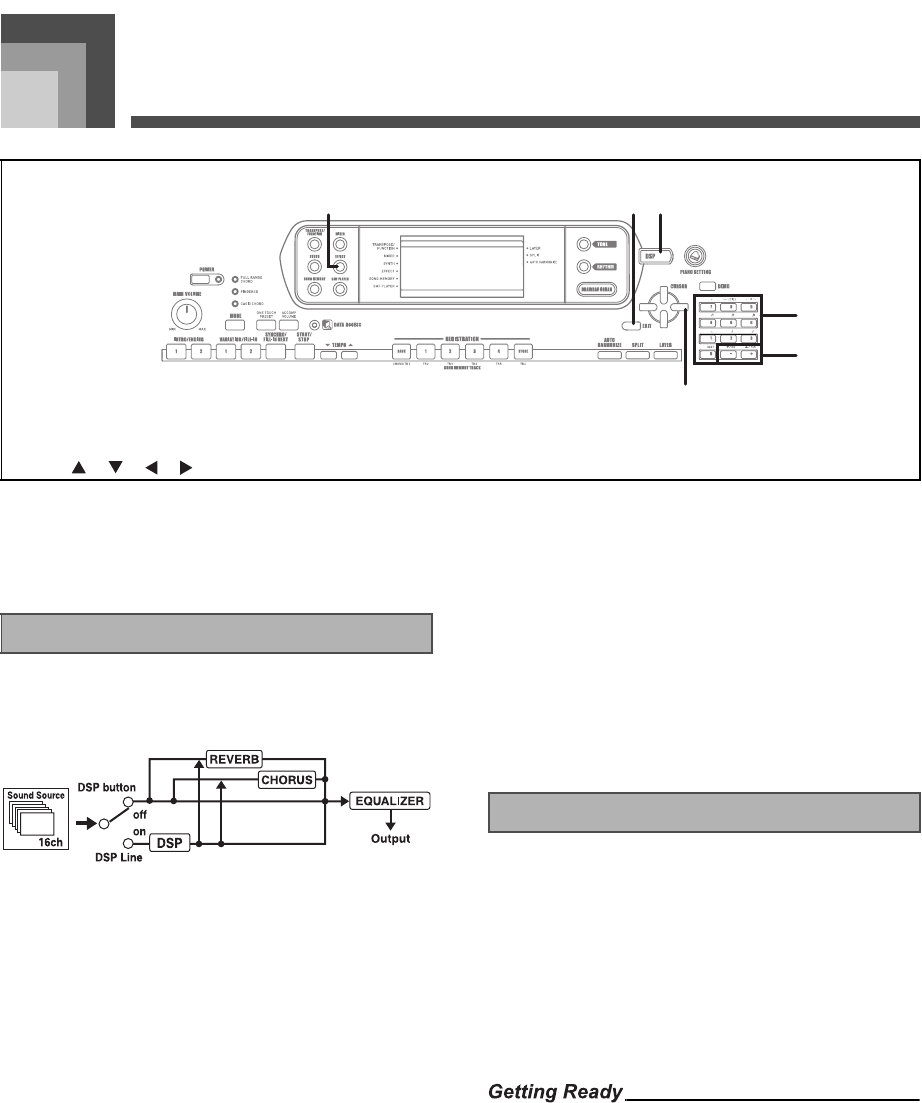
The following shows how the effects of this keyboard are
organized.
J DSP
DSP effects are applied to the connection between the sound
source and output. You can select distortion and modulation
effects. You can create DSP effect setups and also transfer
downloaded DSP data from your computer. The keyboard
has memory that lets you store up to 100 DSP effect setups.
See “Using the Music Data Management Software (on the
Bundled CD-ROM)” on page E-76 and “Saving the Settings of
DSP Parameters” on page E-25 for more information.
J REVERB
Reverb simulates the acoustics of specific types of
environments. You can choose from among 16 different
reverb effects, including “Room” and “Hall.”
J CHORUS
The chorus effect gives sound greater depth by causing it to
vibrate. You can choose from among 16 different chorus
effects, including “Chorus” and “Flanger.”
The equalizer is another type of effect that you can use to
make adjustments in tone quality. Frequencies are divided
among a number of bands, and raising and lowering the level
of each frequency band alters the sound.
You can reproduce the optimal acoustics for the type of music
you are playing (classics, for example) by selecting the
applicable equalizer setting.
In addition to the 100 built-in effect types, you can also edit
effect types to create your own and store them in user
memory. You can have up to 100 effect types in user memory
at one time. You can also select the DSP type of the last DSP
enabled tone that you used. This means you always have
access to the DSP type of Advanced Tones and tones you
download over the Internet. To select the DSP type of the last
DSP enabled tone that you used, select “ton” in step 3 of the
procedure below.
Perform the following steps to select a DSP type.
• When using a DSP effect, you should use the Mixer to
confirm that the DSP lines of the required parts are turned
on. See “Mixer Function” on page E-36 for more information.
1. Press the EFFECT button so the pointer appears
next to EFFECT on the display.
• The DSP type setting screen (step 3) will appear
automatically about fives seconds after you press the
button.
1
EFFECT
2
EXIT
3
DSP
4
[ ]/[ ]/[ ]/[ ] CURSOR
5
Number buttons
6
[
+
]/[–]
1
4
2 3
5
6
Effect Blocks
Selecting a DSP Type
707A-E-025A
CTK900_e.book 23 ページ 2005年3月9日 水曜日 午後5時29分


