


E-14
Selecting and Playing a Tone
Splitting the Keyboard between Two
Tones
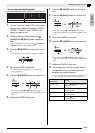
1.
Use the “Tone List” (page E-57) to look up the
group(s) and numbers of the two tones
(UPPER 1 zone tone and LOWER 1 zone
tone) you want to use.
2.
Check to make sure that the both the
(LAYER) and
(SPLIT) button lamps are
unlit.
• If one or both lamps are lit, press the
(LAYER) and
(SPLIT) buttons to turn them off.
3.
Press the
(UPPER 1) button so its lamp is
lit.
• This indicates you can select the UPPER 1 zone tone.
4.
Select the UPPER 1 zone tone.
• For details about selecting tones, see “To select a
tone” (page E-11).
5.
Press the
(SPLIT) button so its lamp is lit.
• At this time the
(UPPER 1) button lamp will go out
and the
(LOWER 1) button lamp will light in its
place. This indicates you can select the LOWER 1
zone tone.
6.
Select the LOWER 1 zone tone.
7.
Play something on the left and right sides of
the keyboard to confirm that the tones are
assigned properly.
• At any time you can press the
(UPPER 1) button to
change the UPPER 1 zone tone or the
(LOWER 1)
button to change the LOWER 1 zone tone.
8.
To cancel the keyboard split, press the
(SPLIT) button again so its lamp goes out.
NOTE
• You also can specify the keyboard split point, which
the location where the keyboard splits between the
left range and right range. In initial default split
point is at key F
#
3.
For details, see “To specify the keyboard split point”
(page E-14).
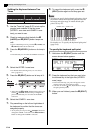
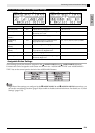
To specify the keyboard split point
1.
Hold down the
(SPLIT) button until the
screen shown below appears.
2.
Press the keyboard key that you want to be
the leftmost key in the right side (UPPER 1
zone) range.
• The name of the key you press will appear on the
display as the new split point key name.
• You also can use the
(w, q) buttons to change
the split point key name.
3.
When you are finished, press the
(SPLIT)
button.
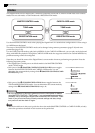
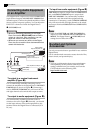
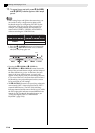
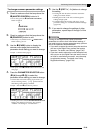
LOWER 1 UPPER 1
Lit
Unlit
Lit
Lit
LOWER 1 zone
Split point
UPPER 1 zone
Current split point key name