


5
Owner’s Manual
Owner’s Manual
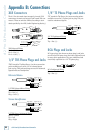
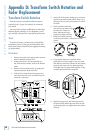
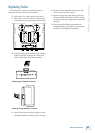
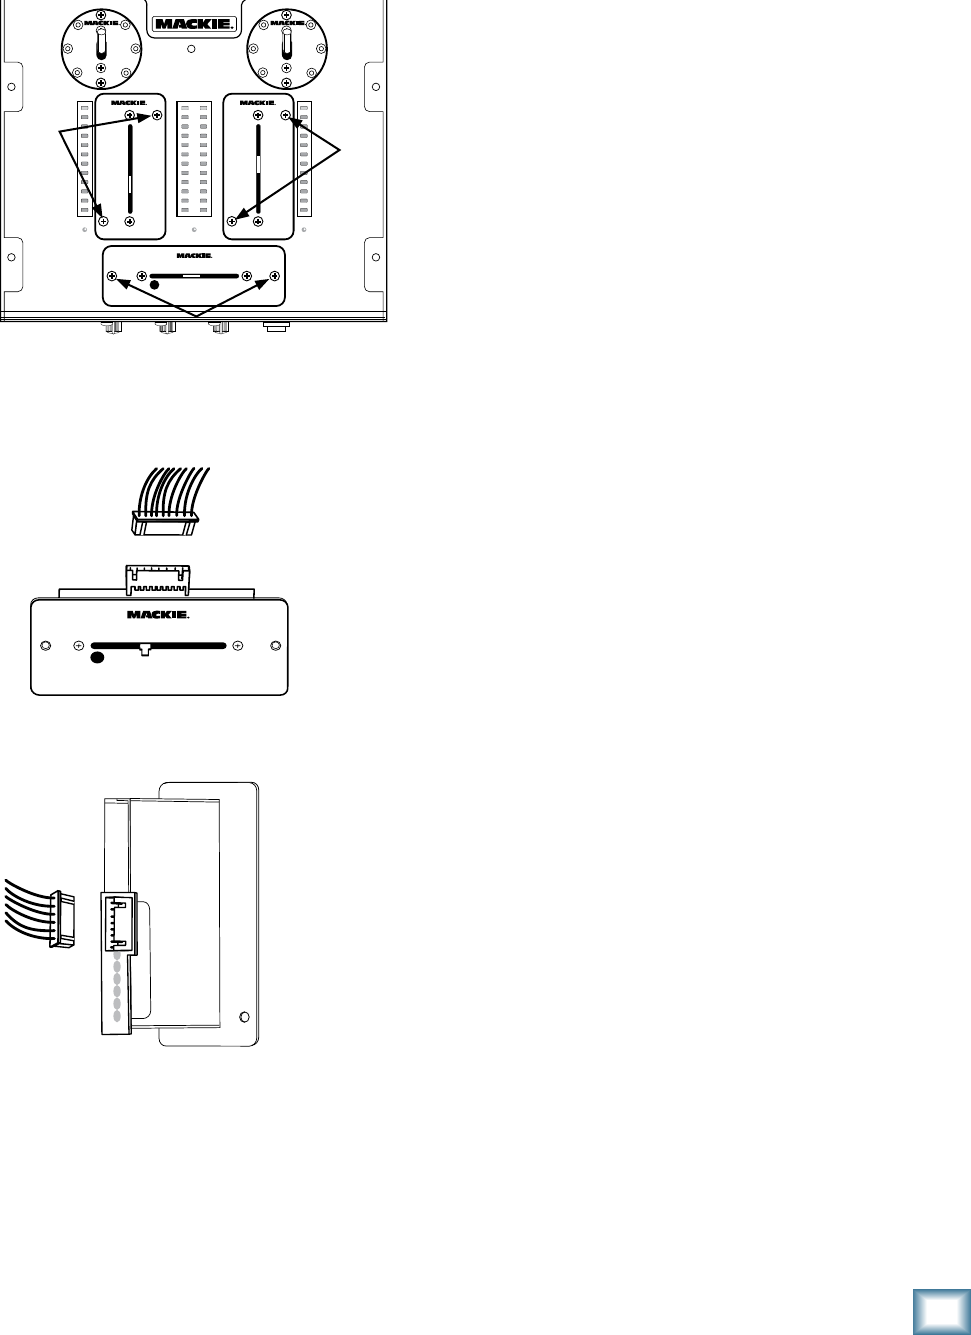
Replacing Faders
If the faders ever need to be replaced, this can be
done with the help of your trusty screwdriver.
10. Follow steps 1 to 5 and remove the top panel.
11. Take care to only remove the two outer screws
of each fader you are replacing, as shown below.
12. Gently lift up the fader assembly, just enough to
be able to pull the connector out of the recep-
tacle on the bottom of the fader assembly.
13. Insert the connector into the receptacle on the
new fader assembly. (It will only fit in one way.)
14. Secure the fader assembly to the chassis with
the two screws you lost in step 11.
15. Replace the top cover, and make sure that all
the meter LEDs and the Reverse LEDs are pok-
ing through before you tighten down the screws
securely.
16. Check that all the faders and switches are
working normally. (You might have to reset the
tension if you changed the crossfader.)
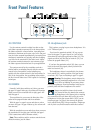
LOW
MID
HIGH
PHONES
BOOTH
MAIN
SOURCE
EQ
FX
PAN BAL
LOW
MID
HIGH
LINE/
PHONO
CD
EQ
SIG
OL
MIC CONTROL
2PGM
LEVEL
PGM
MAIN
STEREO
MONO
+50+3
OO
RL
U
+15-15
U
+15-15
U
+15-15
SOURCE
EQ
BAL
LOW
MID
HIGH
LINE/
PHONO
CD
1
PGM
RL RL
KILL +10
KILL +10
KILL +10
KILL +10
KILL +10
KILL +10
OFF
ON
LEVEL
U
OO
MAX
LEVEL
U
OO
MAX
RETURN
+15
OO
SEND
+15
OO
LEVEL
MAX
LEVEL
U
OO
MAX
LEVEL
U
OO
MAX
PGM SOURCE
111
2
48V
FX
ON
FX
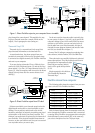
Removing the Crossfader Connector
Removing a Program Fader Connector