


18
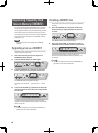
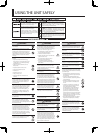
Checking the Lucina AX-09’s
Version
Here’s how to check the Lucina AX-09’s version.
1. While holding down the FAVORITE [A], [B], and
[WRITE] buttons simultaneously, turn on the
Lucina AX-09’s power.
The display will indicate “UtL”; the Lucina AX-09 will be in
Utility mode.
2. Press the TONE [1] button.
The display will indicate the version of your Lucina AX-09.
If you want to continue playing the Lucina AX-09, turn o
the power and wait several seconds before turning it on
again.
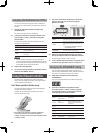
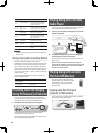
USB Driver Settings
When using a USB cable to connect the
Lucina AX-09 to your computer, you can
choose whether to use the standard USB
driver that’s provided by your computer
or the USB driver provided by Roland.
MEMO
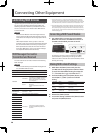
For details on connecting the Lucina AX-09 to your
computer via USB, refer to “Connecting to Your
Computer via USB” (p. 21).
1. While holding down the FAVORITE [A], [B], and
[WRITE] buttons simultaneously, turn on the
Lucina AX-09’s power.
The display will indicate “UtL”; the Lucina AX-09 will be in
Utility mode.
2. Press the TONE [2] button.
The display will indicate “dru”; then the current value is
shown and the [WRITE] button will blink.
3. Use the [INC/+] / [DEC/–] buttons to choose the
desired setting.
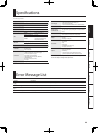
Value Explanation
GEn (Generic)
(Default)
Choose this if you’re using the standard USB driver
provided by your computer.
Normally you’ll use this mode.
unD (Vendor)
Choose this if you’re using the USB driver
downloaded from the Roland website.
4. Press the [WRITE] button to save the setting.
5. Turn the Lucina AX-09’s power o , then on again.
Now you’ll be able to use the USB driver you choose.
Various Settings ( Utility)
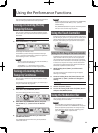
Count In / Metronome
“Count in” refers to a feature that counts you in to the
beginning of the performance. To have a two-measure
count in be sounded, press the modulation bar while you
press the [PREVIEW] button.
Note that, if you wish, you can have a metronome be
sounded instead—simply change the Count Mode to
Ntr
(METRONOME) using the setting below. The metronome
will continue to sound until you press the [PREVIEW]
button a second time.
* A count in will not be sounded when the [AUDIO
PLAYER] button is lighted.
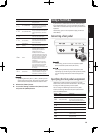
Count In Settings
1. Hold down the [SHIFT] button and press the
[PREVIEW] button; the current count in setting will
blink in the display.
2. Continue holding down the [SHIFT] button, and
press the [PREVIEW] button once again to switch
parameters.
After a brief interval, the value will appear; continue
holding down the [SHIFT] button, and use the [INC/+] /
[DEC/–] buttons to edit the value.
Parameter Value Explanation
Cnt
oFF(OFF),
Cin(COUNT IN),
Ntr (METRONOME)
Count mode
Determines whether count in
or metronome will sound
bPN
20–250 Tempo of count
bAt
0.4, 2.4, 3.4, 4.4, 5.4, 6.4, 7.4
Time signature of count
(2.4 indicates 2/4 time)
LuL
0–10 Volume of count
tyP
1 (Electronic metronome)
2 (Mechanical metronome)
3 (Pulse)
4 (Beep)
5 (Cowbell)
6 (Stick)
Sound used for count
3. To save this setting, hold down the [SHIFT] button
and press the [WRITE] button.
MEMO
To have the tempo of the count be shown in the
display, hold down the [PREVIEW] button. While in this
state, you can set a new tempo by tapping the [SHIFT]
button at least four times at the desired tempo; or you
can set it using the [INC/+] and [DEC/-] buttons.