Practicing
1.
Make sure that you’ve nished recording, and that the
screen shown at the right is displayed.
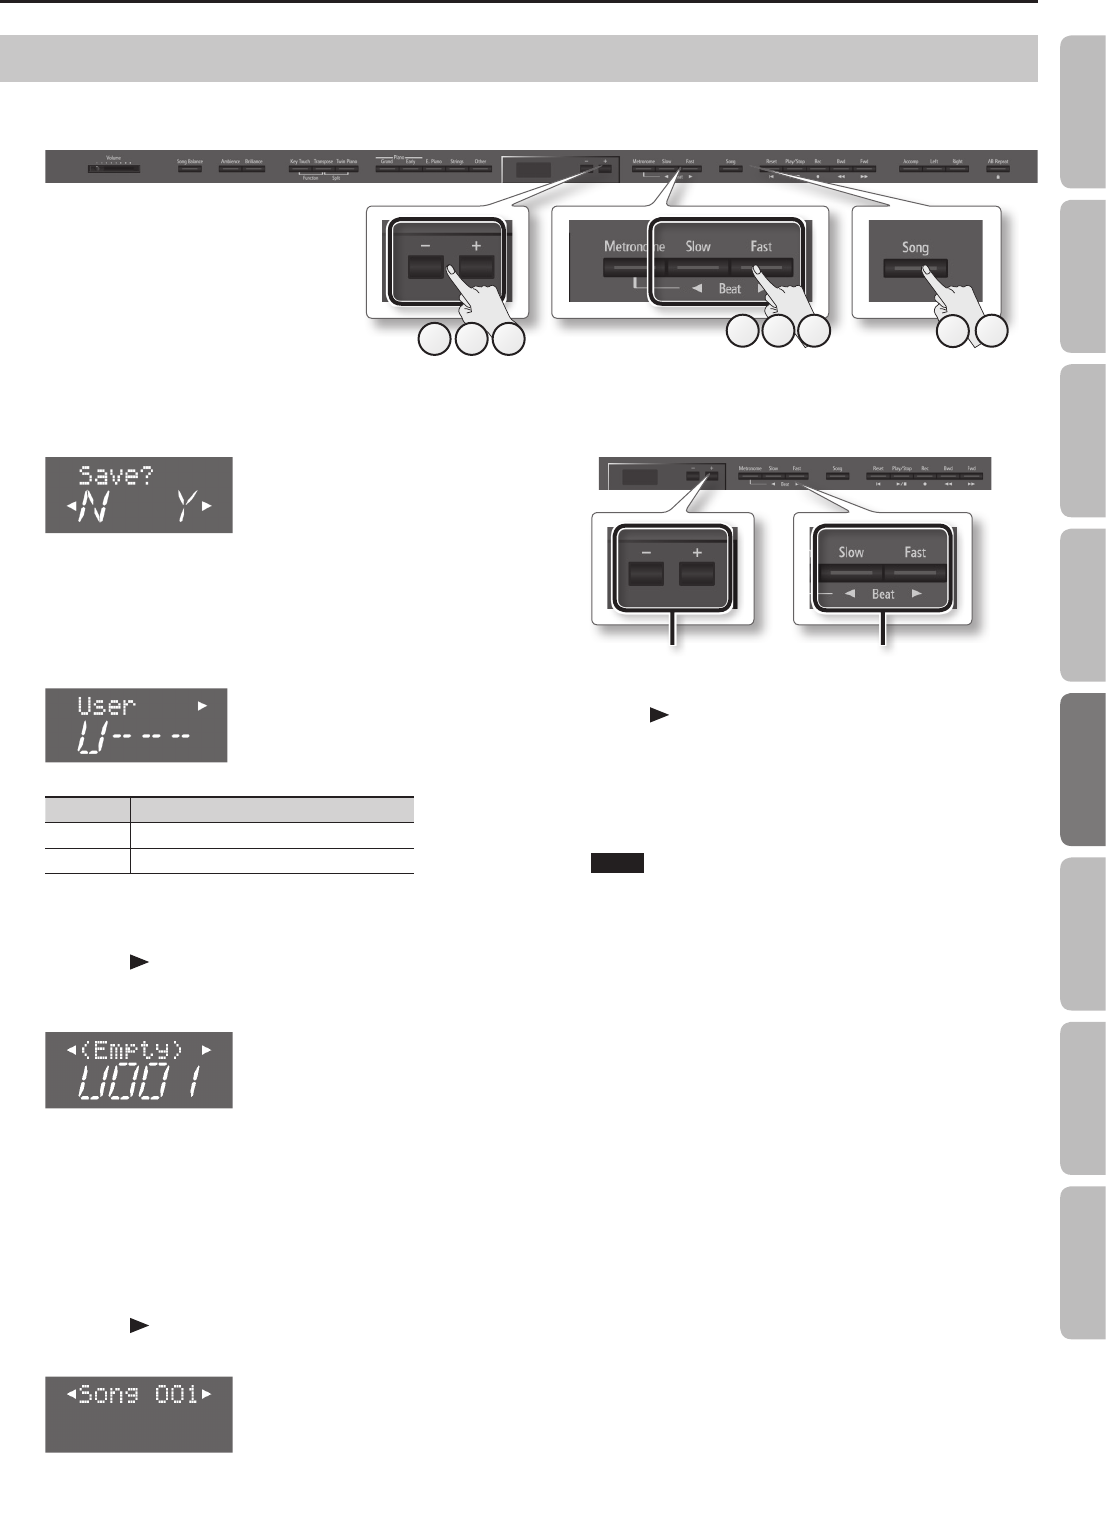
2. Press the [Song] button.
The media select screen will appear.
3. Use the [–] [+] buttons to select the save-destination
media.
Display Save-destination media
U Internal memory
S USB ash drive
* If a USB ash drive (sold separately) is not connected, you won’t
be able to select “USB Memory.”
4. Press the [ ] (Fast) button.
A screen will appear, allowing you to select the song number of
save destination.
5. Use the [–] [+] buttons to select the song number of save
destination.
No song has been saved in song numbers shown as (Empty) in the
song name column.
Choose a song number in which no song has been saved.
If you want to save your song by overwriting an existing song you
no longer need, select the song number of that unwanted song.
6. Press the [ ] (Fast) button.
A screen will appear, allowing you to specify a name for your song.
7. Edit the name using the buttons shown in the illustration
below.
Select the character to changeChange the character
Use the [ ] (Fast) button to select the position at which you want
to specify a character.
Use the [–] [+] buttons to change the character.
8. Press the [Song] button to save the song.
If you decide not to save the song, press the [Metronome] button.
NOTE
Never turn o the power or disconnect the USB ash drive while
the screen indicates “Working...”
Saving a Song with the Name You Specify
Immediately after you’ve nished recording, you can save the song to the memory, song number, and song name that you specify.
* If you want to save to the USB ash drive (sold separately), connect your USB ash drive to the USB memory port before you continue.
764
5 73
8
2
37
Operation Guide Panel Descriptions Before You Play Performing Practicing
Convenient Functions
Appendix
Function Mode
