


57
Convenient Functions
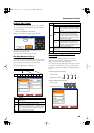
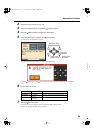
Selecting Images To Be Shown on the
Displays (User Image Display)
You can have image data from computers and other devices
shown on the onboard display.
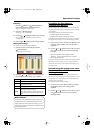
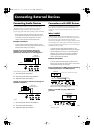
1
Take a floppy disk to which the image data stored in
the HPi-7 has been saved, and insert the disk in the
disk drive.
2
At Step 2 in p. 54, select “User Image Display” and
press the [ (Enter)] button.
3
Select the image you want to be displayed from the list,
then press the [+] (Save) button.
When you press [ (Preview)] button, you can then show the
selected image data on the display.
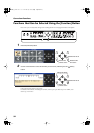
Image Data That HPi-7 can display
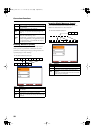
To Delete a Saved Image
4
Press the [ ] button to return to the top of the
list, then press the [ ] button once more.
The file name for the saved image is highlighted.
5
Press the [+ (Delete)] button.
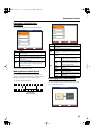
Setting the Demo (Auto DEMO)
Sets whether or not Auto mode is started when no action is
taken for a set length of time.
Refer to p. 54 for the procedure.
→
If you select “Demo” with an image saved in “User Image
Display,” the saved image appears at the beginning of the demo.
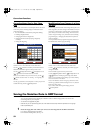
Changing the parts assigned to the
track buttons during SMF playback
(Track Assign)
Ordinarily, when playing back SMF music files for Roland Piano
Digital instruments (p. 77), the left-hand part is assigned to the
Track [3/Left] button, and the right-hand part is assigned to the
Track [4/Right] button.
However, right-hand and left-hand part assignments in certain
SMF music files may differ. If these are set to “Auto,” and as a
result you are unable to use the track buttons to control the left-
and right-hand parts properly, change the setting to “2/1 Part”
or “3/4 Part.”
Refer to p. 54 for the procedure.
* After changing this setting, try selecting the song once again.
Size
640 x 240 pixels
Color
1/4/8 bit (2/16/256 colors)
Format
BMP format (The HPi-7 cannot deal with
compressed image data).
Name
1–8 characters in length (lowercase is ok). A
filename extension of “.BMP” (uppercase
characters) must be added after the name.
The following characters can be used to name an
image.
A B C D E F G H I J K L M N O P Q R S T U V W X
Y Z a b c d e f g h i j k l m n o p q r s t u v w x y z 0
1 2 3 4 5 6 7 8 9 # $% & ` ( ) - @
~ { } ^ _ !
* If you use a character that cannot be used in a
name, it will be replaced by another character
when displayed.
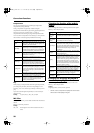
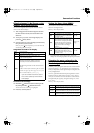
Item Description Setting
Auto
Start
Sets whether or not Auto mode is
started when no action is taken for a
set length of time.
On, Off
Mode
Selects the image to be displayed in
the screen when Auto mode starts.
Select “Demo” to display the demo
introducing the piano’s functions.
Select “User Image” to display the
image saved with “User Image
Display.”
Demo, User
Image
BGM
Selects whether or not BGM
(background music) is played when
Auto mode starts. When “On” is
selected, all of the songs are played
in random order.
On, Off
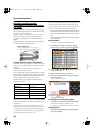
Setting Description
Auto
The part assigned to each track will be determined
automatically, depending on the song file.
2/1 Part
Part 1 will be assigned to the right-hand track, part
2 to the left-hand track, and part 3 to the user track.
3/4 Part
Part 4 will be assigned to the right-hand track, part
3 to the left-hand track, and part 1 to the user track.
HPi-7_e.book 57 ページ 2005年1月18日 火曜日 午後4時39分