


60
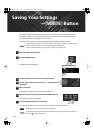
Detailed Tone Settings
The process of modifying a rhythm set’s (p. 55) settings is called “rhythm
editing (RHYTHM EDIT).”
To edit the currently selected rhythm set, proceed as follows.
1.
Press the [MENU] button.
The “MENU” screen will appear.
2.
Use the [
] [ ] buttons to select “EDIT,” and press
the [ENTER] button.
3.
Using the [
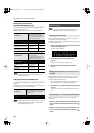
] [ ] buttons, get “RHYTHM EDIT” to be
indicated in the upper line of the screen.
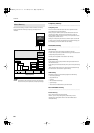
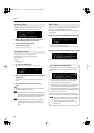
fig.disp-rhyedit.eps_70
You can access the edit screen of step 3 by holding down the
[SHIFT] button and pressing the [RHYTHM] button.
If you’re using split or dual, the part name is shown in the upper line
of the screen.
For split
U
: Upper (UPPER) part
L
: Lower (LOWER) part
For dual
1
: Part 1
2
: Part 2
4.
Use the [
] [ ] buttons to move the cursor to the
item that you want to edit.
5.
Use the dial to set the desired value.
6.
Press the [EXIT] button to leave the edit screen.
The changes you make are temporary; they will be discarded
when you turn off the power or select a different tone. If you
want to keep the changes you make, you must write them into
memory (p. 62).
When you use Rhythm Edit to modify the settings, an “*” will
appear next to the tone name in the main screen. The “*” will
disappear when you save that tone (p. 62).
When using settings that play more than one tone at a time (i.e., when
the [PERFORM] button is lit), “part editing (PART EDIT)” is the process of
modifying the settings of each part to which the tones are assigned.
1.
Press the [MENU] button.
The “MENU” screen will appear.
2.
Use the [
] [ ] buttons to select “EDIT,” and press
the [ENTER] button.
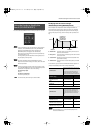
3.
Using the [
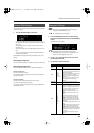
] [ ] buttons, get “PART EDIT” to be
indicated in the upper line of the screen.
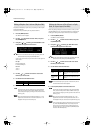
fig.disp-rhyedit.eps_70
(Example screen: Split)
You can access the edit screen of step 3 by holding down the
[SHIFT] button and pressing the [PERFORM] button.
4.
Use the [ ] [ ] buttons to move the cursor to the
item that you want to edit.
5.
Use the dial to set the desired value.
In the case of Super Layer, only Part 1 will be shown, and the
overall volume balance will be adjusted.
6.
Press the [EXIT] button to leave the edit screen.
The changes you make are temporary; they will be discarded
when you turn off the power or select a different tone. If you
want to keep the changes you make, you must write them into
memory (p. 62).
When you use Part Edit to modify the settings, an “*” will
appear next to the tone name or performance name. This “*”
will disappear when you save that tone or performance (p. 62).
If you’re using settings that play more than one tone at a time
(i.e., when the [PERFORM] button is lit) and Split, Dual, and
Super Layer are all turned off, you’ll be able to select Part 3–
Part 16 in step 4. (E.g., when you press the [PERFORM] button
and select “64: GM2 Template.”)
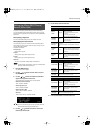
Editing a Rhythm Set’s Volume (Rhythm Edit)
Item
Value Description
Rhythm Level
0–127 Specifies the volume of the rhythm set.
Editing the Volume of Each Part in a Split,
Dual, or Super Layer (Part Edit)
Item
Value Description
Part 1 (Upper)
Level
0–127
Adjusts the volume of Part 1.
When using Split, this adjusts the Upper
volume.
Part 2 (Lower)
Level
0–127
Adjusts the volume of Part 2.
When using Split, this adjusts the Lower
volume.
JUNO-Di_e.book 60 ページ 2009年6月22日 月曜日 午前9時23分