


27
Chapter 3. Sampling
4.
Press [FILTER+DRIVE] so it’s lit.
The filter + overdrive effect is turned on, and the effect is
applied to pad 1 of bank A.
As desired, turn the CTRL 1 and CTRL 2 knobs to adjust the
effect.
If [RESAMPLE] is lit, you can’t use the CTRL 3 knob to adjust
the effect. If you want to use the CTRL 3 knob to adjust the
effect, press [CANCEL] to make [RESAMPLE] go dark.
5.
Turn the CTRL 3 (LEVEL) knob to adjust the sampling level
so that the PEAK indicator lights occasionally.
6.
Press [REC] so it’s blinking.
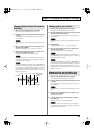
The bank buttons and pads available for resampling start
blinking.
7.
Specify the resampling-destination by pressing the BANK
[B] button to make it light, and then press pad 12.
Pad 12 lights.
You can’t resample to the same pad of the same bank of the
original sample.
8.
Press [LO-FI] to select the sampling grade.
[LO-FI] unlit: STANDARD (high audio quality)
[LO-FI] lit: LO-FI (low fidelity audio)
9.
Press [STEREO] to select stereo or monaural sampling.
[STEREO] lit: stereo sampling
[STEREO] unlit: monaural sampling
10.
Press [REC] so it’s lit.
Resampling has not yet started at this point.
11.
To specify the resampling source, press BANK [A] so it’s lit,
and press pad 1.
The pad 1 sample starts playing, and resampling starts at the
same moment.
Never turn off the power while resampling is in progress.
Doing so may destroy not only the sample being resampled, but
also other samples as well.
12.
At the point where you want to stop resampling, press
[REC].
[REC], pad 1, and [FILTER+DRIVE] go out.
BANK [A] goes out, and BANK [B] lights.
13.
Press pad 12 to play the sound you just resampled.
1.
Make sure that [PATTERN SELECT] is not lighted.
If it’s lit, press [PATTERN SELECT] to switch it off.
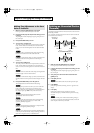
2.
Press [DEL] so it’s lit.
“dEL” appears in the display. and pads to which samples are
assigned start blinking.
If no samples are assigned to any pad in a bank, “EMP” appears
in the display and you won’t be able to execute the Delete
operation.
3.
Use the bank buttons and pads to specify the bank and pad
for the sample you want to delete.
The selected pad lights, and [DEL] begins blinking again.
Nothing will happen if you press a pad to which no sample is
assigned (i.e., an unlit pad).
You can simultaneously select more than one pad within the
same bank.
If you specify a bank that is protected (p. 43), “Prt” (Protected)
appears in the display, and you won’t be able to delete the
sample.
If you decide not to delete, press [CANCEL].
4.
Press [DEL].
[DEL] changes from blinking to lit, and the dot in the display
begins blinking.
The pad whose sample is being deleted lights.
Once the sample has been deleted, the dot will go dark.
Never turn off the power while the dot is blinking. Doing so
may destroy not only the sample you’re deleting but also other
samples and even the memory card.
Here’s how to delete all samples from internal memory or the
memory card in a single operation.
1.
Make sure that [PATTERN SELECT] is not lighted.
If it’s lit, press [PATTERN SELECT] to switch it off.
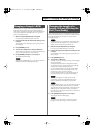
2.
Hold down [CANCEL] and press [DEL].
“dAL” appears in the display and [DEL] lights. BANK [A]–[F/J]
begin blinking.
If no memory card is inserted in the slot, BANK [C/G]–[F/J]
will not blink.
3.
Press one of the bank buttons to specify the memory that
you want to delete.
BANK [A] or [B]: Internal memory
BANK [C/G]–[F/J]: Memory card
If the memory is protected (p. 43), “Prt” (Protected) appears in
the display, and you won’t be able to delete any samples.
If you decide not to delete, press [CANCEL].
4.
Press [DEL].
[DEL] changes from blinking to lit, and the dot in the display
begins blinking.
Once the samples have been deleted, the dot will go dark.
Never turn off the power while the dot is blinking. Doing so
may destroy not only the samples you’re deleting but also other
samples and even the memory card.
Deleting a Sample
Deleting All Samples
SP-404_e.book 27 ページ 2006年3月3日 金曜日 午後2時46分