


32
Chapter 4. Changing the Settings of a Sample
1.
Make sure that [PATTERN SELECT] is not lighted.
If it’s lit, press [PATTERN SELECT] to switch it off.
2.
Press the pad that plays the sample whose setting you want
to change.
The pad lights and the sample begins playing. This pad is now
the current pad.
3.
Press [START/END/LEVEL] so it’s lit.
4.
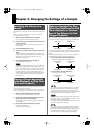
Turn the CTRL 1 (START) knob.
The center position of the knob corresponds to the current Start
Point. Turn the knob toward the left to move the Start Point
earlier, or turn it toward the right to move the Start Point later
in time.
If the Start Point is set at the beginning of the sample, turning
the knob toward the left won’t move the Start Point.
If you decide to discard the change you made, return the CTRL
1 (START) knob to the center position so that the display
indicates “0.”
5.
Turn the CTRL 2 (END) knob.
The center position of the knob corresponds to the current End
Point. Turn the knob toward the left to move the End Point
earlier, or turn it toward the right to move the End Point later in
time.
If the End Point is set at the end of the sample, turning the knob
toward the right won’t move the End Point.
If you decide to discard the change you made, return the CTRL
2 (END) knob to the center position so that the display indicates
“0.”
6.
Press [START/END/LEVEL] so its LED goes out.
This completes the Start Point and End Point settings.
Performing this procedure once allows you to move the Start
Point or End Point a maximum of approximately 130 ms
forward or backward. If you need to move a point farther than
this, simply repeat steps
3
–
6
as many times as necessary.
You can’t set the Start Point and End Point closer than
approximately 100 ms from each other.
If the Start Point and End Point both return to the beginning
and end of the sample (respectively) as a result of this
operation, [MARK] will go dark.
If you move the Start Point or End Point of a sample for which
[MARK] is not lighted, [MARK] will light.
When you move the Start Point or End Point, the BPM (tempo)
of the sample will automatically change accordingly. However,
there will be a slight inaccuracy in this BPM value.
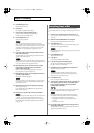
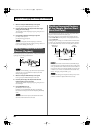
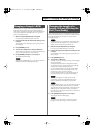
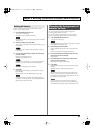
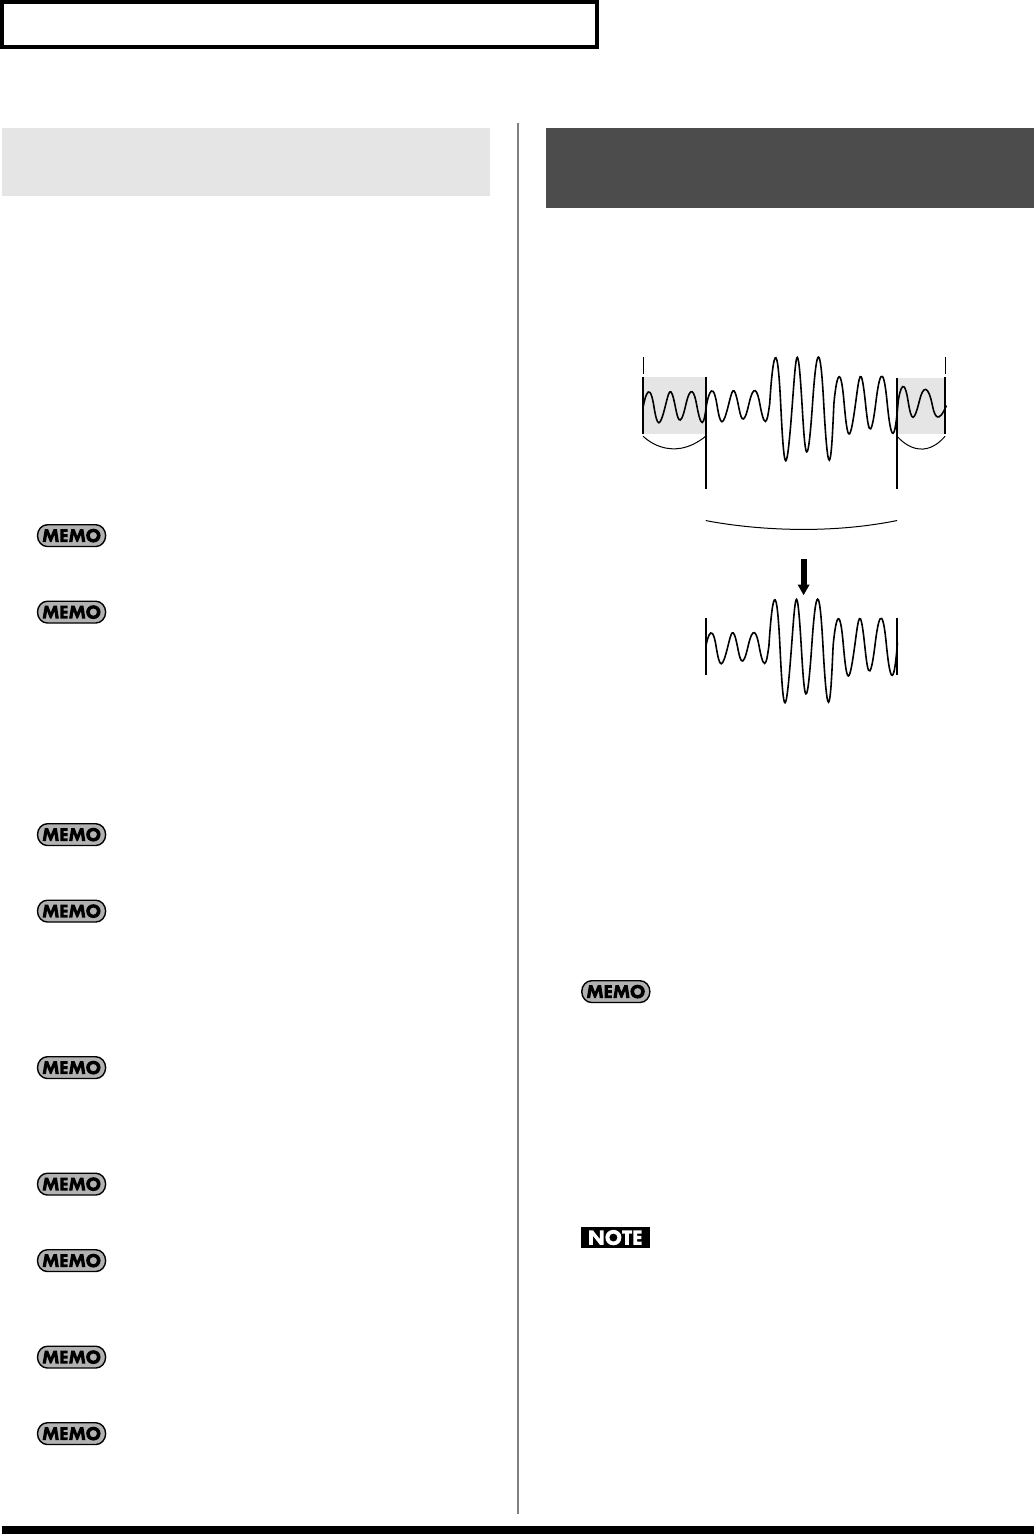
Adjusting the Start/End Points will result in some of the waveform
data being unneeded.
You can delete (truncate) this portion of the waveform to make the
most efficient use of memory.
1.
Make sure that [PATTERN SELECT] is not lighted.
If it’s lit, press [PATTERN SELECT] to switch it off.
2.
Press the pad that plays the sample whose setting you want
to change.
The pad lights and the sample begins playing. This pad is now
the current pad.
3.
Verify that you’ve set the Start Point and/or End Point
([MARK] is lit).
4.
Press [DEL] so it’s lit.
The pad will also blink at this time, but don’t press the pad.
5.
Press [MARK].
[DEL] changes from lit to blinking, and “trC” appears in the
display.
6.
Press [DEL].
[DEL] lights, and the Truncate operation is executed.
The dot in the display will blink while the operation is being
executed.
Never turn off the power while the dot is blinking. Doing so
may destroy not only the sample being truncated, but also the
other samples or the memory card itself.
Making Fine Adjustments to the Start
Point or End Point
Deleting an Unwanted Portion
(Truncate)
unwanted
Beginning of
the sample
Start point End point
unwanted
End of
the sample
the portion which is played back
Truncate
SP-404_e.book 32 ページ 2006年3月3日 金曜日 午後2時46分