


35
Chapter 5. Recording a Performance of Samples (Pattern Sequencer)
If no memory card is inserted, you can’t select pattern banks C–
J.
4.
Press the pad to which you want to assign the pattern to be
recorded.
The pad you pressed lights, and the remaining pads go out.
[REC] starts blinking, and the metronome begins sounding.
5.
Press [START/END/LEVEL] so it’s lit.
6.
Turn the CTRL 3 (LEVEL) knob to adjust the metronome
volume.
7.
Press [TIME/BPM] so it’s lit.
The display shows the pattern tempo (BPM).
8.
While listening to the metronome, turn the CTRL 2 (BPM)
knob to adjust the pattern tempo.
Range: 40–200
If the BPM is 40–60 or 160–180, only even-numbered values can
be set.
If the BPM is 180–200, you can specify a value of 180, 183, 186,
190, 193, 196, or 200.
You can also set the tempo by pressing [TAP TEMPO] several
times at a regular interval. If you use [TAP TEMPO], you’ll be
able to set the BPM to any desired value in the range of 40–200.
9.
Press [LENGTH] so it’s lit.
The display shows the length of the pattern to be recorded (as a
number of measures).
10.
Turn the CTRL 3 knob to specify the length of the pattern.
The display shows the pattern length (the number of measures)
that you specify.
Range: 1–99
If a pattern already contains data, you can’t make it shorter than
its current length.
Lengths of 1–20 measures can be specified in one-measure
steps, and lengths greater than this can be specified in four-
measure steps.
11.
Press [QUANTIZE] so it’s lit.
[LENGTH] goes out.
The display shows the current quantization setting.
What is
quantization
?
When you press the pads to play samples, a certain amount of
timing inaccuracy will inevitably occur. Quantization is a
function that automatically corrects these timing inaccuracies
when you record. If you’re using quantization, the recorded
timing will automatically be corrected to precise intervals of
quarter notes, eighth notes, sixteenth notes, etc. In particular for
groove-based music, this function is a convenient way to ensure
that your timing is tight. It’s also convenient when creating
rhythm patterns.
12.
Turn the CTRL 3 knob to specify the quantization.
The display shows the quantization setting you specify.
The indications in the display have the following meanings.
4:
Adjust timing to quarter note intervals.
4-3:
Adjust timing to quarter note triplet intervals.
8:
Adjust timing to eighth note intervals.
8-3:
Adjust timing to eighth note triplet intervals.
16:
Adjust timing to sixteenth note intervals.
16-3:
Adjust timing to sixteenth note triplet intervals.
32:
Adjust timing to thirty-second note intervals
oFF:
No quantization. The exact timing you use in pressing
pads will be recorded.
13.
Press [QUANTIZE] so its LED goes out.
14.
Press [REC].
[REC] changes from blinking to lit, and recording begins.
A one-measure count will occur before recording actually
begins. Wait for one measure while you listen to the
metronome. During the count, the display will show the count
as -4, -3, -2, -1.
When the count ends, recording will begin, and the display will
show the measure and beat.
Pads you play during the count will not be recorded.
15.
Press pads at the desired timing to record them.
During recording, pressing the pads will play the assigned
samples. You can also use the bank buttons to switch sample
banks.
The samples of the pads you press will sound, and they will be
recorded with the timing corrected by the Quantize setting.
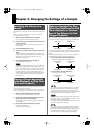
When the measure number shown in the display exceeds the
specified length of the pattern, recording will automatically
return to the first measure and continue (Loop Recording).
At this time, the performance you recorded on the previous
passes will play.
If you press [REC] once again so it’s blinking, “rEH” appears in
the display, indicating you are in
rehearsal
mode. While in this
mode, pressing a pad causes its sample to play, but it will not be
recorded. If you press [REC] once again so it’s lit, rehearsal
mode will be cancelled and you will return to normal recording.
Rehearsal mode provides a convenient way to check the sound
of the sample you intend to record next.
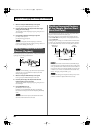
16.
Press the pads of the other samples you want to record.
The pad presses you perform on this pass will be added to the
pad presses you recorded on the previous pass. (This is called
overdubbing.) This allows you to build up complex
performances that might be difficult to play in a single pass, or
that would require you to play several samples simultaneously.
If you want to change the quantization while recording
1.
Press [QUANTIZE] so it’s lit.
2.
Turn the CTRL 3 knob to change the quantization setting.
3.
Press [QUANTIZE] to turn off its LED.
The new quantization setting is activated, and is
immediately applied to pattern recording.
17.
When you have finished recording, press [CANCEL].
The dot in the display starts blinking. When the recorded data
has been stored, the blinking stops.
Never turn off the power while the dot is blinking. Doing so
may destroy not only the recorded pattern but also other
patterns and even the memory card.
SP-404_e.book 35 ページ 2006年3月3日 金曜日 午後2時46分