


31
Chapter 4. Changing the Settings of a Sample
1.
Make sure that [PATTERN SELECT] is not lighted.
If it’s lit, press [PATTERN SELECT] to switch it off.
2.
Press the pad that plays the sample whose setting you want
to change.
The pad lights and the sample begins playing. This pad is now
the current pad.
If Gate Playback (p. 29) is selected, continue holding down the
pad.
3.
When you reach the point that you want to specify as the
Start Point, press [MARK].
[MARK] starts blinking, and “---” appears in the display
4.
When you reach the point that you want to specify as the
End Point, press [MARK] once again.
When the setting has been made, [MARK] lights.
If you were not able to make the setting as you wished, press
the lit [MARK] button once again during playback to make it go
dark, and try again from step
1
.
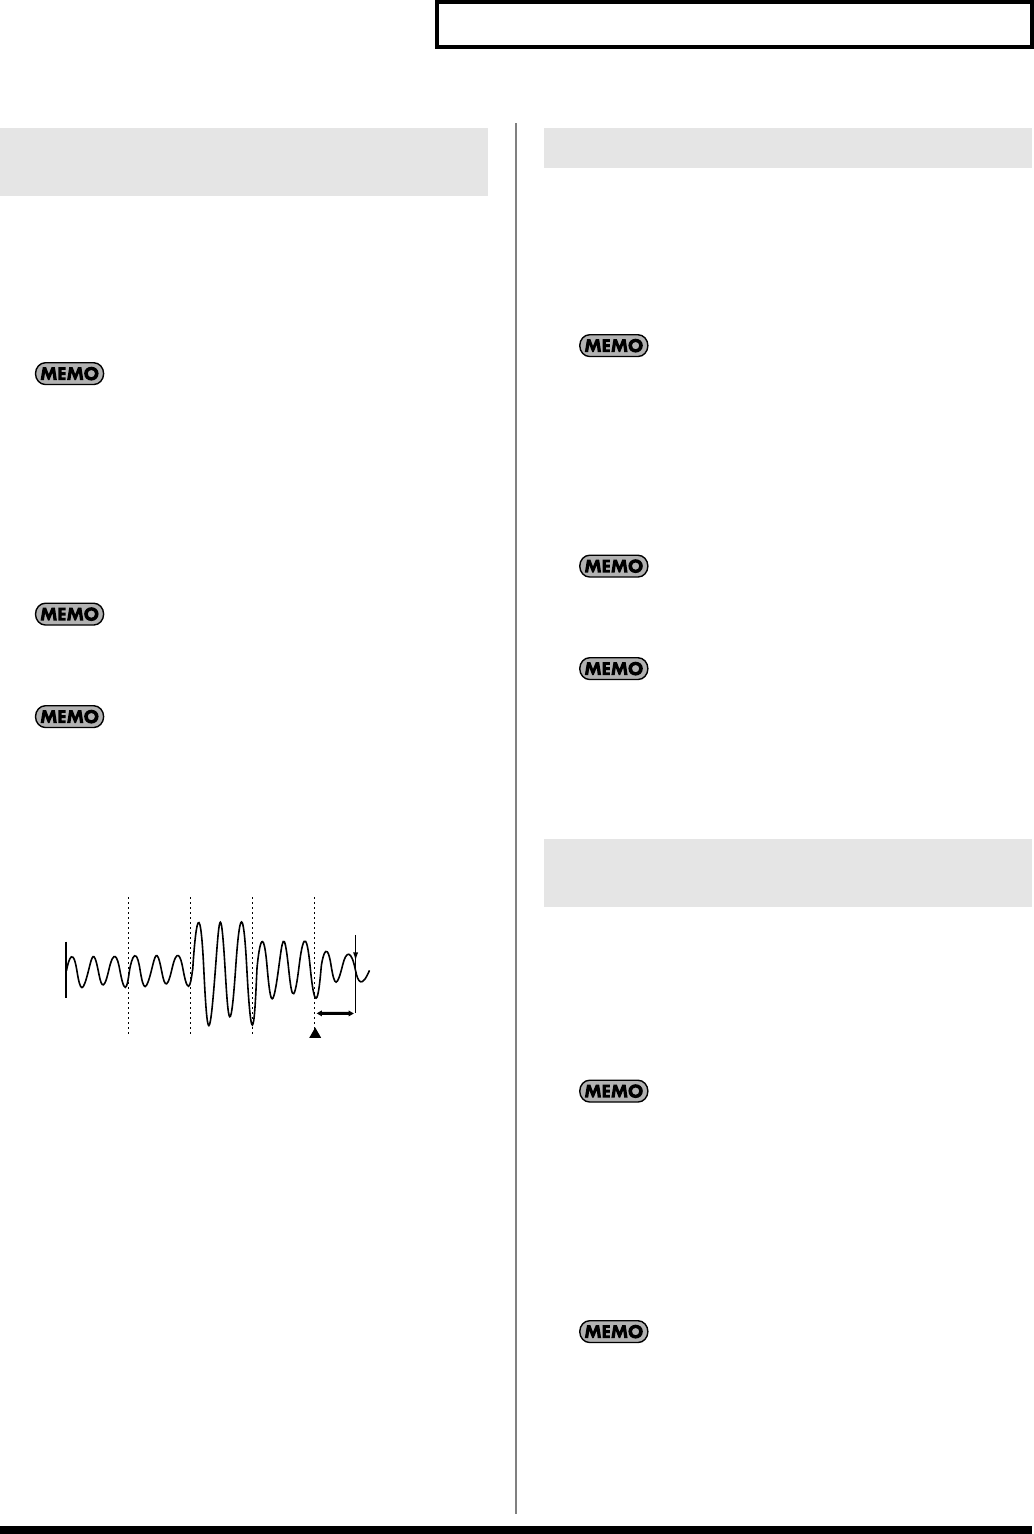
If you specify the BPM (tempo) between steps
3
and
4
, the end
point will automatically be set to the location of the beat closest
to the moment you pressed [MARK] in step
4
(i.e., a number of
beats from the Start Point). To specify the BPM, you can press
[TIME/BPM] so it’s lit and turn the CTRL 2 knob, or press [TAP
TEMPO] several times.
1.
Make sure that [PATTERN SELECT] is not lighted.
If it’s lit, press [PATTERN SELECT] to switch it off.
2.
Hold down [MARK] and press the pad that plays the sample
whose setting you want to change.
The pad lights and the sample begins playing. This pad is now
the current pad.
If Gate Playback (p. 29) is selected, continue holding down the
pad.
3.
Release [MARK].
[MARK] starts blinking, and “---” appears in the display
4.
When you reach the point that you want to specify as the
End Point, press [MARK].
When the setting has been made, [MARK] lights.
If you were not able to make the setting as you wished, press
the lit [MARK] button once again during playback to make it go
dark, and try again from step
1
.
If you specify the BPM (tempo) between steps
3
and
4
, the end
point will automatically be set to the location of the beat closest
to the moment you pressed [MARK] in step
4
(i.e., a number of
beats from the Start Point). To specify the BPM, you can press
[TIME/BPM] so it’s lit and turn the CTRL 2 knob, or press [TAP
TEMPO] several times.
1.
Make sure that [PATTERN SELECT] is not lighted.
If it’s lit, press [PATTERN SELECT] to switch it off.
2.
Press the pad that plays the sample whose setting you want
to change.
The pad lights and the sample begins playing. This pad is now
the current pad.
If Gate Playback (p. 29) is selected, continue holding down the
pad.
3.
When you reach the point that you want to specify as the
Start Point, press [MARK].
[MARK] starts blinking.
4.
Press the pad once again. (If Gate Playback is selected,
release the pad.)
When the setting has been made, [MARK] lights.
If you were not able to make the setting as you wished, press
the lit [MARK] button once again during playback to make it go
dark, and try again from step
1
.
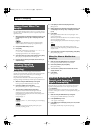
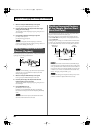
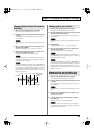
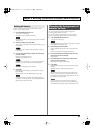
Changing Both the Start Point and the
End Point
Start point
newly adjusted End Point
timing at which
you pressed
[
MARK
]
beat beat beat beat
adjusted
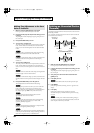
Changing Only the End Point
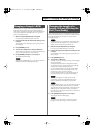
Changing Only the Start Point (the
End Point Is the End of the Sample)
SP-404_e.book 31 ページ 2006年3月3日 金曜日 午後2時46分