


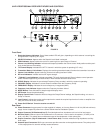

7
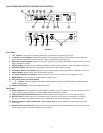
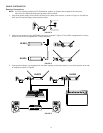
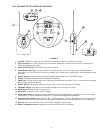
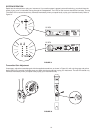
4. If the receiver XLR output is used, make sure the MIC/LINE switch setting matches the input requirements of the
mixer or amplier, as shown in Figure 7. The Mic/Line switch does not affect the output of the unbalanced 1/4 inch
phone jack.
FIGURE 7
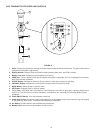
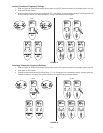
Turning the Receiver On
NOTE: These instructions assume no other wireless microphone systems are in use.
CAUTION: DO NOT TURN ON THE TRANSMITTER BEFORE POWERING UP THE RECEIVER.
TURNING THE TRANSMITTER ON FIRST WILL INTERFERE WITH THE RECEIVER’S
FREQUENCY SCANNING FUNCTION.
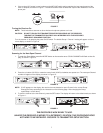
Turn the receiver on by pressing the power On/Off switch. The default Group 1 Channel 1 setting will appear on the re-
ceiver display, as shown in Figure 8.
FIGURE 8
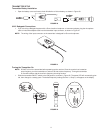
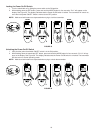
Scanning for the Next Open Channel
1. To enter the Scan Mode, press the MODE button on the receiver once. SCAN CHANNEL will ash on the dis-
play,
as shown in Figure 9.
FIGURE 9
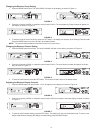
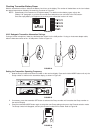
2. Press the or buttons (ULXS4) or rotate the control knob (ULXP4) clockwise one quarter turn. The next open Channel
number will appear on the display, as shown in Figure 10.
FIGURE 10
NOTE:
If “NO” appears on the display, the receiver has not detected an open Channel in the current Group.
Change the Group according to the instructions on the following page. After changing the Group,
repeat Steps 1 and 2 above.
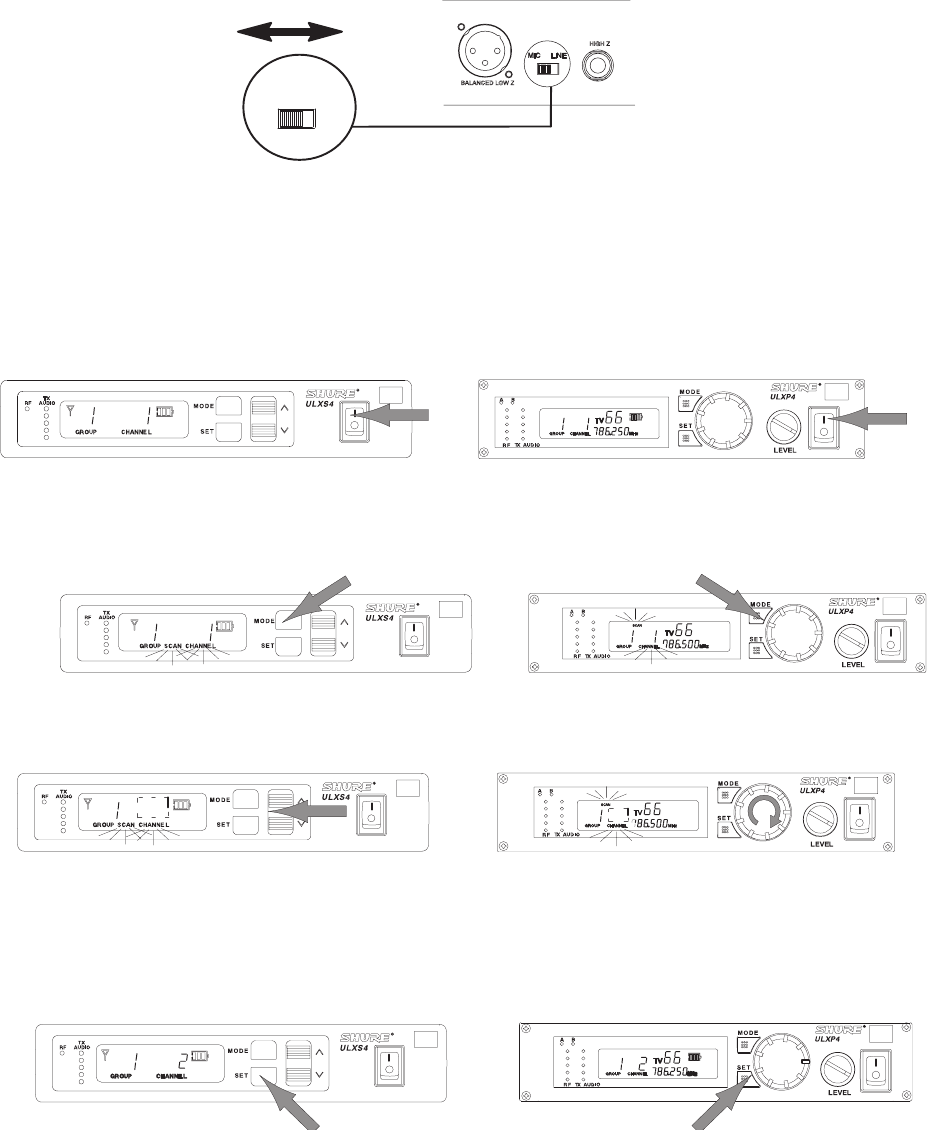
3. To tune the receiver to the new Channel, press the SET button. The display will return to the default mode, as shown
in Figure 11.
FIGURE 11
THE RECEIVER IS NOW READY TO USE.
UNLESS THE RECEIVER IS MOVED TO A DIFFERENT LOCATION, THIS PROCEDURE DOES
NOT NEED TO BE REPEATED. PROCEED TO TRANSMITTER SETUP SECTION.
MIC LINE