


17
REAR PANEL FEATURES
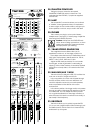
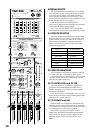
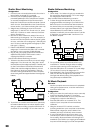
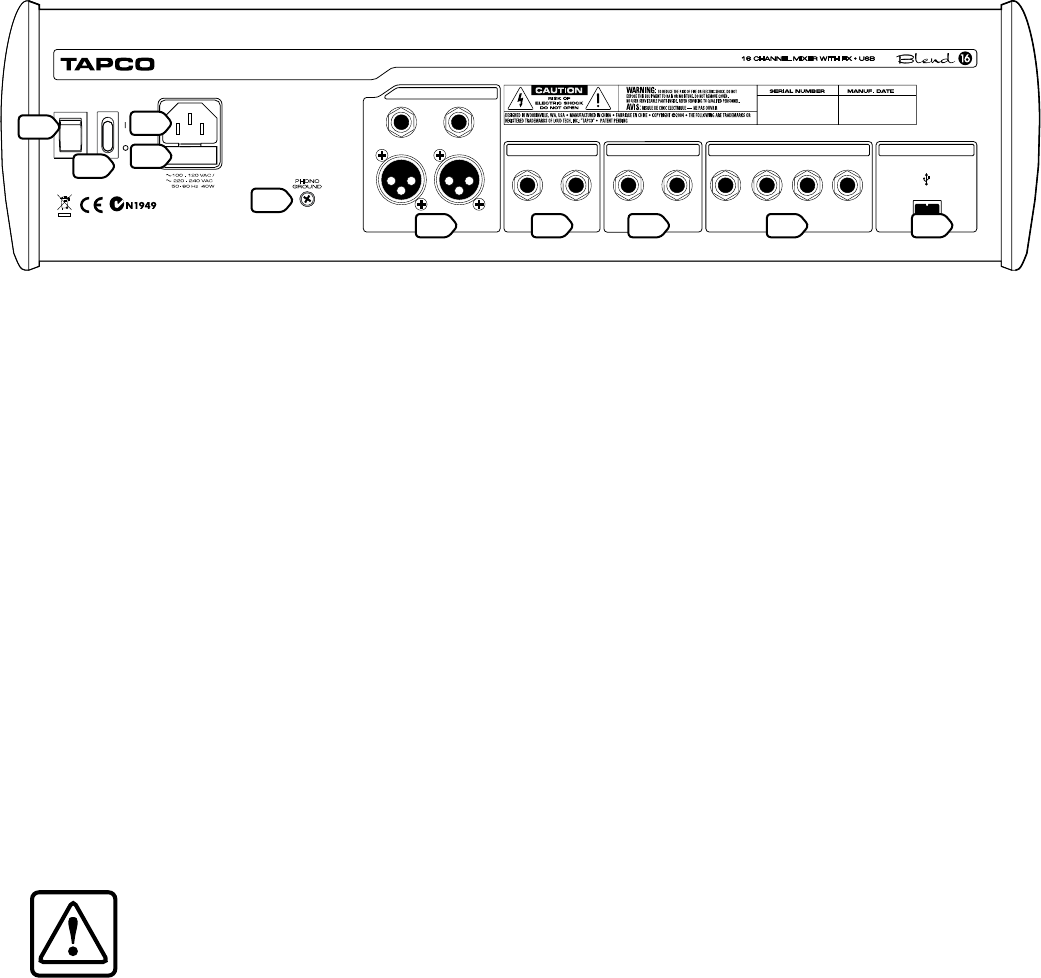
53. POWER SWITCH
Push the top of the switch labeled “ON” to turn
the mixer on; you should see the POWER LED (27)
glow with happiness. To turn the mixer off, push the
bottom of the switch.
As a rule, turn the mixer on first, before any amp
or powered speakers. At the end of a show, turn it
off last. This will prevent any turn-on/turn-off thumps
from being heard in the speakers.
54. PHANTOM POWER
Turn on this switch to provide +48 VDC phantom
power to the MIC (1) input XLR jacks (pins 2 and 3).
Phantom power is required to operate most
condenser microphones (some condenser
microphones are battery-powered).
If you have ribbon mics, tube mics, or dynamic
mics that do not require phantom power, leave the
switch out. If you are using both condenser and
dynamic mics, don’t worry. Phantom power will not
hurt most dynamic mics. Check the microphone’s
user manual if you’re not sure.
Caution: Turn all output levels down
before operating this switch to avoid the
possibility of a “pop” in your speakers.
Do not use phantom power with tube or
ribbon microphones, as this may cause
damage. Always turn off phantom power when
connecting or disconnecting your microphones.
55. AC POWER IN
This standard IEC connection is where you
connect the supplied power cord.
Connect the power supply cord to the Blend 16
first, then plug the power supply into a suitable and
properly rated AC outlet.
The Blend 16 has a universal power supply that
will operate with AC mains voltages from 100 VAC to
240 VAC.
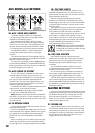
56. AC FUSE
If you suspect a blown fuse, disconnect the power
cord, pull the fuse drawer out (located just below
the cord receptacle) and replace the fuse with
the same type and current rating. If two fuses blow
in a row, something is very wrong, and you should
unplug the mixer and call technical support.
LEFTRIGHT 1234
SUB OUTS
MAIN INSERT
LEFT
BAL/UNBAL BAL/UNBAL
TIP SEND / RING RETURN
RIGHT
CONTROL RM OUT
USB IN/OUT
POWER
ON
PHANTOM
ON
MAIN OUT
RIGHT LEFT
PHONO
GROUND
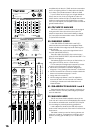
57. PHONO GROUND
If you have a turntable connected, use this screw
terminal to connect the turntable’s ground wire. This
will prevent a hum in your system.
58. MAIN OUTPUTS
These 1/4" TRS jacks and XLR jacks represent the
end of the mixer chain, where your fully mixed stereo
signal entertains your audience.
Connect these outputs to the inputs of your
amplifiers, powered speakers, or serial effects
processor (graphic equalizer, for example).
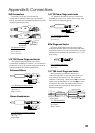
59. MAIN INSERTS
These allow you to insert an external device such
as the Tapco SQUEEZE compressor/limiter or TWEEQ
graphic EQ into the main mix signal path.
You will need “Insert Cables” that allow the main
mix signals to go out to your external device, and
have the processed signals come back into the
mixer on the same plug (see Appendix B).
The inserts are taken directly from the main mix
bus, before the 7-Band EQ (31) and the MAIN MIX
FADER (52).
60. CONTROL ROOM OUTPUTS
These 1/4" TRS jacks can be used to monitor the
main mix, CD/Tape inputs, subgroups, or SOLOed
channels.
Use the control room SOURCE SELECT (42) switches
to select what you want to hear, all independent of
what the main mix outputs are playing.
Connect these outputs to the inputs of an
amplifier with speakers, or powered speakers for
monitoring.
61. SUBGROUP OUTS
These 1/4" TRS jacks represent the output from
your subgroups. You can connect them to amplifiers
or powered speakers, or send the outputs off to an
ADAT recorder (or not use them at all).
62. USB IN/OUT
One end of the supplied USB cable connects
here, and the other end connects to the USB port of
your computer. The USB cable can simultaneously
send and receive two channels of audio to and
from any Mac or PC audio software.
54
53
55
58 59 60 6261
57
56