9
!7 Page Button [PAGEs, PAGEt]
These buttons are used to navigate through the display pages. The
[PAGEs] button moves to the next page while the [PAGEt] but-
ton moves to the previous.
Hold the button to continuously move through the pages. Hold the
[SHIFT] button and press the [PAGEs] button to mute the drum
voice during playback (Rhythm Mute Function).
Hold the [SHIFT] button and press the [PAGEt] button to dis-
play the Song Tempo Setting (P. 18)
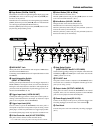
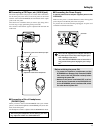
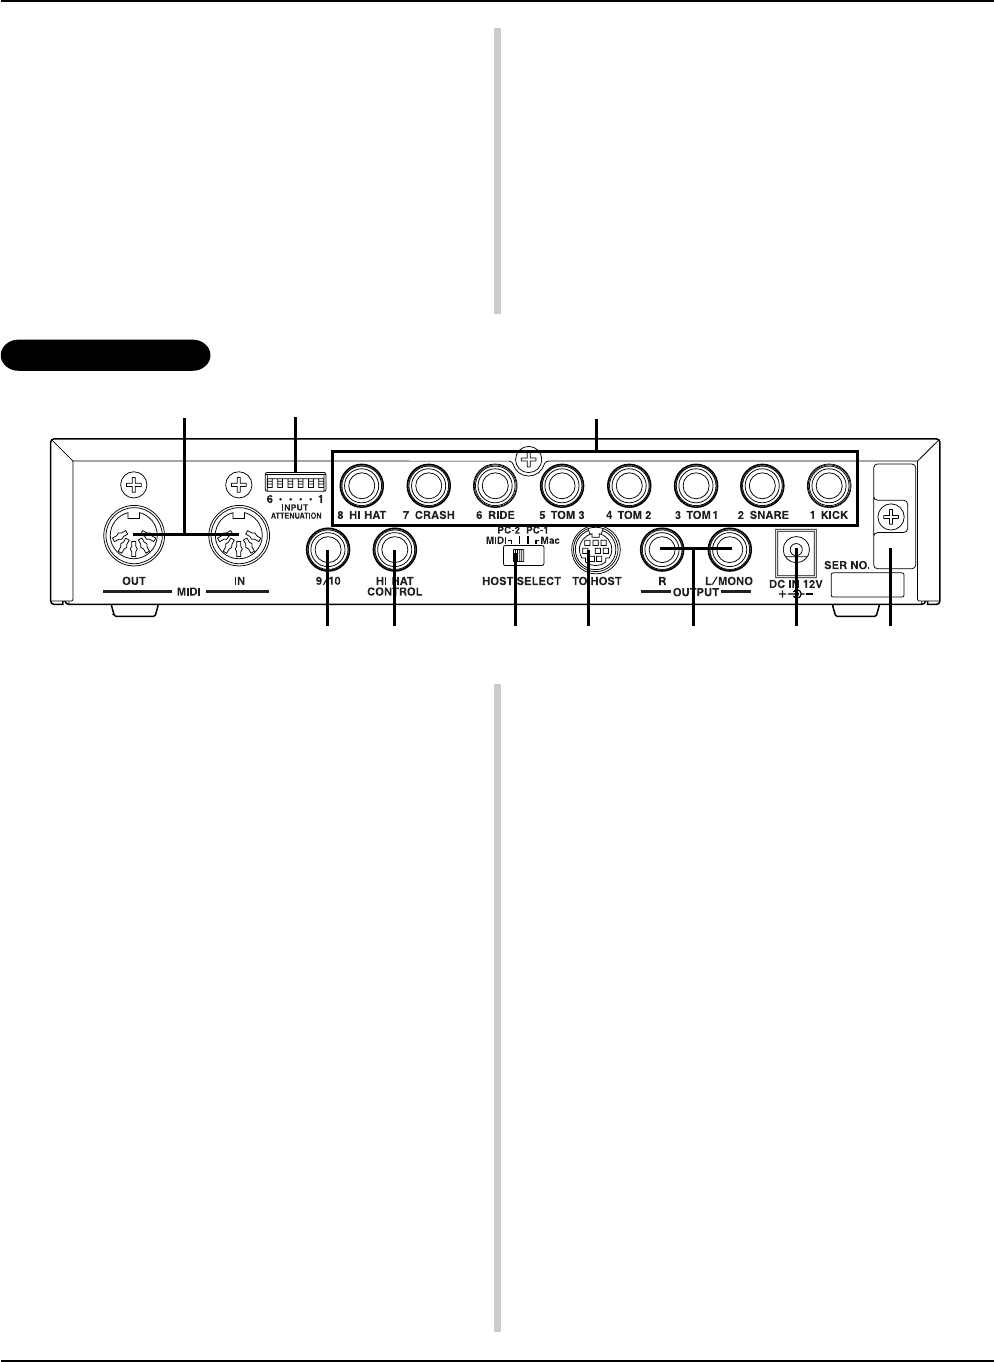
@0 MIDI IN/OUT Jack
These jacks are for the transmission and reception of MIDI data to
and from external MIDI devices.
Connecting external MIDI devices will expand the function of the
DTXPRESS.
@1 Input Attenuation Switch
(INPUT ATTENUATION)
Sets the general Input Attenuation for each Trigger Input Jack (1
KICK-6 RIDE). Lowering the switch (L) lowers the attenuation.
Raising the switch (H) increases attenuation. This adjusts the in-
put level to meet the specification of pads and trigger sensors con-
nected to the DTXPRESS. (P. 10)
@2 Trigger Input Jack (1 KICK-8HI HAT)
Connect pads and trigger sensors to these jacks. Connect pads ac-
cording to the indication below each input. (P. 10) Stereo output
pads are also compatible with the DTXPRESS.
@3 Trigger Input Jack (9/10)
Used to connect a pad to the DTXPRESS. The stereo jack’s L
corresponds to input 9, R corresponds to input 10. Using a stereo
phone plug to connect two pads makes two-trigger input possible.
If a monaural phone plug is used, only input 9 is available for use.
@4 Hi-Hat Controller Jack (HI HAT CONTROL)
This jack is used to connect a hi-hat controller (P. 10).
* Use a cable with a stereo plug when connecting a Hi-hat controller.
Rear Panel
@5 Host Select Switch
(HOST SELECT Mac/PC-1/PC-2/MIDI)
Set the switch according to the type of computer connected to the
TO HOST jack @6. If the MIDI jack is used set the switch to the
“MIDI” position. (P. 12, 26)
@6 TO HOST Jack
This jack is used to connect a computer to the DTXPRESS with a
serial cable. Use a cable that is compatible with the type of com-
puter you are using. (P. 26)
@7 Output Jacks (OUTPUT L/MONO, R)
These jacks are used to connect the DTXPRESS to an external
amplifier, mixer, etc. For monaural playback use the L/MONO
jack. For stereo playback connect both L/R jacks.
@8 Power Supply Jack (DC IN 12V)
Connect an AC adaptor to this jack. To prevent the adaptor from
becoming unplugged, secure the cord to the cord hook @9.
@9 Cord Hook
Prevents the power cord from accidentally becoming unplugged.
(P. 13)
!8 Select Button [SEL<, SEL>]
Use these buttons to move the cursor.
Hold the [SHIFT] button and press the [SEL>] button to switch
to the “Groove Check Function”. (P. 17)
!9 Value Button (VALUE–, VALUE+)
Changes the data value selected with the cursor.
Hold the button to continuously change the value.
Hold the [VALUE+] button and press the [VALUE–] button to
increase the value by 10 continuously.
Hold the [VALUE–] button and press the [VALUE+] button to
decrease the value by 10 continuously.
Controls and Functions
L
H
@0 @1
@3
@2
@4 @5 @6 @7 @8 @9


