


N3/N2 Owner’s Manual • 41
ENGLISH
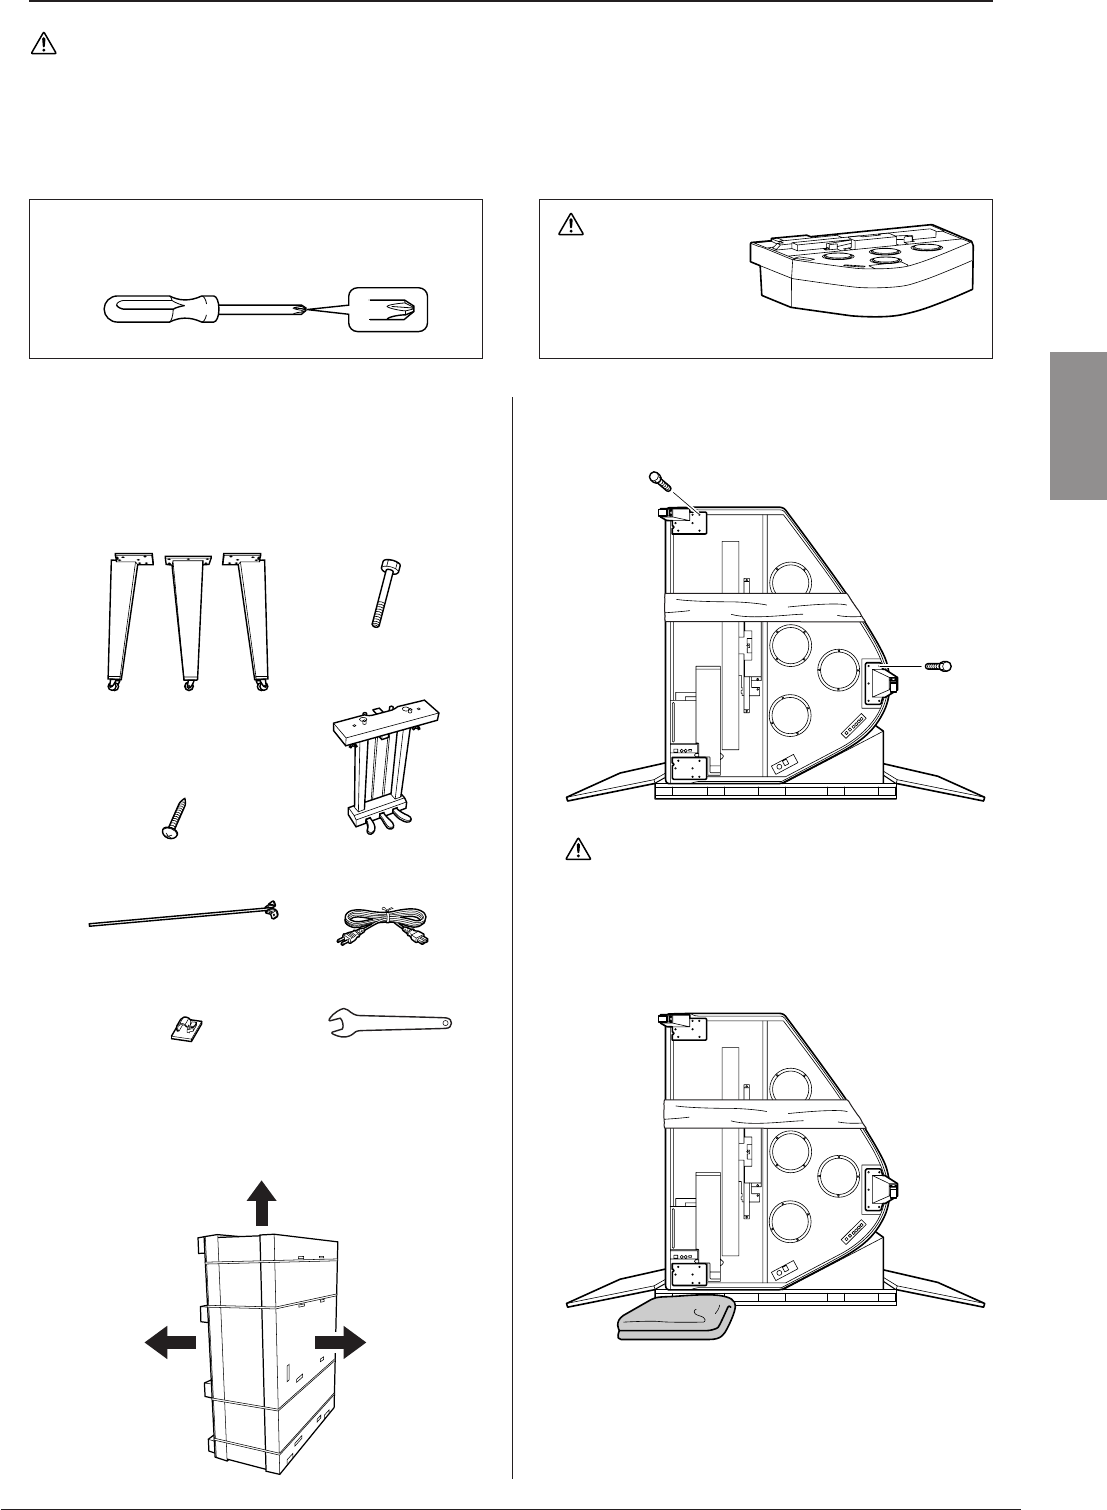
N3: Assembling the Unit
• Be careful not to confuse parts, and be sure to install all parts in the correct orientation. Please assemble in accordance
with the sequence given below.
• Assembly should be carried out by at least three persons.
• Be sure to use the correct screw size, as indicated below. Use of incorrect screws can damage the instrument.
• Be sure to tighten all screws upon completing the assembly of each unit.
•To disassemble, reverse the assembly sequence given below.
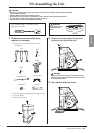
1 Remove the parts and collect them
together for assembly.
1-1 Remove the parts shown below from the
smaller box.
1-2 Set the larger box upright with the right side up.
1-3 Cut the bands.
1-4 Remove the covers.
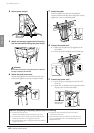
2 Attach and securely tighten the right front
leg and the rear leg with the bolts.
3 Set a blanket at the left corner.
CAUTION
Have a Phillips-head (+) screwdriver of the
appropriate size ready.
Do not lay the main unit
upside down on the
floor.
CAUTION
Incorrect
x 17
Bolts
Pedal
Wrench
AC power cord
Pedal brace rods
Cord holders
x 3
x 4
Screws
Front (L) Rear Front (R)
Legs
x 2
(Used to tighten bolts)
When the instrument is set upright (as in the illustration above),
take extra care not to keep the instrument from falling over, since
it is unstable in this position.
x 6
x 5
CAUTION
39