


10
U-CONTROL UMA25S
4. UMA25S as audio interface
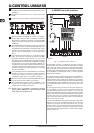
The LEVEL control adjusts the input volume of the
microphone signal. Make sure the input signal does not clip
(distortion).
The LINE OUT connector lets you connect RCA audio
cables.
The LINE IN connector lets you connect RCA audio cables.
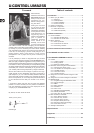
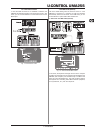
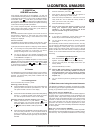
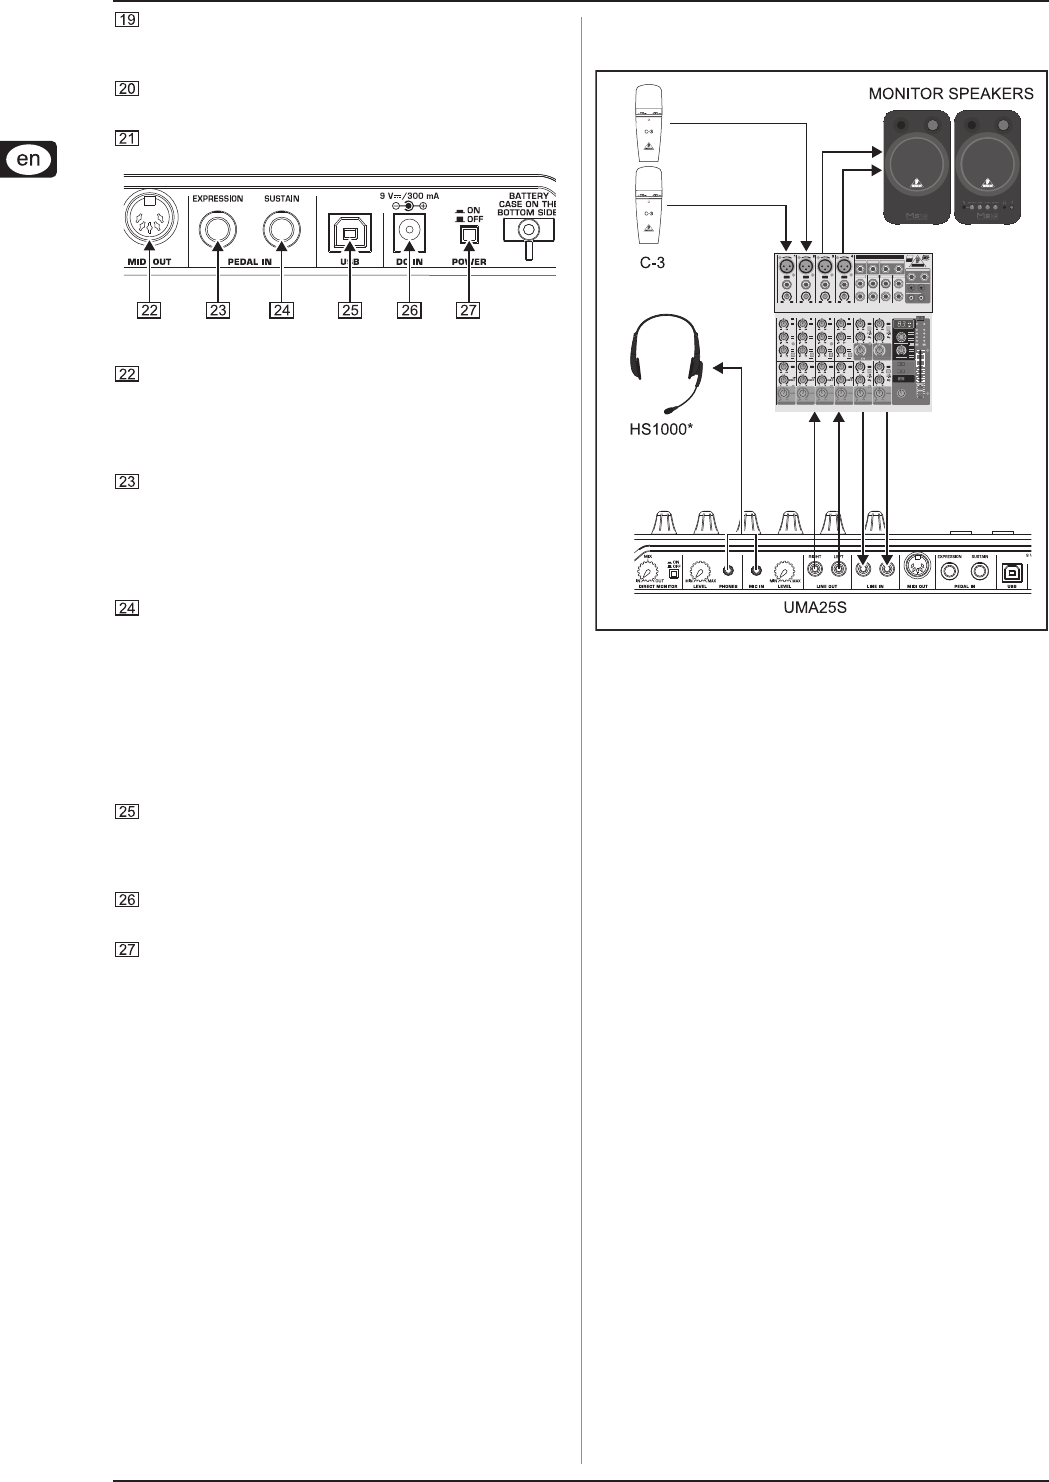
Fig. 3.3: Rear panel connectors
MIDI OUT allows the UMA25S to connect to a computer.
On the other hand, it provides a connection to additional
MIDI devices, making the UMA25S a full-fledged MIDI
interface for the host computer next to its master keyboard
functionality.
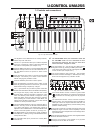
The EXPRESSION connector lets you hook up a foot pedal
which can be used to control assignable MIDI data. The
foot pedal typically controls the volume level, which is then
referred to as expression pedal, but can also be used to
control a filter’s cutoff frequency or even a typical wah
effect.
The SUSTAIN connector allows you to connect a Sustain
pedal. This connector is assigned by default to the MIDI
parameter “Damper Pedal” (Sustain, CC 64), which
represents a switch controller. When the pedal is pressed
(and held) while in normal Play Mode, it generates a controller
with the value 127. As soon as the pedal is released, the
controller jumps to the value 0 (which is the typical behavior
of a piano’s sustain pedal). Aside from this, you can assign
the pedal connector to any MIDI controller as is the case
with the push buttons.
This is the USB connector on the UMA25S. The connector
(type B) on the device is connected to a free port (type A)
on the host computer using the supplied cable. It is
compatible with both USB 1.1 and USB 2.0 standards.
Use the DC IN connector to supply the UMA25S with power
from an external power adapter (not included).
The POWER switch is used to turn the UMA25S on and
off. Be sure the POWER switch is turned to the “Off”
position when connecting to the mains.
Please close all software applications before
turning off the UMA25S or disconnecting the USB
cable while the computer is on.
4. UMA25S as audio interface
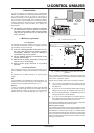
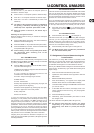
* included
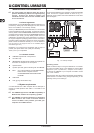
Fig. 4.1: Using the audio connectors
The UMA25S provides a professional recording interface
between mixer and computer when used alongside a suitable
mixer. This type of setup allows you to record several signals
onto the computer and to play several recorded takes or playbacks
simultaneously. Additionally, it lets you listen to the entire recording
on loudspeakers (or headphones). Figure 4.1 shows a possible
setup with the UMA25S.
Connect the subgroup outputs with the inputs of the UMA25S. It
is possible to connect either the TAPE INPUT connectors or your
monitor speakers to the outputs of the interface. For monitoring
purposes, plug the stereo headphones into the PHONES output
on the UMA25S or into the headphone output on the mixer. Use
the supplied USB cable to connect your computer by way of the
USB port.
By routing the channels you want to record to the subgroups, it
is now possible to use the mixer’s channels to record one
instrument after the other onto your computer. If you connect the
outputs of the UMA25S to the free channel inputs (not via TAPE
INPUT), make sure that the signal is not switched to the subgroup
but to the main output of your mixer to avoid feedback. Be also
sure to select the correct monitoring paths in the Control Room
section on the mixing console.
If you feed the UMA25S back through a channel input (not TAPE
INPUT), you can set up an additional monitor mix for performing
musicians by using the Aux Send (for example, Aux 1) of the
specific channel. In case the musicians want to hear themselves
as well as the playback or previous recording takes, use the
Aux Sends in the recording channels to mix the recording signals
with the monitor mix.