Installation
This section describes the features and connectors for the MVC 121 Plus:
• Rear Panel Features
• Front Panel Features
Rear Panel Features
2
1
+48V
MIC
12MIC/LINE
LINE 3
L
R
RL
POWER
0.4A MAX
12V
RS-232
VARIABLE
FIXEDLR
DIGI IN
MVC 121 Plus
Tx Rx 1 2 3
INPUTS OUTPUTS
RESET
1 2 3
4 5
6
7
9
8
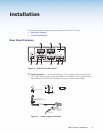
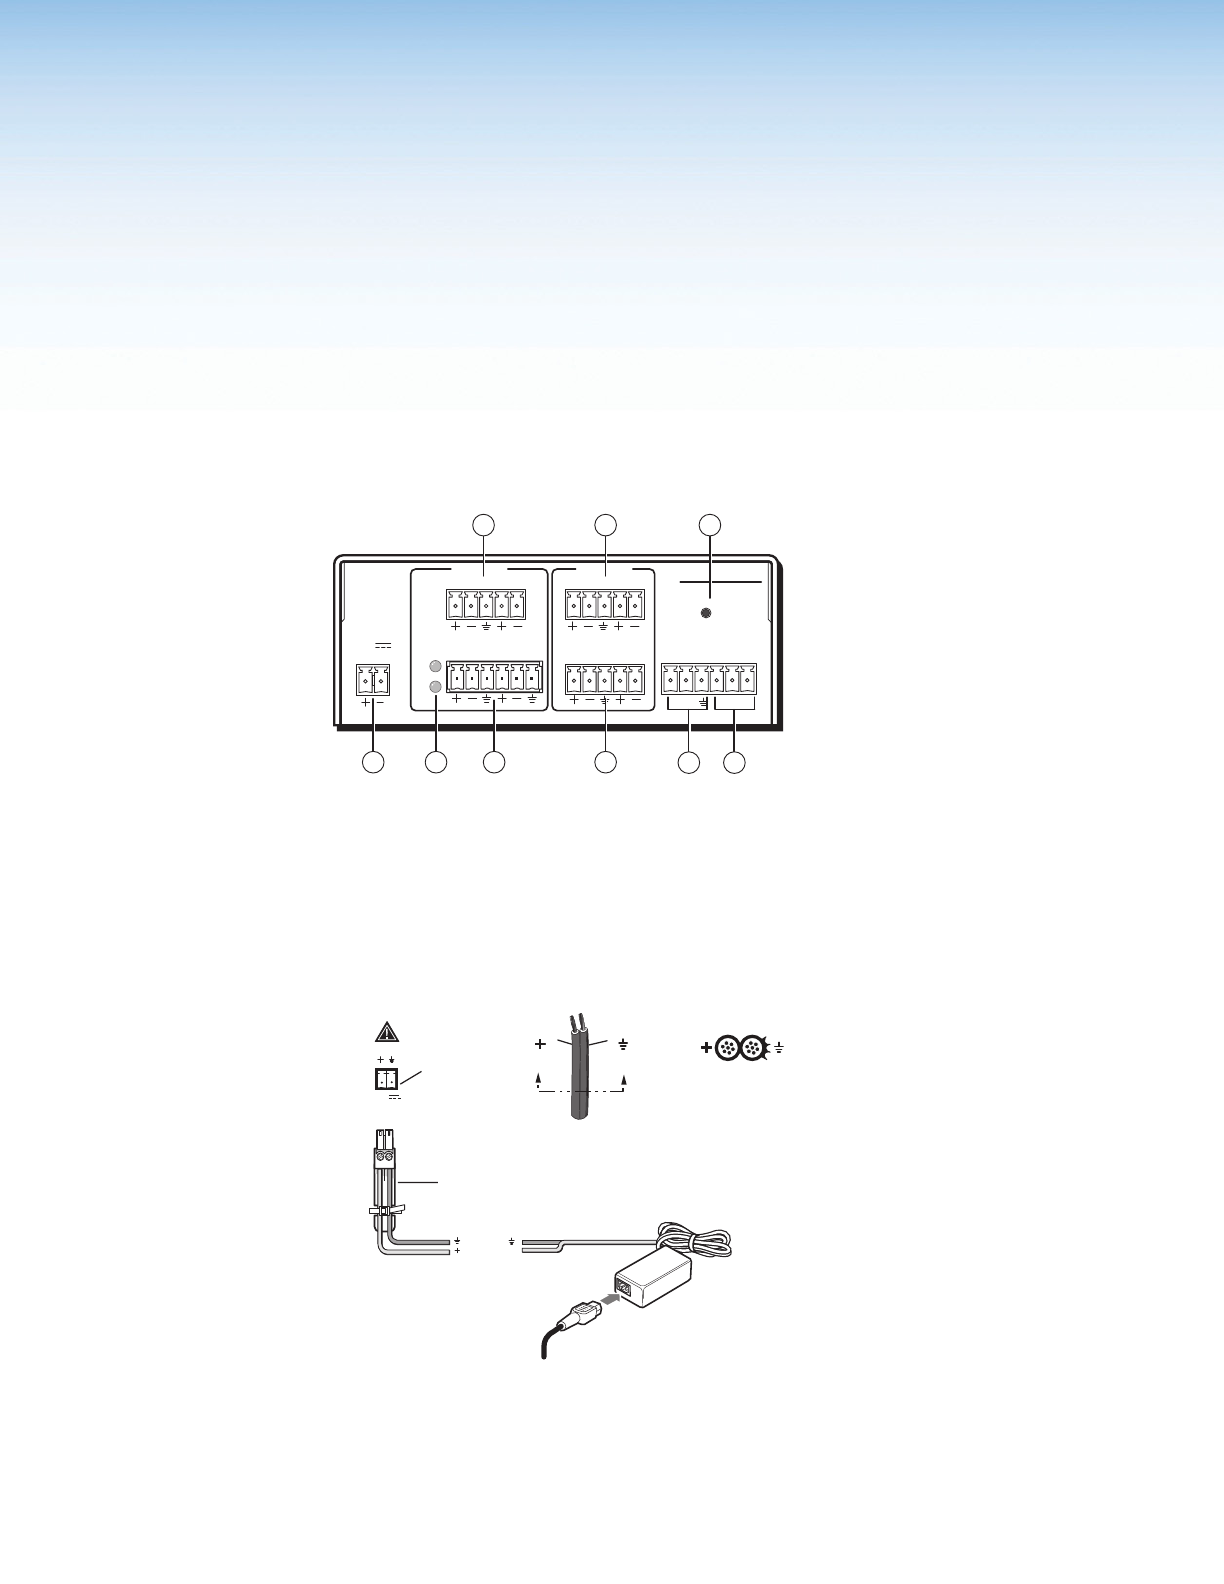
Figure 2. MVC 121 Plus Rear Panel
a Power connector — Connect the two pole, 3.5 mm captive screw connector from
the 12 VDC external power supply (provided) to this socket on the rear panel. Ensure
the connections have the correct polarity as shown in the illustration below:
Power Receptacle
Power Supply
Output Cord
SECTION A–A
RidgesSmooth
AA
DC Power Cord
Captive Screw Connector
AC Power Cord
Ground
+12 VDC
External
Power Supply
(12 VDC, 1 A )
POWER
12V
3A MAX
Figure 3. Power Supply Connection
MVC 121 Plus • Installation 4


