


DX810 – 23
Next we’ll create the combination to allow the
inputs for rooms B and C to be heard in both B and C
outputs when C2 is active.
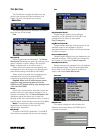
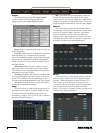
14. Open the combine view by clicking on the
Combine button.
15. Click on C1 to deactivate Combination 1.
16. Create Combination 2 by clicking on C2 for
Outputs B and C.
17. Click on C2 in the last row of reddish combine
buttons to activate Combination 2.
Now Mics 2 and 3 will be heard in both rooms B
and C outputs.
• Groups 2 and 3 are linked and control the output
level into B and C outputs.
• Group 5 controls the volume of mic #2 into B and
C outputs.
• Group 6 controls the volume of mic #3 into B and
C outputs.
18. Finally, activate both C1 and C2, and all three
inputs can be heard in all three outputs.
• Groups 1, 2, and 3 are linked and control the
output level into A, B, and C outputs.
• Group 4 controls the volume of mic #1 into all
three outputs.
• Group 5 controls the volume of mic #2 into all
three outputs.
• Group 6 controls the volume of mic #3 into all
three outputs.
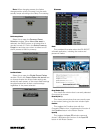
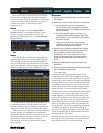
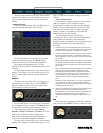
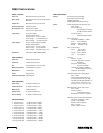
Input EQ
Click this button to view the Input 3-band EQ
controls, superimposed over the Crosspoint Matrix
Section.
Each input strip has a 3-band EQ comprised of:
1. A high-frequency shelving EQ with adjustable gain
(±15 dB) and frequency (500 Hz–20 kHz).
2. A mid-frequency parametric EQ with adjustable
gain (±15 dB), frequency (20 Hz–20 kHz), and
bandwidth (0.1–6.0 octaves).
3. A low-frequency shelving EQ with adjustable gain
(±15 dB) and frequency (20 Hz–500 Hz).
4. An ON button to turn the EQ on and off.
Click and drag up and down on the control knob
to change the setting.
Note: You can not directly enter a numeric value
with the mouse and keyboard. The EQ settings apply
to all the outputs to which the input is assigned.
Use the arrow keys on the keyboard to make fine
adjustments to a selected control, and the Page Up/
Down keys to make course adjustments. Use the Tab
key to quickly move the selection to adjacent controls.
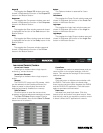
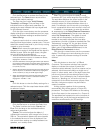
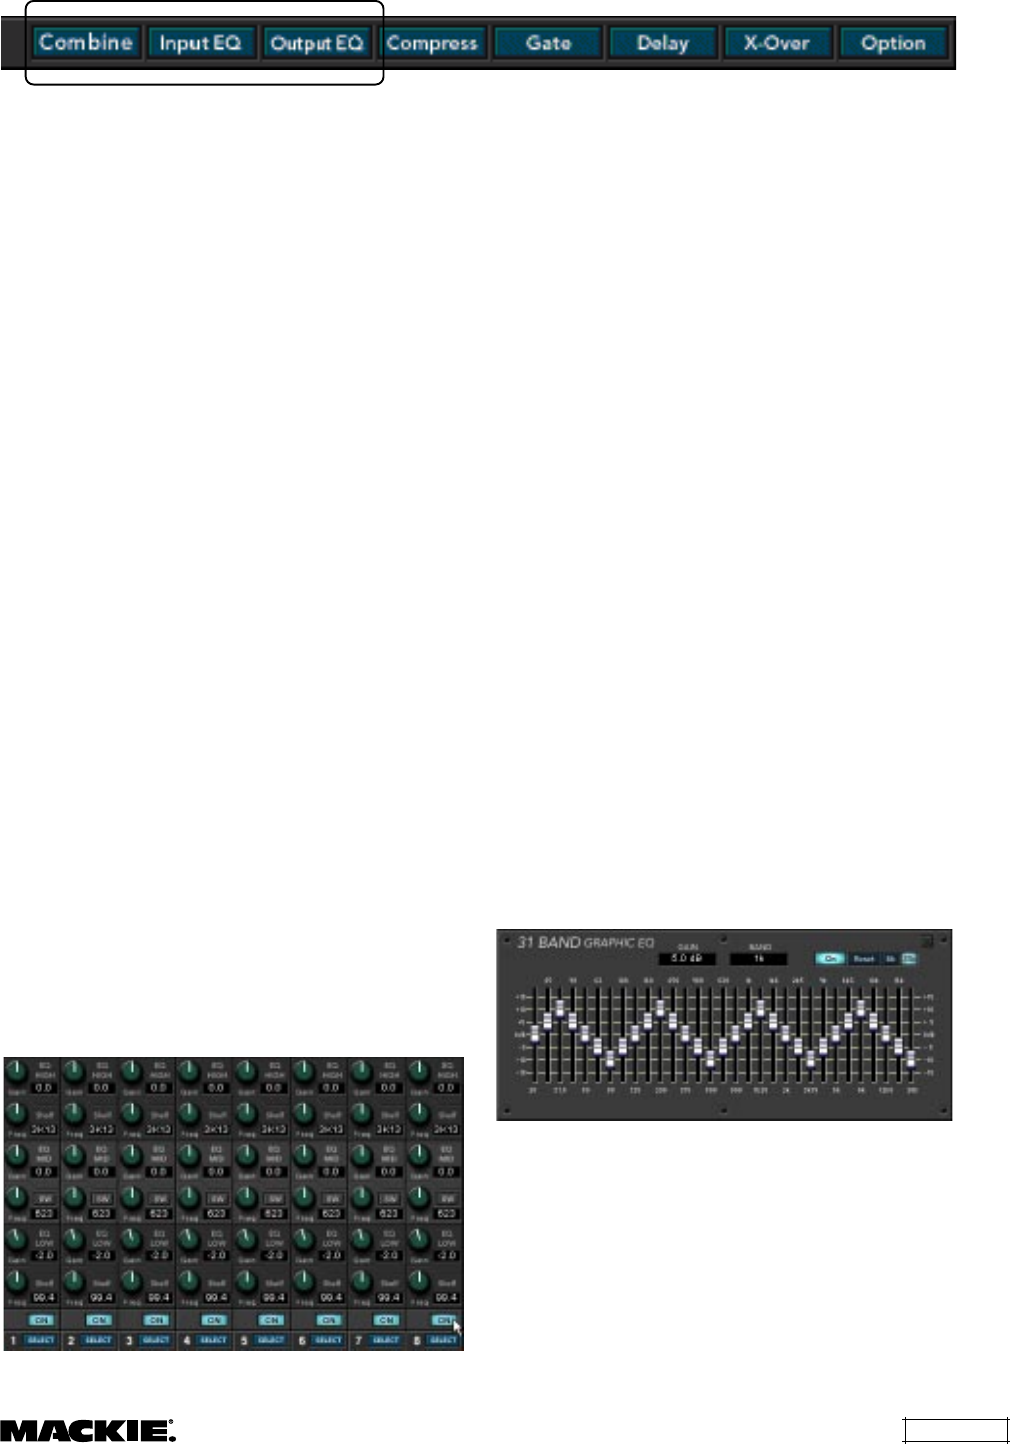
Output EQ
Click this button to view the Output EQ controls.
Click the output letter buttons (A-J) to select an
output after the Output EQ window is open.
Select either a 31-band Graphic EQ or an 8-band
Parametric EQ.
Note: When switching between the 31-band
Graphic EQ and the 8-band Parametric EQ, a
warning will appear: "This will reset all EQ
parameters!" Click Cancel to retain the current EQ
settings, or OK to change EQ modules.
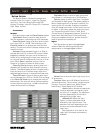
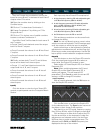
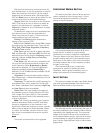
31-band Graphic EQ
With an output selected, click the 31b button to
view the Graphic EQ controls.
Click the On button to activate the Graphic EQ
for the selected output. The Reset button returns all
the sliders to their center (0 dB) positions.
Each band is on an ISO center frequency ranging
from 20 Hz to 20 kHz, with ±15 dB gain on each band.
Click and drag on a slider knob to adjust the EQ.
Use the arrow keys on the keyboard to make fine
adjustments to a selected control. Use the Page
Up/Down keys to make course adjustments. The
selected band’s GAIN and BAND (frequency) are
displayed at the top of the window.