


3. Clip LED
Indicates that the signal is too strong and is near or at clipping. Adjust the Input Level control to occasionally
allow the Clip LED to illuminate.
4. -18 dB LED
Illuminates to indicate that signal is present. If the LED will not light, adjust the Input Level control accordingly.
ANALOG COMPRESSOR
5. Threshold
Sets the dynamic range (the upper level potential) of the Analog Compressor. Use this control to reduce
your loudest transients, bringing them to a more usable level. On the Vocal 100, the minimum Threshold
is -24 dB. Unlike most controls, the Threshold knob, when turned clockwise, actually decreases the effect of
the compressor, as it raises the maximum level where it will take effect.
Placing this control in the “0 dB” position (fully clockwise) will restrict the compressor’s capabilities. Likewise,
placing this control in the “-24 dB” position (fully counterclockwise) will affect virtually all the transients and
greatly limit the signal’s dynamic range. Your objective is to use the Threshold control in conjunction with the
Ratio (#6) and Gain (#7) controls to find a suitable level between the two. Refer to the Recommended
Compression Settings on page 18 for some good starting points. When adjusting the Threshold from scratch,
it is good to start at the “0 dB” position and work your way back.
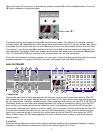
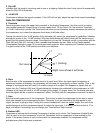
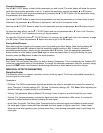
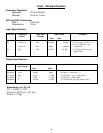
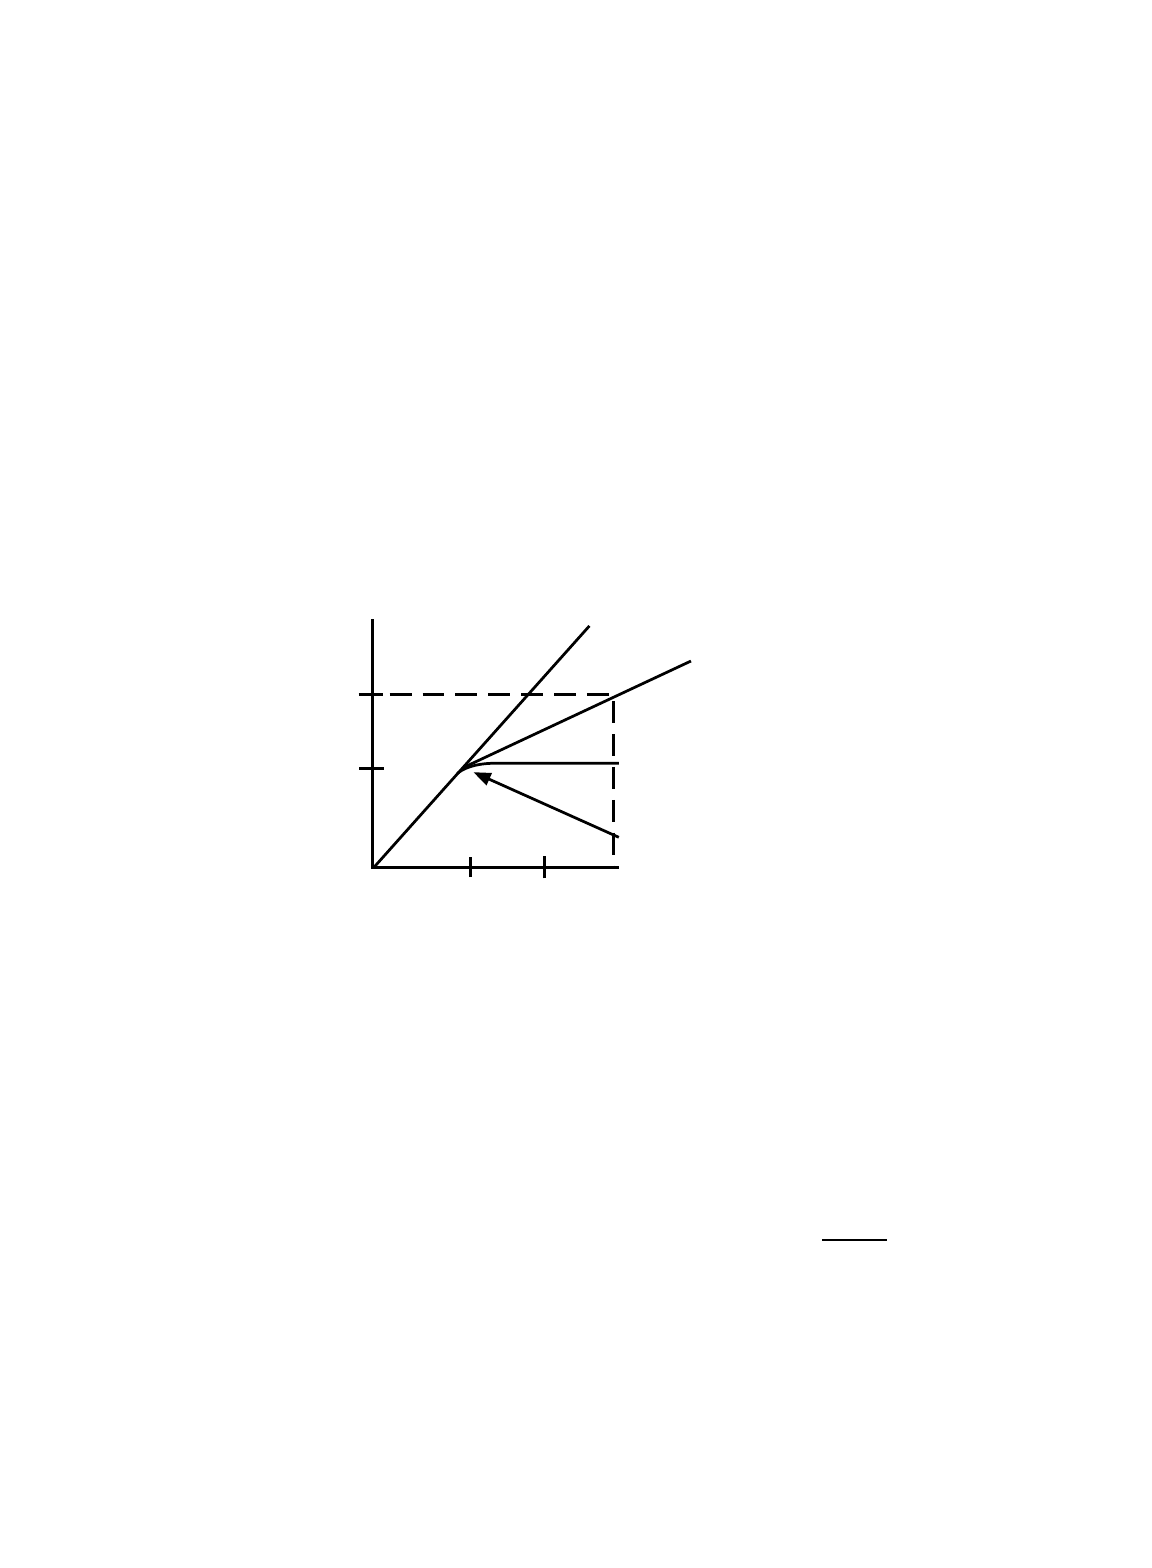
6. Ratio
Sets the ratio of the compressor’s output level to its input level. When the input signal increases by a
determined number of decibels, the compressor will increase the signal but by a lesser number. Thus, a big
change in input signal level will result in a smaller change at the output.This happens to signals that are
higher than the Threshold (#5) level. Signals below the threshold go unaffected by the compressor (a 2 dB
increase at the input will result in a 2 dB increase at the output). In simpler terms, the Threshold sets what
level the signals will be to see the compressor’s effect. The Ratio tells the compressor how much to affect it!
7. Gain
Sets the overall output level of the compressor. This control is added to compensate for the drop in signal
level often caused by the compressing function. Obviously, if you are attenuating the high peaks in your
signal, the level is going to drop. Turning this control clockwise will raise the overall
output (the sum of the
unaffected signal and the compressed signal) to match the input level. It is best to set this control at “0” to
begin and adjust it accordingly as you change your Threshold and Ratio controls.
8. Enabled LED
Illuminates to indicate that the Analog Compressor is active and in circuit. The Compressor Enable Button
(#16) is used to turn the compressor on and off. Remember that the compressor is also enabled by the
preset. If the preset (factory or user) is stored with the compressor enabled, the compressor will be
activated every time that preset is selected.
5
Out Level
In Level
1:1
2:1
:1 (limiting)
Slight curve shows a soft knee
∞