


3
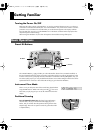
Features
410 Sounds
Sound selection is made easy thanks to sound category Groups
or Alphabetical listing.
Specially Selected Effects
Ambience (5 Types) and a choice from on-board Multi Effects
(20 types) can be used at the same time.
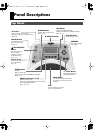
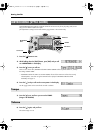
Friendly Interface
The large, custom LCD lets you easily view various functions
and information. The panel buttons and the friendly interface
make modifying a kit a very simple process. The Control knob
gives you instant editing access. The Preset Kit buttons give you
quick access to 5 specially selected kits and 5 of your favorite
kits.
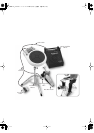
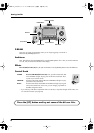
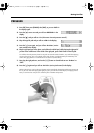
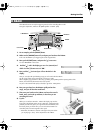
Pads and Expandability
10 velocity sensitive and pressure reactive pads. 2 of these
pads also feature positional sensing. The D Beam can be used
for triggering and controlling sounds and effects. The stereo
input for external triggers lets you have a choice to use optional
kick triggers, a head/rim capable pad, cymbal pads or foot
switches (with multi-functions possible).
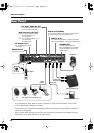
Play With External Audio Sources
The mix in allows one to connect external audio sources, ideal
for playing along with CDs or for connecting external sound
modules.
For Improving Techniques
In addition to normal metronome functions, the HandSonic 10
includes a unique Style Guide Metronome, featuring a wide
range of rhythmical categories; perfect for learning, practicing
and performing.
The Coach Mode's functions include Time Check, Rhythm
Check and Pad Follow. These exercises will challenge you and
help you to improve your technique.
Set Up & Portability
Lightweight and compact, the HandSonic 10 mounts easily on
the optional PDS-10 stand, (recommended) or on a cymbal
stand when using the APC-33.
This Manual
This manual should be read carefully as it will not only explain
WHAT is possible, but will guide you in a friendly way so you
can understand HOW to use the on-board sounds, functions
and the potential of the incorporated technology.
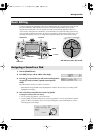
To hear some of the HandSonic 10’s possibilities, we have incorporated 5 different demo songs.
1.
Press the [CONGA] button (or any of the 5 Preset Kit buttons) and hold it down for 2 seconds.
The demo song will start to play.
If you press the [CONGA] button again, the demo song will re-start from the beginning.
If you press any of the other Preset Kit buttons, the demo songs assigned to those will play.
You can also use the [+]/[-] buttons to change songs.
2.
To stop the demo, press [KIT] button.
While the demo song is playing, all pads are disabled. Also, the kit being played in the demo song may not
be the same as indicated by the button name.
982
* No data for the music that is played will be output from MIDI OUT.
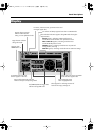
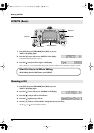
Demo Songs
KIT Button
Value Buttons
Preset KIT Buttons
HPD-10_e1.book 3ページ 2006年4月7日 金曜日 午後2時14分