


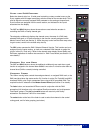
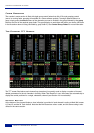
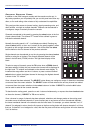

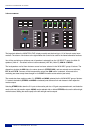
Central Routing Panel
In addition to the DAW transport controls and the console monitor pot, in
day-to-day operation you will probably find you use this panel more than any
other, so it’s worth taking a few minutes to fully understand its capabilities.
This panel provides access to channel routing, signal processing order, and
other facilities, on single or multiple channels. Channels can be selected in
a contiguous range or randomly across the console.
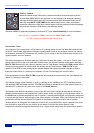
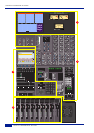
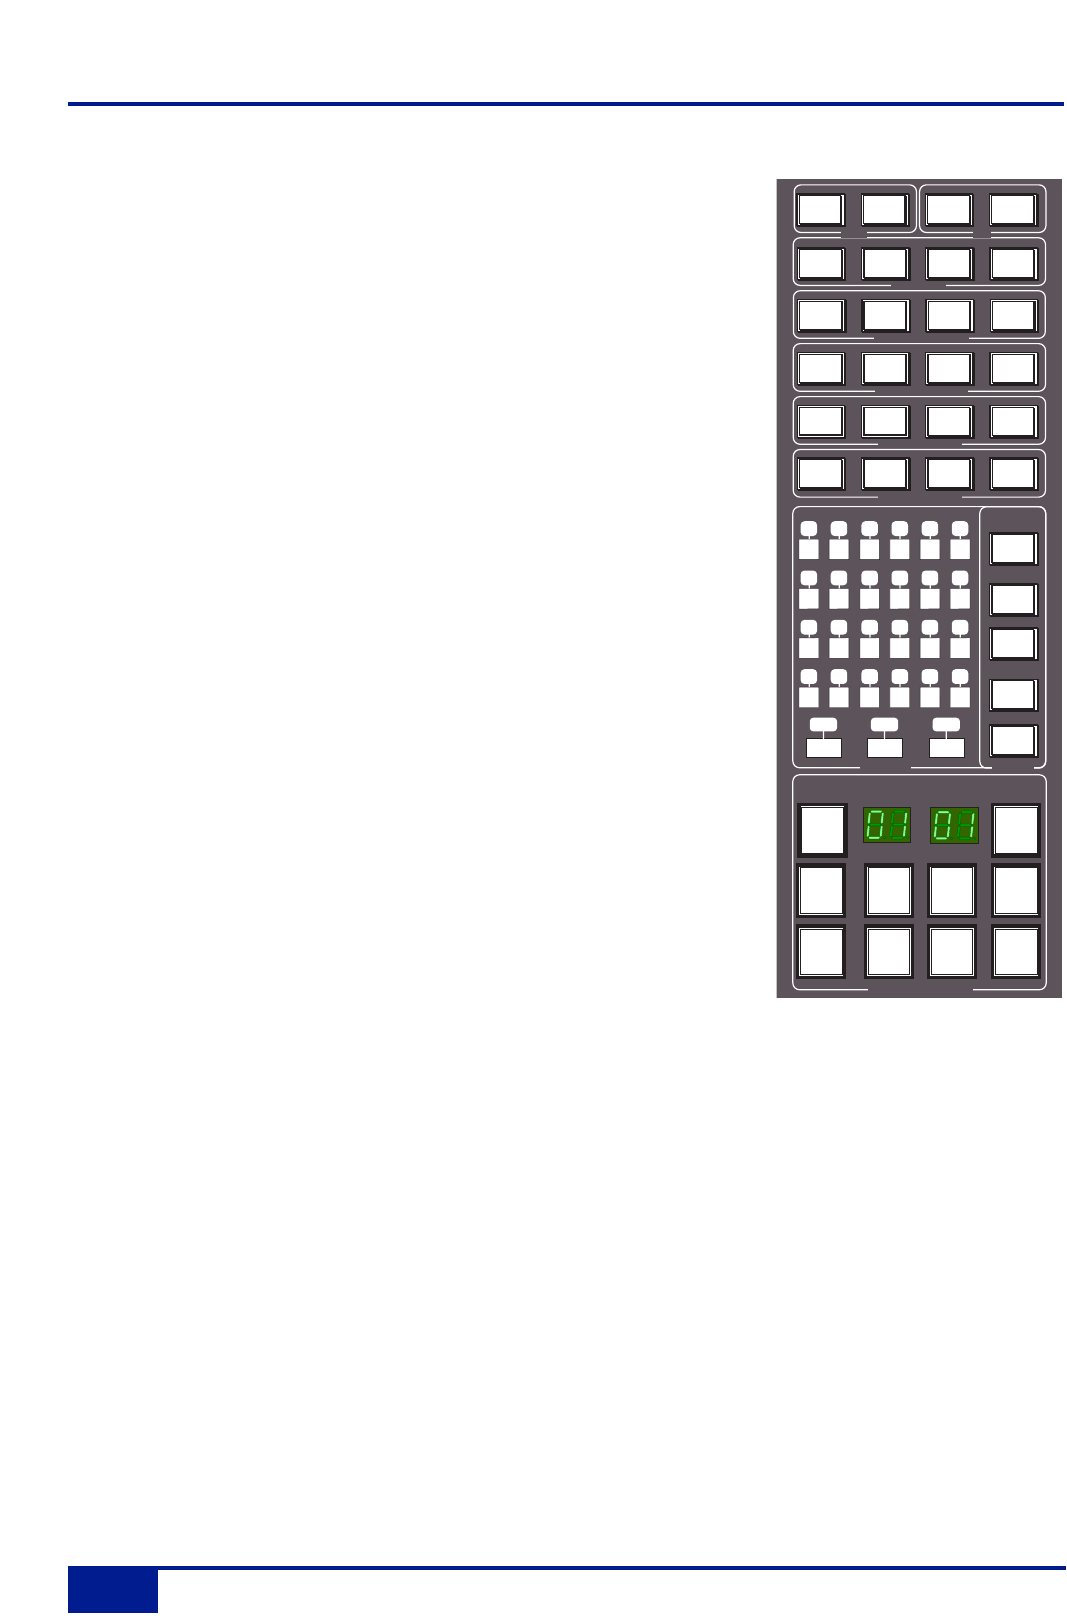
Channels are selected to the panel by pressing the select button at the foot
of each channel fader. The channel TFT meter will be outlined in green to
indicate the selected channel.
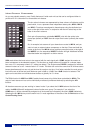
Normally the routing panel is ‘off’ – ie all displays are blank. Pressing any
channel select button, or the + and - buttons (on the panel) together, wakes
the panel up with a single channel selected – this will be either the select
button channel or the first channel of the previous selection.
Single channels can be selected at any time by pressing the channel select
buttons or using the +/- buttons. The currently selected channel will be
shown in the left hand (‘FROM’) window. The right hand display will be
blank.
To select a range of channels, press the TO button when a FROM channel
has been selected. Initially, the next consecutive channel will be displayed in
the right hand ‘TO’ window and indicated on the channel meter display. To
increment the range either use the +/- buttons, or press a second channel
select button to select the highest channel in the range; the highest channel
is shown in the ‘TO’ window.
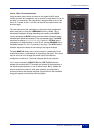
Once a channel has been selected, The SELECT button allows non contiguous arrays of channels to be added
or removed from the current selection. The SELECT button will flash when active and any channel can added
or removed from the current selection via the select button on its fader. If SELECT is active the ALL button
can be used to select all the console channels.
To deactivate the routing panel, press the + and - buttons simultaneously, or re-press the channel select button
on the active channel, (if SELECT or TO are not active).
Once a channel or range of channels has been selected, selections and changes made on the routing panel
are made across all selected channels. If some functions are on and some are off on the selected channels,
the lowest numbered channel in the selection sets the initial state. For example, you select channels 3 to 6. If
channel 3 is assigned to a bus, then the first press on that bus routing button will deroute channels 3 to 6 from
that bus. If channel 3 is not assigned to a bus, then the first press on that bus routing button will route channels
3 to 6 to that bus.
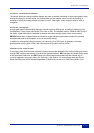
CHANNEL SELECT
PAN MODE
BUS
ROUTING
FROM
TO
123456
78
9101112
13 14 15 16 17 18
19 20 21 22 23 24
5.1
PAN
MIX A MIX B MIX C
–
CLEAR
SET SELECT
ALL
INC
ROUTE
UNDO
+
PAN
TO TRK
EFX
TO TRK
CHANNEL OUTPUT
PROCESSING IN/OUT
PROCESSING ORDER
CHANNEL IN
CHANNEL METERS
POST
FADE
INS POST
DYN
BUS
POST
FADE
INPUT
INSERT
IN
DYN POST
EQ
MIC
INPUT
INPUT
FLIP
EFX
FILTER
TO INPUT
SPLIT
CHAN
OUT
SOLO
ISOLATE
PRE
FADE
EQ
IN
INS POST
EQ
LINE
MON
RETURN
+48V
INPUT MISC
SET
AUX
TO
Console Operator’s Guide
2-16
Duality Operator’s Manual