


3-30
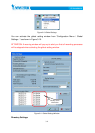
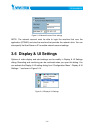
Step 1: Step 2:
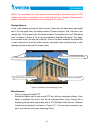
Figure 3-9 Change the Sequence of the Connected Camera
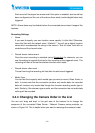
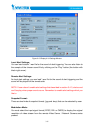
3.4.5 37BSaving the Changes
Once you have clicked on the “Save” button in the bottom left corner of this window,
the changes for all camera configurations will be saved and validated immediately in
this IP surveillance system.
NOTE: If you try to change the remote settings of any Video Server / Network Camera
series product in the web page (right part of this window), you will need to apply the
“SAVE” button in each corresponding page in order to save the settings to the remote
servers. There are different “SAVE” buttons for changing the settings of the local IP
surveillance system and that of the remote Video Server / Network Camera series
product.
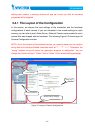
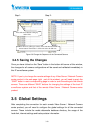
3.5 14BGlobal Settings
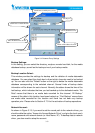
After completing the connection for each remote Video Server / Network Camera
series product, you will need to configure the global settings for all the connected
servers. These include the media datamedia database directory, the usage of the
hard disk, internet settings and backup status information.
Press left mouse button at the gray
index field.
Move mouse to where you want to move and then release the
mouse button. Then Video 1 will be moved to the 10th row.