


70
Recording/Playback/Remote Control
01X Owner’s Manual
Before Using Basics Section AppendixGetting Started Reference
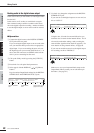
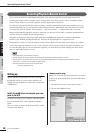
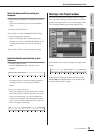
e From the Devices menu, select “VST Outputs.”
r Activate all the outputs buses you intend to use.
Click on the [power] button to activate a desired bus.
(Bus 1 is on by default and doesn’t have such a button.)
Up to nine buses can be activated. In these instruc-
tions, we’ll use the simplest routing system—only
using Bus 1—so leave all the other buses off. (For
instructions on how to use multiple buses and multiple
mLAN channels, see the box below.)
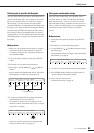
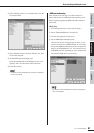
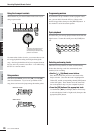
t From the Devices menu, select “Mixer.”
y Make sure all audio tracks are set to Bus 1. (This does
not apply to MIDI tracks.)
First, make sure the tracks are set to full width. Click
on the leftmost down arrow and select “Wide” from the
pop-up menu.
If any track is not set to Bus 1, click the [Bus] box at
the bottom of the channel strip, and select Bus 1 from
the pop-up menu.
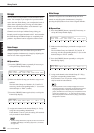
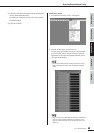
u Click the Show Master button (shown below) to display
the stereo master output channel strip.
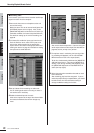
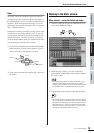
i To route signals to 01X monitor input, set “MONITOR
17-18” in mLAN Auto Connector (PC ➝ 01X) to
“2CH,” then set the master outputs from the DAW to
Channels 17 and 18, as shown below.
In this setup, all tracks are set to Bus 1 (the default) and
Bus 1 is routed to the mLAN master outputs.
• It is possible to monitor without decreasing the number of input
channels (faders) by using the monitor input function of 01X
(direct monitor).
• When you are using WDM and ASIO simultaneously, refer to
“Setting in the mLAN Auto Connector” in the separate Installation
Guide.
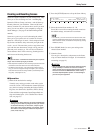
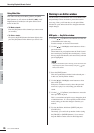
o On the 01X, press the [MONITOR A/B] button so that
the lamp lights.
This enables monitoring of the master outputs from the
DAW/computer.
Keep in mind that this monitor setting can be changed
(page 96). The instructions here apply when the
default setting is used.
Click here