


25
—Owner’s Manual
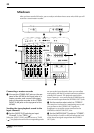
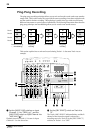
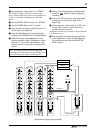
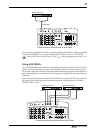
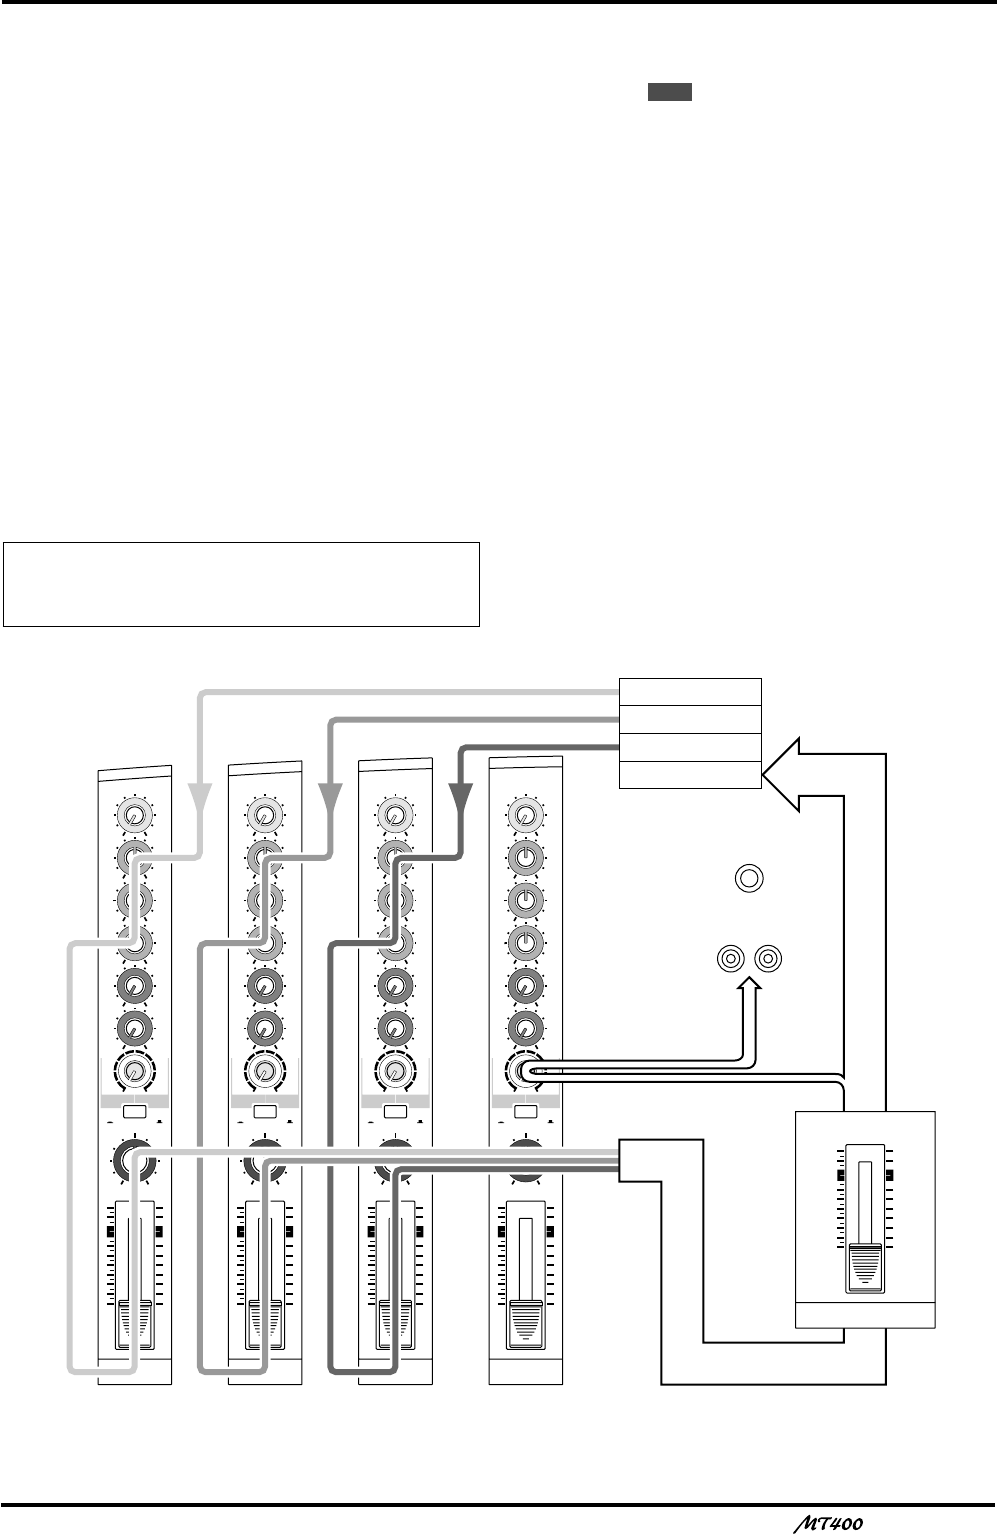
3 Set the monitor select switch to “STEREO”.
The Stereo bus signal is selected as a monitoring
source, which enables you to listen to the playback on
Tracks 1–3 through the headphones or the audio
system.
4 Set the [METER SELECT] switch to “STEREO”.
5 Set the STEREO fader to the 7–8 mark.
6 Turn the PAN controls on Input Channels 1–3
all the way to the right (R).
7 Press the [REW] button to rewind the tape,
and press the [PLAY] button to start playback.
8 While listening to the headphones or the
monitor speakers, adjust the faders on Input
Channels 1–3 to set the track balance. Use
the EQ controls, if necessary, to adjust tonal
quality.
9 After you set the optimum recording level,
press the button to start ping-pong
recording.
0 Press the [STOP] button to stop ping-pong
recording, and rewind the tape to the
beginning.
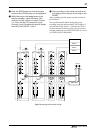
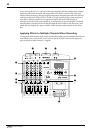
A Set the monitor select switch to “CUE” and
set the CUE control on Input Channel 4
midway (around “noon”).
At this time, turn the CUE controls on Input Channels
1–3 all the way to 0.
B Play the tape from the beginning and listen
to the playback on Track 4 while adjusting
the monitoring level with the MONITOR
LEVEL control.
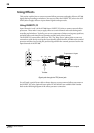
Signal flow during ping-pong recording
Note: Use caution when you set the ping-pong
recording level. If the output level is too high, Track
4 may sometimes generate an oscillating noise.
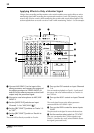
REC
GAIN
HIGH
10
9
8
7
6
5
4
3
2
1
0
LINE MIC
–12 +12
MID
–12 +12
LOW
–12 +12
AUX
1
010
AUX
2
MIX CUE
MIX CUE MIX CUE MIX CUE
010
010
PAN
INPUT-FLIP
TAPE
TAPE
MIC/
LINE
MIC/LINE
to L
LR
1
GAIN
HIGH
10
9
8
7
6
5
4
3
2
1
0
LINE MIC
–12 +12
MID
–12 +12
LOW
–12 +12
AUX
1
010
AUX
2
010
010
PAN
INPUT-FLIP
TAPE
TAPE
MIC/
LINE
MIC/LINE
to R
LR
2
GAIN
HIGH
10
9
8
7
6
5
4
3
2
1
0
LINE MIC
–12 +12
MID
–12 +12
LOW
–12 +12
AUX
1
010
AUX
2
010
010
PAN
INPUT-FLIP
TAPE
TAPE
MIC/
LINE
MIC/LINE
to L
LR
3
GAIN
HIGH
10
9
8
7
6
5
4
3
2
1
0
LINE MIC
–12 +12
MID
–12 +12
LOW
–12 +12
AUX
1
010
AUX
2
010
010
PAN
INPUT-FLIP
TAPE
TAPE
MIC/
LINE
MIC/LINE
to R
LR
4
PHONES
MONITOR OUT
STEREO
10
9
8
7
6
5
4
3
2
1
0
Stereo bus R
Track 1
Track 2
Track 3
Track 4
CUE bus
R