


35
—Owner’s Manual
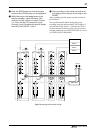
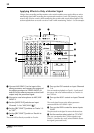
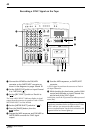
1 Connect a sound source to MIC/LINE 4.
2 Set the [INPUT-FLIP] switches on Input
Channels 1–4 to “MIC/LINE ( )”.
3 Set the [REC SELECT] switches on Tracks 1–3
to “OFF”, and set the [REC SELECT] switch on
Track 4 to “”.
4 Set the monitor select switch to “CUE”.
The monitor select switch should be set to “CUE” so
that you will hear the existing sound playback until
punch in, after which you will hear the new sound that
is being recorded.
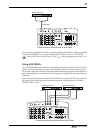
5 Set the [METER SELECT] switch to “”.
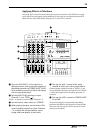
6 Press the [PAUSE] button, then the
button.
You can now check the recording level of the signal
sent from MIC/LINE INPUT 4 to Track 4 on the level
meter.
7 While watching the level meter, use the GAIN
control and the fader on Input Channel 4 to
adjust the input level of the sound source.
8 Press the [STOP] button to cancel pause
mode. Also, set the [REC SELECT] switch on
Track 4 to “OFF”.
9 Start playing the tape and use the CUE
controls on Input Channels 1–4 and the
MONITOR LEVEL control to adjust the
monitoring level.
0 Locate a position before the point at which
you want to punch in, and press the
button.
Playback starts but recording does not start since all
the [REC SELECT] switches are set to “OFF”.
A At the point where you want to punch in, set
the [REC SELECT] switch to “” and start
playing the sound source.
Recording starts as soon as you set the [REC SELECT]
switch to “ ”. You will hear the new sound play
back, instead of the existing sound.
B At the point where you want to punch out,
set the [REC SELECT] switch on Track 4 to
“OFF”, and press the [STOP] button.
Recording stops as soon as you set the [REC SELECT]
switch on Track 4 to “OFF”. You will hear the existing
sound playback via the CUE control on Input Channel
4.
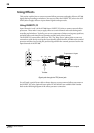
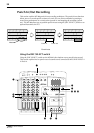
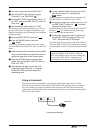
Using a Footswitch
Punch in/out can be performed by connecting an optional footswitch, the FC5, to the
PUNCH IN/OUT jack on the front panel of the MT400. This technique leaves your hands
free, and is useful if you play an instrument and operate the MT400 at the same time for
punch in/out recording. This section explains how to punch in a sound source connected to
MIC/LINE 4 onto Track 4.
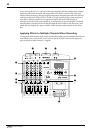
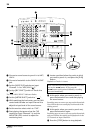
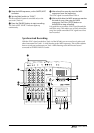
Connecting a footswitch
4
4TR
REC
Note: Pressing the [STOP] button to stop recording
instead of setting the [REC SELECT] switch to
“OFF” may introduce noise into the recording. Be
sure to use the [REC SELECT] switch to stop
recording first, then press the [STOP] button.
REC
4
4
PHONES PUNCH I/O
Footswitch