


3 Setting Up
Refer to fig. 12.
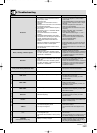
3.10 Before the Soundcheck
Important!
Refer to fig. 1.
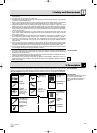
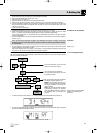
3.10.1 Finding Dead Spots
Diagram 9: Using the Rehearsal
function to find dead spots
(dropouts).
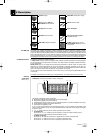
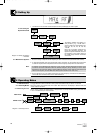
1. Plug the mini XLR connector (1) on the cable of your microphone or on the MKG L instrument cable
(2) into the audio input connector (3) on the bodypack transmitter.
2. Set the ON-MUTE/PRG-OFF switch (4) to "ON".
3. Switch power to the receiver on.
4. Open the battery compartment on the bodypack transmitter.
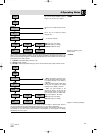
5. Speak or sing into the microphone or play a few bars on your instrument (the louder the better).
6. Use the integrated screwdriver (6) on the battery compartment cover (5) to set the gain control (7) to
the point where the receiver will optimally drive the input to which it is connected. (Also refer to the
manual of your mixer.)
7. Close the battery compartment.
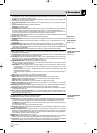
1. Activate the Rehearsal function on the receiver referring to section 3.10.1 below.
2. Move the transmitter around the area where you will use the system to check the area for "dead
spots", i.e., places where the field strength seems to drop and reception deteriorates.
If you find any dead spots, try to eliminate them by repositioning the receiver. If this does not help,
avoid the dead spots.
3. If the received signal is noisy, set the squelch threshold to a level where the noise will stop. (Refer to
section 3.10.2.)
Never set the squelch threshold any higher than absolutely necessary. The higher the squelch
threshold, the lower the sensitivity of the receiver and thus the usable range between transmit-
ter and receiver.
4. The RF bargraph on the receiver extinguishing and the red RF LED (5) coming on mean that no signal
is being received or the squelch is active.
Switch the transmitter ON, move closer to the receiver, or set the squelch threshold to the point that
the green RF LED (5) will illuminate and the RF bargraph reappear.
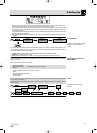
The Rehearsal function detects a maximum of six dropouts and records the time each dropout occurred,
the minimum field strength at each antenna, and the maximum audio level. You can view the list of results
after the recording has stopped.
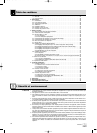
Move the transmitter around the area
where you will use the system.
Up to six dropouts are recorded.
You can stop the recording at any time
by pressing o briefly.
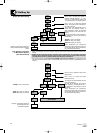
D1: The recording has been completed,
the display indicates dropout no. 1.
MIN RF: The recording has been com-
pleted, no dropout has been detected.
The display indicates the minimum RF
level measured.
OVFL: The recording has been stopped
automatically because six dropouts
have been detected already or because
the available time (16 minutes) has
elapsed.
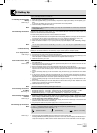
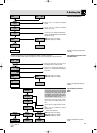
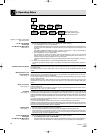
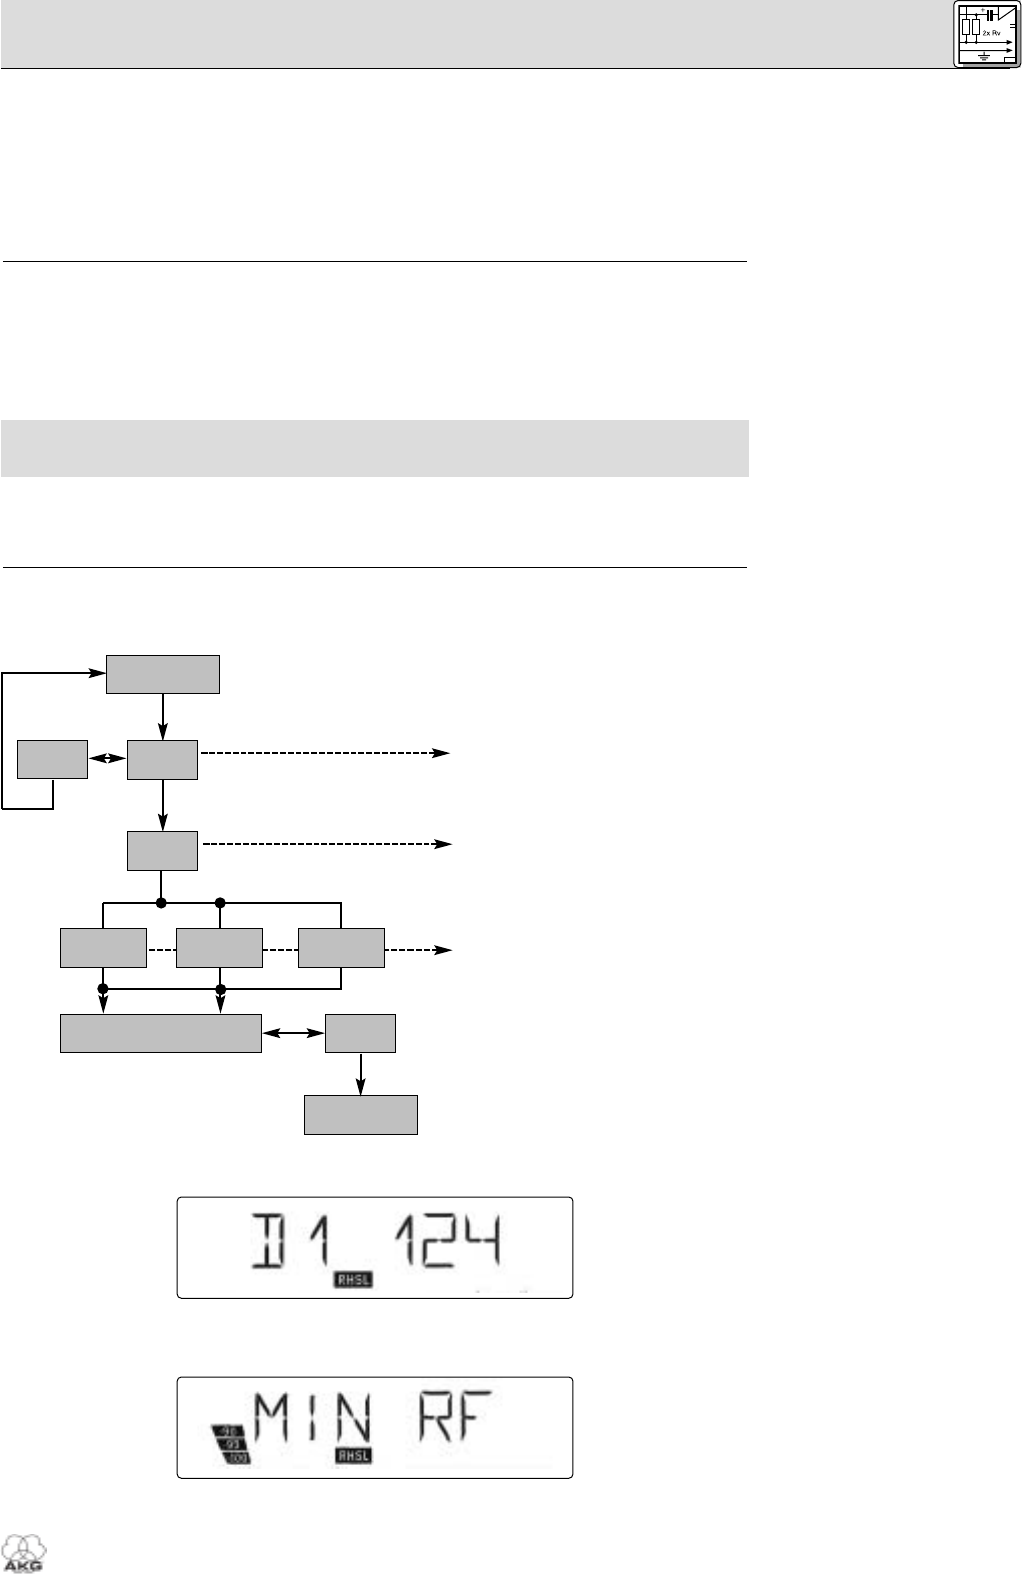
•To retrieve the other results press or briefly. Dropouts are indicated like this (Example 1):
Example 1: Dropout no. 1 occurred after 124 seconds.
• The first storage locations are assigned to dropouts, the last two for the lowest RF level and highest
audio level measured (Examples 2 and 3).
Example 2: Minimum RF level: -90 dB
27
WMS 400
REHEARSAL
RHSL
REHEARSAL
RHSL
Ergebnisliste
>EXIT<
RHSL
EXIT
"D1 124"
RHSL
OVFL
RHSL
MIN RF
RHSL
>START<
RHSL
RECORD
RHSL
6393_04_BDA_Kern_wm 30.04.2004 10:04 Uhr Seite 27