


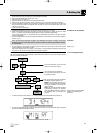


4 Operating Notes
• Optional Remote Mute
Switch
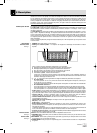
Refer to fig. 16.
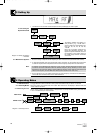
4.3.2 Locking the
ON-MUTE/PRG-OFF Switch
Refer to fig. 17.
4.3.3 Microphone Technique
• C 417 L, CK 55 L Lavalier
Microphones
• C 420 L, C 444 L Head-worn
Microphones
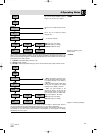
The display indicates the frequency in MHz - frequency in Preset form - "Prg IR" and changes to
alternating between the currently selected Preset and "Prg IR".
• If you switched from "ON" to "MUTE/PRG":
The microphone is muted and the status LED (20) will change from green to red. The infrared
receiver section is OFF. Since the RF section continues transmitting the carrier frequency, no
unwanted noises will become audible form the sound system.
The display alternates between the currently selected Preset and the remaining battery capacity in
hours.
2. To switch the microphone back on, set the ON-MUTE/PRG-OFF switch (19) to "ON".
The status LED (20) will change to green. The display will indicate the remaining battery capacity in
hours.
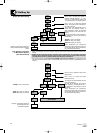
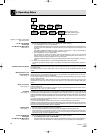
The optional Remote Mute Switch allows you to mute the transmitter if it is mounted in a position where
it is difficult or impossible to use the "on-board" MUTE switch.
1. Plug the cable (1) on the Remote Mute Switch into the REMOTE MUTE jack (2) on the transmitter.
2. Put the Remote Mute Switch in a jacket or shirt pocket or use the belt clip to clamp the Remote Mute
Switch on the belt.
3. To mute the microphone, press the button on the Remote Mute Switch. The button will lock and the
status LED will change to red.
4. To switch the microphone back on, press the button again. The status LED will change to green.
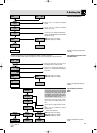
1. Plug the supplied terminal connector (3) into the REMOTE MUTE jack (2) on the bodypack transmit-
ter.
The ON-MUTE/PRG-OFF switch on the bodypack transmitter is electronically locked. You can not
mute the microphone unintentionally.
2. To unlock the ON-MUTE/PRG-OFF switch, disconnect the terminal connector (3) from the REMOTE
MUTE jack (2).
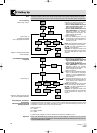
1. Fix the microphone to the H 40/1 lavalier clip or H 41/1 tiepin referring to the microphone’s instruction
manual.
2. Clamp the microphone on your clothing as close as possible to your mouth.
Remember that gain-before-feedback will be the higher the smaller the distance between the micro-
phone and the mouth!
3. Make sure to aim the microphone at your mouth.
Refer to the user’s manual of the respective microphone for instructions on how to use head-worn micro-
phones.
To clean the transmitter and receiver surfaces, use a soft cloth moistened with water.
31
WMS 400
5 Cleaning
6393_04_BDA_Kern_wm 30.04.2004 10:04 Uhr Seite 31