


Axiom Line User Guide
48
English
With some of these applications it is necessary to set up your Axiom keyboard within the software.
How to use the Axiom with Ableton Live
Ableton Live does not have any default MIDI controller assignments but it is possible to make your own very quickly and easily
using the MIDI Learn function. It is best to use Preset 17 with Live, since it is programmed with a selection of unassigned MIDI
controllers.
1) Set up your Axiom selected as the remote control device:
< Select Preferences from the Options menu (PC) or Live menu (Mac).
< Click on the MIDI/Sync tab.
< In the Input column, set your Axiom keyboard remote setting to ON.
2) Close the Preferences window.
3) Click on the MIDI button in the top right hand corner.
4) Click on the parameter you want to control.
5) Move the desired control on your Axiom.
6) When you have finished making all your assignments, click on the MIDI button in the top right hand corner to exit Live’s
MIDI Map mode.
We recommend that you use Preset 17 when setting up controls in Ableton Live. If you wish to take advantage of the endless
encoder functionality, then use preset 20. The encoders loaded from Preset 20 will send relative (binary offset) increment/
decrement MIDI messages. The pads on both Presets 17 and 20 are assigned to trigger the eight samples in Live’s Impulse
module.
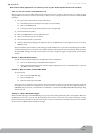
Preset 4: GForce Minimonsta
In order to select your Axiom keyboard as the MIDI input device for Minimonsta:
< Click on the Setup button just above Minimonsta’s keyboard.
< Select your Axiom keyboard from the menu that appears (displayed by name or as “USB audio device” on PC and
“CoreMIDI In interface” on Mac.)
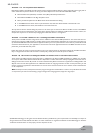
Preset 5: Way Out Ware TimewARP 2600
To use this preset:
< Click on the TimewARP 2600 logo.
< Select Load MIDI map.
< Select the default map and click OK.
The trigger pads are assigned to send controller data in this preset. The pads on the left will control the filter cut-off and
resonance. The other pads can be assigned to any control you choose. To assign the pads, hold down SHIFT (Windows) or
CONTROL (Mac) and click on a control. Make sure “MIDI learn” is ticked in TimewARP’s Global MIDI Map Settings dialog.
Then, press a pad.
Preset 6: Wizoo Darbuka/Latigo
Wizoo’s Darbuka and Latigo are VST/AU/RTAS plug-ins so you must access these applications within a host application. Make sure
the MIDI input to the host is set to be your Axiom keyboard. Set one of the tracks in the host to output to Darbuka or Latigo.
Please consult the documentation for the host to see how this is done. To make the most of the Wizoo preset, the host should be
set to transmit on all MIDI channels to Darbuka or Latigo.