


20 DIGITAL PRO MIXER DDM4000 User Manual
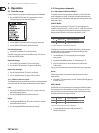
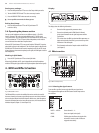
DELAY, ECHO:
For the delay and echo eect, you can edit the delay time in musical units.
The number of beats is displayed:
Fig. 4.3: Beats and note values for delay and echo
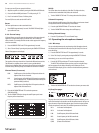
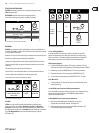
A rhythmical representation of the whole looks like this
(showing a selection of several beats):
Fig. 4.4: Rhythmically represented delay parameter
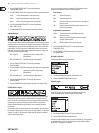
FLANGER, PHASER, PAN, FILTER:
For the lter eect, the BPM synchronization is only possible in LFO Mode.
You can adjust the speed of the modulation (LFO speed). The values 1–32
correspond to the number of beats that are needed for one oscillation period:
Fig. 4.5: Beats and note values for modulation eects
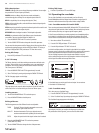
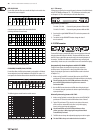
The following picture results from the musical context:
Fig. 4.6: LFO parameter, represented in beats and bars
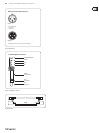
FX setup4.1.7
FX Setup lets you specify the crossover frequencies between the individual bands
of the EFFECT/BAND push buttons (46) – (48) (Kill function on the eect path,
see Chapter 4.1.2). This is individually done for both eect devices.
Adjustable parameters:
FX 1 LOW / FX 2 LOW: Crossover frequency between LOW and MID.
FX 1 HIGH / FX 2 HIGH: Crossover frequency between MID and HIGH.
Press the left or right PARAMETER knob 1) (45) to select the parameter for
FX 1 and FX 2.
Turn the left or right PARAMETER knob to change the value of 2)
the selected value.
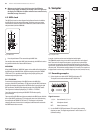
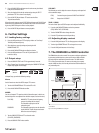
BPM counter4.2
The Auto BPM Counter is automatically able to convert the tempo of the track
being played into BPM (Beats Per Minute). The detected BPM values are the
basis for all time-related eect parameters and for the recording duration of
the sampler. The BPM can be detected in two dierent ways: manually and
automatically. In both cases, the current BPM is shown in Section B of the display.
Automatically detecting beats with AUTO BPM:
The BPM Counter detects the tempo of the signal source assigned to
the Eect section. The signal source is shown in the BPM section of the
display. (Assigning the signal source to the BPM/Eect section is described
in Chapter 4.1.1.)
Make sure that “Auto BPM” is activated. When active, the AUTO BPM 1)
push button (50) shines yellow and the BPM indicator ashes on the display.
Should Tap Mode be active (AUTO BPM push button shines blue), ◊
press the AUTO BPM push button longer than one second to
activate Auto BPM.
Now the BPM Counter determines the BPM value of the played signal. 2)
It is constantly brought up to date to be able to respond immediately to
any tempo changes.
Manually detecting beats with TAP:
Make sure that Tap Mode is activated. When active, the AUTO BPM/TAP 1)
push button (50) shines blue and the BPM indicator shows “Manual.”
Tap the TAP push button 2) (50) (at least 2x) in the rhythm of the music,
which results in a constant BPM value. Here’s a tip: while tapping,
listen in on the signal using the headphones.
Should Auto BPM be active (AUTO BPM push button shines ◊
yellow), go to Step 2. When tapping the tempo, Manual Mode
is automatically activated.
The BPM value can always be readjusted by tapping over and over again.3)
The Auto BPM is always active when the device is turned on.◊