Assembling the Stand
E-39
To tighten the joint connector and screw
(1) Rotate the screw counterclockwise about three
turns to ensure that the screw is in the center of the
joint connector.
(2) Slowly rotate the screw clockwise and confirm that
it tightens without resistance. If you feel any
resistance, it means that the screw is not engaging
properly with the joint connector. Rotate the screw
counterclockwise again and try to get it to engage
properly.
(3) If you experience problems getting the screw to
engage properly, use a screwdriver to rotate the
joint connector 180 degrees. Next perform steps (1)
and (2) again to engage the screw from the screw
hole on the other side.
* Forcibly tightening a screw while it is not engaged
properly can strip the threads of the screw and joint
connector, making them unusable.
9.
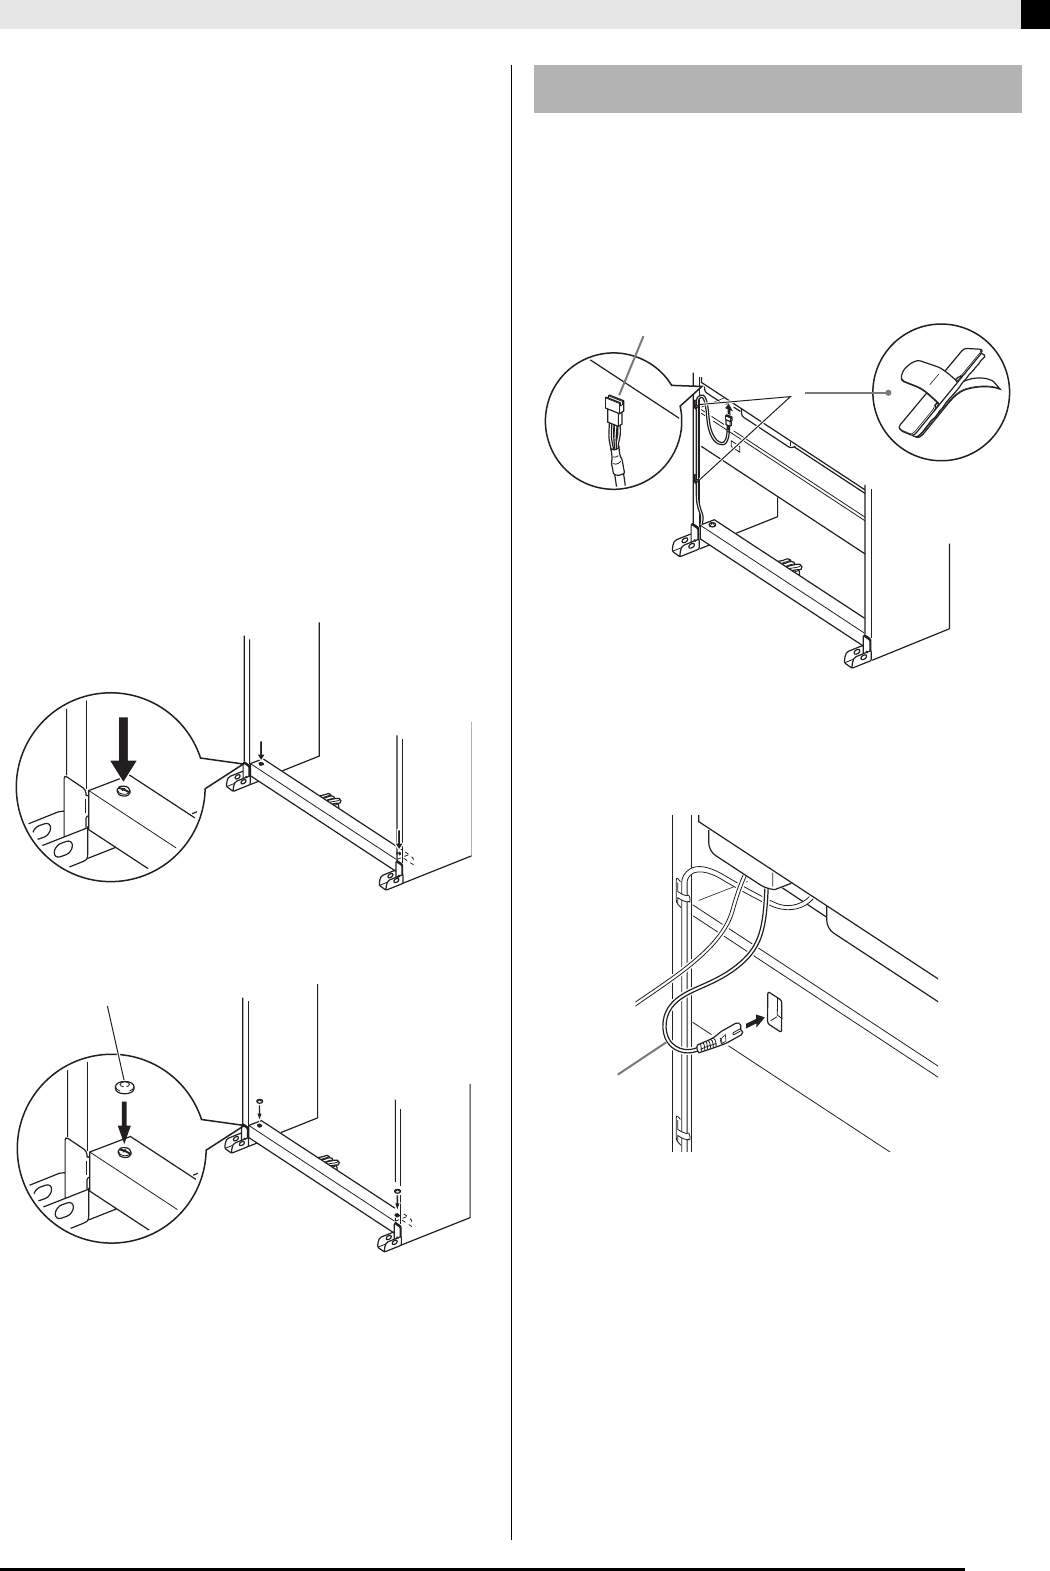
Securely tighten the screws G that you
temporarily tightened in step 5.
10.
Cover the screw heads with the caps J.
1.
Orienting the pedal unit plug as shown in the
illustration, plug it into the pedal connector on
the bottom of the digital piano. Secure the
pedal cord with clips H.
• Attach the clips H at two locations to the stand’s side
panel as shown in the illustration.
2.
Connect the speaker power cord that comes
out of the power supply box to the speaker
box.
3.
Check to make sure that the POWER button
is in the OFF position (raised). If power is on,
press the POWER button to turn it off.
J
To connect cords
H
Pedal unit plug
Speaker power cord
PX800_e.book 39 ページ 2006年10月12日 木曜日 午後12時5分


