


25
CP-3 Digital Surround Processor
Calibration
Setting
Output Levels
NOTE: Because the CP-3 is
not capable of generating PAL
or SECAM composite video
signals by itself, during INTER-
NAL NOISE generation (when
all inputs are turned off) users
with PAL or SECAM TVs will
have to rely on the LCD when
adjusting Output Levels.
When CP-3 Input and Output levels are set properly, the entire system will
be calibrated to play films at the level intended by the director. Setting the
output levels is easy, particularly if a Sound Pressure Level (SPL) meter is
used. Using the PARAM and the PARAM ▲ and ▼ buttons, adjust the level
of each individual output until they are all the same relative level. You can
use an external source for this, or the CP-3's internally generated calibration
signal.
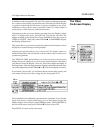
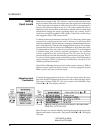
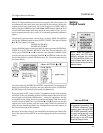
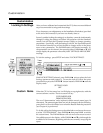
Temporarily turn the system volume down to about -20dB. Press SETUP
and use the PARAM button to select OUTPUT LEVEL. Then press PARAM
▲ or ▼. The display will read:
INTERNAL SOURCE
EXTERNAL SOURCE
Use the PARAM button to select the built-in signal generator (INTERNAL
SOURCE) or an EXTERNAL SOURCE. With your choice selected by the
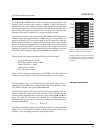
cursor, press PARAM ▲ and ▼ to activate your selection. PARAM is used
to select the output to be adjusted; PARAM ▲ and ▼ raise and lower the
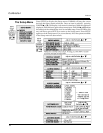
level of that output in precise 1dB increments. The Level sub-menu choices
are shown below.
Note that selecting INTERNAL SOURCE automatically disconnects all
audio and video inputs, and plays only one channel at a time. EXTERNAL
SOURCE allows all channels to be heard simultaneously.
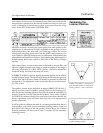
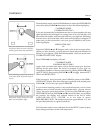
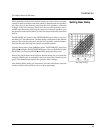
If you are using an SPL meter, use the C-weighting with the meter response
on SLOW. From your listening position, hold the meter at about ear level at
arm's length (to avoid body interference). A tripod is useful here. Aim the
microphone at the ceiling and set to a scale incorporating 75dB. Increase the
system volume to 00dB. Now use PARAM ▲ and ▼ to raise or lower the
output level of the speaker until the meter reads 75dB. Press PARAM to
select the next channel specified in the Configuration menu and continue in
this manner through all the channels.
Be sure to record the values on the Installation Worksheet provided at the
end of this manual. Press SETUP to save the settings and return to the Setup
menu.
PAL and SECAM
NOTE: When you select the
Output menu, the CP-3 auto-
matically engages the Home
THX Cinema mode. When you
exit the Output menu, the sys-
tem will return to the previously
selected mode.