


31
CP-3 Digital Surround Processor
Customization
Custom Modes
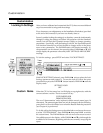
At this point an underline character appears in the bottom row of the LCD
display. (On the on-screen display, one of the characters of the current name
will flash.) The cursor will move to the leftmost character of the mode name.
Now push PARAM ▲ or ▼ until the character you want appears in the
space. (Holding either button for one second activates an auto-repeat mode
to speed you through the list.) All letters are available, in upper case, as are
digits 0-9, a blank space and an assortment of other characters. When the
first space in the display is correct, press PARAM, use PARAM ▲ and ▼ to
set the second character and repeat until the new name is complete.
Press SETUP to exit to the main Setup menu. Press SETUP again to resume
normal operation.
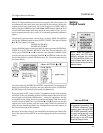
Lastly, the CP-3 is designed to be operated day to day with the Standard
Remote. Unless you are an incorrigible tweaker, simply put the Expanded
Remote away, with its batteries removed for safe keeping.
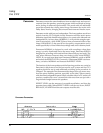
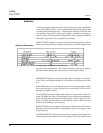
When the CP-3 is powered up via the Standard remote, it will automatically
restrict itself to the five operating modes in User Bank B that correspond to
those listed on the remote. These modes are stored in registers B2, B6, B11,
B10, and B15. Since these modes are stored in User registers, it is possible
to change these modes so that a new operating mode is engaged when one
of the five mode buttons on the Standard remote is pressed. For instance,
you may choose to have NIGHTCLUB load a small Ambience hall instead
of the default Panorama Wide mode — To do this, simply load the small
Ambience hall into register B2. Of course you can also adjust any of the
parameters in the mode. Adjustments will be saved automatically.
Mode: loads register: default preset:
NIGHTCLUB B2 PANORAMA-WIDE
CONCERT HALL B6 AMBIENCE-LARGE HALL
MUSIC SURROUND B11 SURROUND- MUSIC LOGIC
TELEVISION B10 SURROUND-TELEVISION
MOVIES B15 SURROUND-HOME THX