


6
<DRB1252>
En/Fr
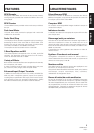
L
R
L
R
L
R
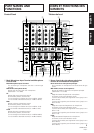
MASTER
OUT2
R
MASTER
LEVEL
ATT.
SIGNAL
GND
MASTER
OUT 1
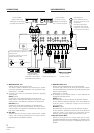
PHONO 3 LINE
CH - 4
PHONO 2 LINE
CH - 3
PHONO 1 CD 2 /LINE LINE CD 1 /LINE
CH - 2 CH - 1
CH - 1CH - 2
PLAYER CONTROL
BOOTH
MONITOR
L
RR
RETURN CH - 4 SUBMICSENDREC OUT
LR
2 COLD
1 GND
3 HOT
L
(MONO)
L
(MONO)
L
R
L
R
*1
R LR LR L R L
R LR LR L R L
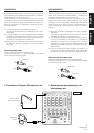
Cassette deck, etc.
Lecteur de cassette, etc...
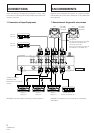
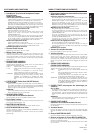
CONNECTIONS
When connecting or changing the connection of units, make
sure to first turn off the power switch and disconnect the power
cord from the outlet.
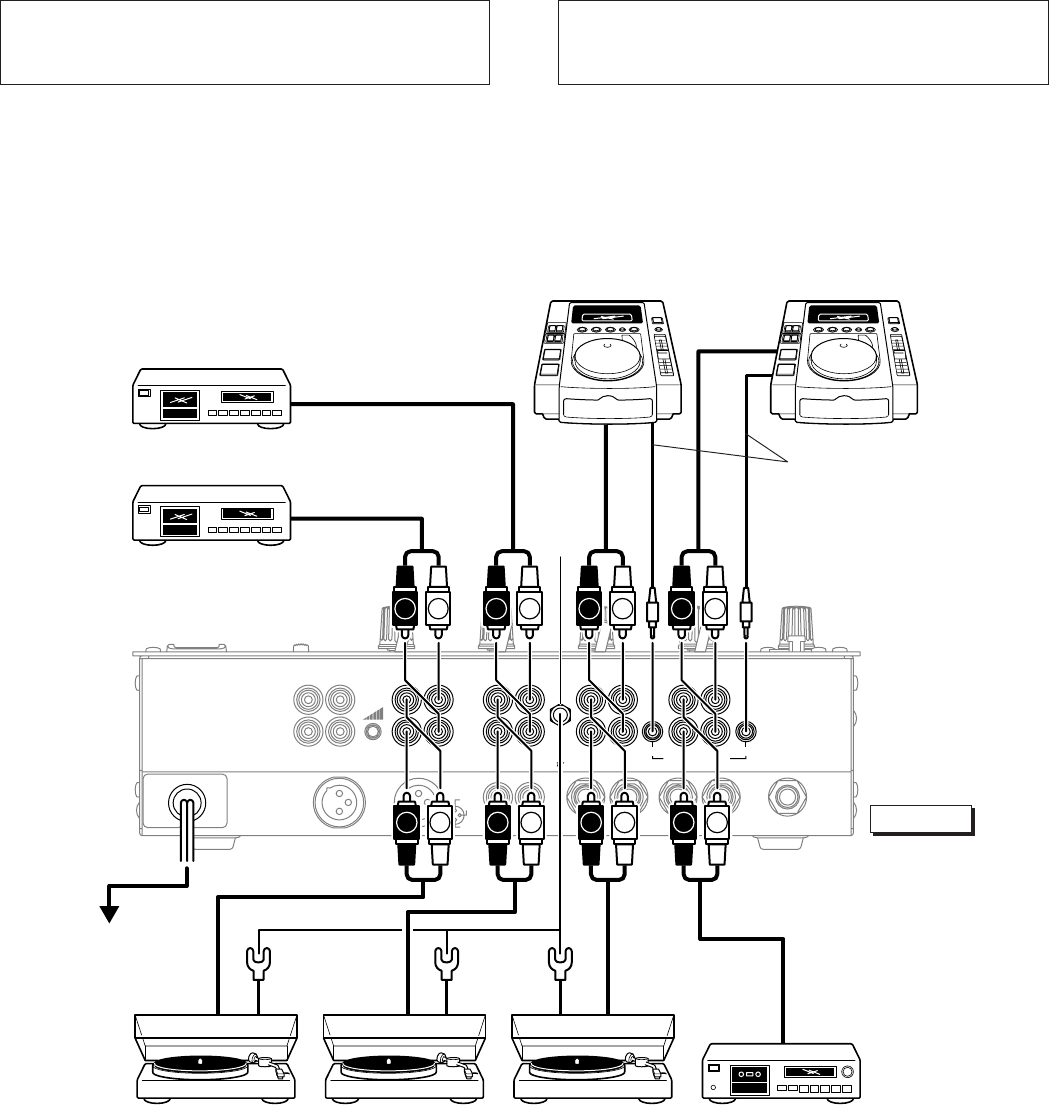
1. Connection of Input Equipment
DAT, etc.
DAT, etc...
DAT, etc.
DAT, etc...
CD 2 CD 1
CDJ-100S/
CDJ-700S/
CDJ-500 II
CDJ-100S/
CDJ-700S/
CDJ-500 II
Control cord
*2
(Can be connected to the CDJ-100S,
CDJ-700S and CDJ-500 II, etc.)
Cordon de commande
*2
(Peut être raccordé au CDJ-100S, au
CDJ-700S et au CDJ-500 II, etc...)
DJM-600
Connect to a wall’s
electrical outlet
Brancher sur une prise de
courant
Player 3
*3
Lecteur 3
*3
Player 2
*3
Lecteur 2
*3
Player 1
*3
Lecteur 1
*3
(PHONO 3 cannot be used if connecting a sub-microphone.)
RACCORDEMENTS
Veillez à mettre l’appareil hors tension et à retirer le cordon
d’alimentation de la prise avant d’effectuer ou de modifier des
raccordements.
1. Raccordement d’appareils aux entrées
(PHONO 3 est inopérant si vous raccordez un microphone
secondaire.)