


KR-11 Owner’s Manual—Music Assistant, Pad buttons, pedals
46
Saving Music Assistant settings to disk
You can store up to 32 Music Assistant settings,
including Manual settings, on the KR-11. These 32
settings make up one set, and up to 99 sets can be
saved on a disk.
Music Assistant settings can only be saved on a disk
that has been formatted by the KR-11. If you’re using a
new disk, first format it (see page 36), then carry out
the following steps.
1.
Set the Write Protect tab on the disk to the “Write”
position and insert the disk into the disk drive.
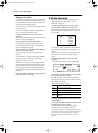
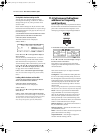
2.
Press the [Music Assistant] button.
The Music Assistant screen is displayed.
3.
Press <Disk...>.
4.
Use <▲> and <▼> to the right of the display to
select a number.
You can choose any number between “1” and “99”.
Note that selecting a number that already contains
data means that the set in question (i.e. 32 Music
Assistant settings) will be overwritten by your new set.
5.
Use <√> and <®> below the display and <▲>
and <▼> to the left of the display to enter a name.
See page 34 for a list of available characters.
6.
Press <Save> at the bottom right of the display.
Note: To cancel without saving the Set, press the [EXIT]
button.
Loading a Music Assistant set from disk
1.
Insert the floppy disk that contains the desired
Music Assistant file into the disk drive.
2.
Press the [Music Assistant] button.
The Music Assistant screen is displayed.
3.
Press <Disk...>.
4.
Use <▲> and <▼> to the right of the display to
choose the set.
5.
Press <Load> at the bottom right of the display.
Note: Please bear in mind that loading a set means that all
32 internal Music Assistant memories will be overwritten.
You may want to save them to disk first (see above).
Note: To stop the operation, press the [EXIT] button.
11.2 Performance Pad buttons:
additional or frequently
used functions
You can assign a wide variety of performance-related
functions to the two Performance Pad buttons on the
panel. After a function has been assigned, it can be
called up by pressing the corresponding Pad button.
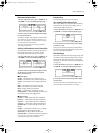
1.
On the Basic screen, press <Pad/Pedal>.
2.
Use <▲> and <▼> next to the display to assign a
function to “Pad 1” and “Pad 2.”
Press [EXIT] if you’ve changed your mind about
assigning one of the following functions to a Perfor-
mance Pad button.
Here are the functions you can assign to the Perfor-
mance Pad buttons:
Leading Bass— This switches the Leading Bass func-
tion on or off. During normal Style Play, the root of
the chord played is used as the bass note, but when the
Leading Bass function is used, the lowest note of the
chord actually played is used as the bass note. This
means that the bass note changes when an inverted
chord is used.
Note: If you assign this function to a footswitch, the Leading
Bass function is “On” whenever the footswitch is depressed.
Break— Break is a great function for Rock’n’Roll
songs and ballads. Use it to halt the Arrangement
either for the remainder of the current bar or for an
entire bar (when pressed on the last beat of a bar).
Usually, the melody or solo continues during such a
silent (tacet) bar. This feature allows you to achieve the
breaks in “Great Balls Of Fire”, for example.
Fill In To Variation.— This has the same function as
the [TO VARIATION] button.
Fill In To Original.— This has the same effect as the
[TO ORIGINAL] button.
Fill In— This inserts a Fill-in, but the accompaniment
pattern afterward does not change.
Original/Variation— This changes to Original or
Variation without inserting a Fill-in.
KR-11_Book Page 46 Thursday, November 21, 2002 9:35 PM