


EnglishDeutschFrançaisItalianoEspañol
31
Basic recording methods
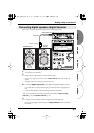
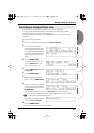
fig.rec-time.eps
6
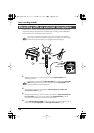
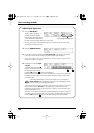
Press the
REC button
.
Recording will begin.
* You can also start recording by pressing
the
PLAY/PAUSE button
.
If you move the
input volume control
in Record Standby mode or during
recording, the input level will change. Be careful that you don’t operate the
input volume
control inadvertently. Even if the
HOLD switch
is ON, the
input volume
is not affected by the HOLD function.
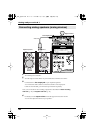
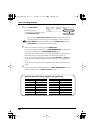
7
When you’re finished recording, press the
STOP button
.
If you want to pause recording, press the
PLAY/PAUSE button
. To defeat pause
and resume recording, press the
PLAY/PAUSE button
again.
The recorded data will be saved as a file on the CompactFlash card. The display will
indicate the file name of the recorded data, and that file will be selected.
* The file name is created automatically, using this format:
R1_0001.MP3
. The
0001
portion
will be the number that follows the highest-numbered file existing on the CompactFlash
card.
* The file is created at the root level of the CompactFlash card. Folders (directories) are not
created.
* Since the R-1 does not contain an internal clock, all files will have a creation date of January
1, 2002.
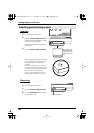
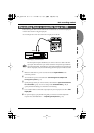
8
To listen to the data you just recorded, press the
PLAY/PAUSE button
. For other
playback methods, refer to
“Playback methods”
(p. 38).
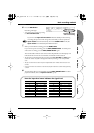
Elapsed time from
start of recording
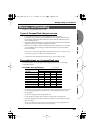
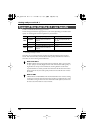
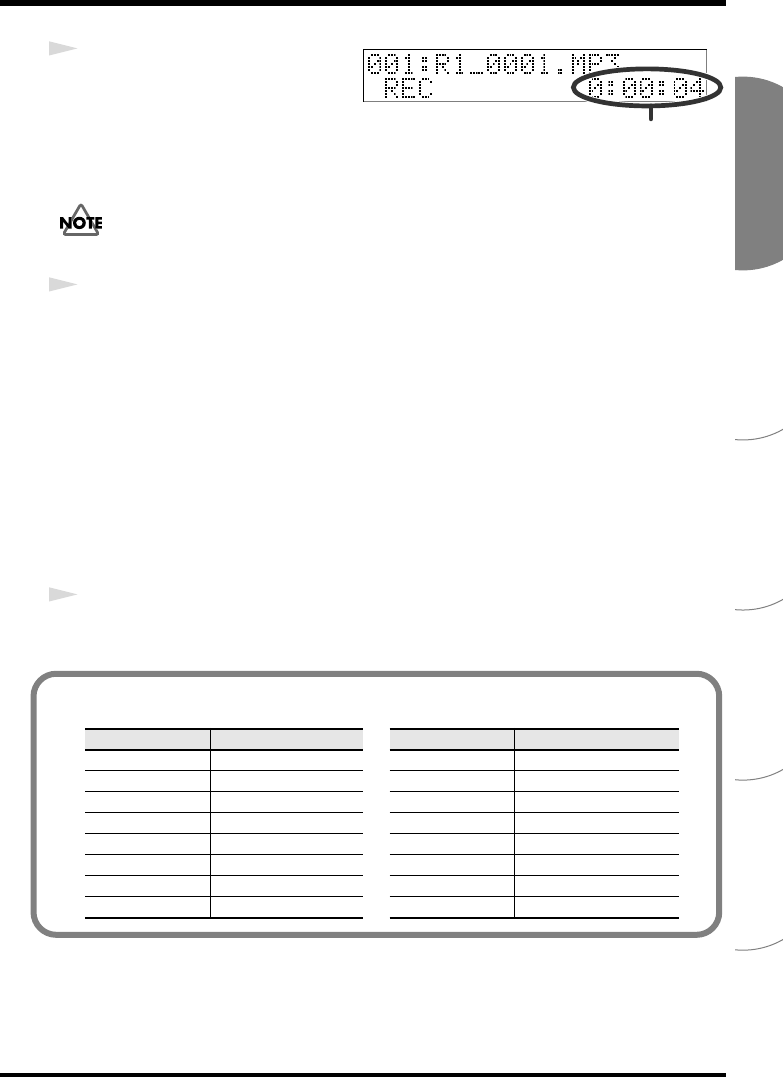
How the input level meter indicates the signal level
Number of ■’s dB Number of ■’s dB
None ∞ –– -50.0 8 -21.0 –– -18.0
1 -50.0 –– -40.0 9 -18.0 –– -15.0
2 -40.0 –– -36.0 10 -15.0 –– -12.0
3 -36.0 –– -33.0 11 -12.0 –– -9.0
4 -33.0 –– -30.0 12 -9.0 –– -6.0
5 -30.0 –– -27.0 13 -6.0 –– -3.0
6 -27.0 –– -24.0 14 -3.0 –– 0.0
7 -24.0 –– -21.0 15 0.0 –– (Clip)
R-1_egfis1.book 31ページ 2005年11月11日 金曜日 午後5時13分