


36
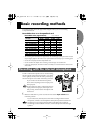
Basic recording methods
Adjusting the input level
fig.rec-1.eps
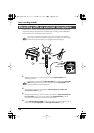
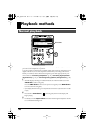
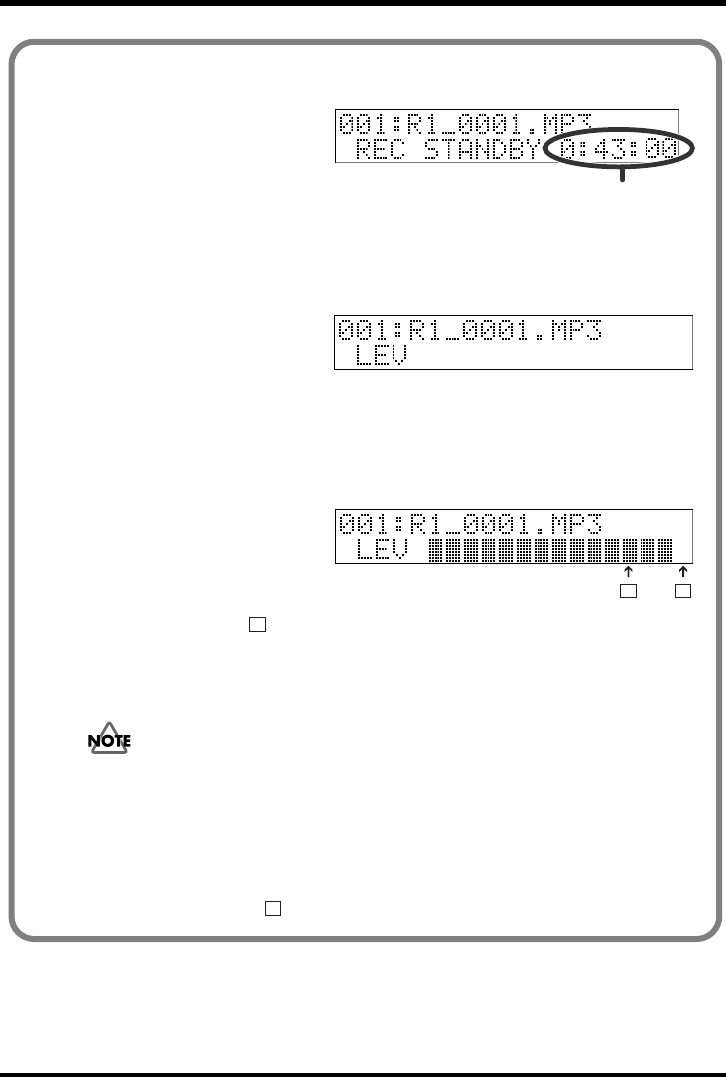
1. Press the REC button.
The R-1 enters recording-
standby mode. The display
indicates the remaining amount
of time that the R-1 can record for
the type of file (recording quality) you’ve selected.
* The song name shown in Record Standby mode is the name of the file that will be newly
created when recording is finished.
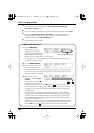
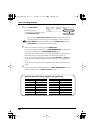
fig.rec-2.eps
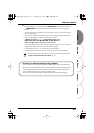
2. Press the DISPLAY button.
3. On the device that’s connected to the line input jack, play back the sounds that
you want to record. In this example, play back a CD on your CD player.
* If you want to apply an effect to the sound while you record it, adjust the input level while
the effect is turned on (i.e., applied).
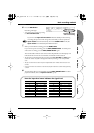
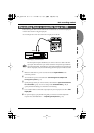
fig.rec-3.eps
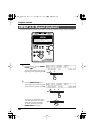
4. Gradually increase the input
volume.
Adjust the level so that the ■
input level indicators shown in
the display do not reach the
rightmost ■. (Position in the above illustration)
If the recording level is too low, you won’t be able to record very soft sounds. If the
recording level is too high, loud sounds will be distorted, causing crackles in the
recorded sound.
If the sound still distorts or is too soft even after you’ve used the R-1’s
input volume control to adjust the input level, try adjusting the volume
of your CD player or other playback device.
* If the material you are recording occasionally contains sudden loud sounds, we recommend
that you use the Limiter (06 Limiter, p. 54). When doing so, adjust the input level
appropriately for the principal type of sound you are recording—not for the sudden loud
sounds that sometimes occur.
When you use the Limiter, the input level is automatically adjusted so that the audio input
level doesn’t get excessively high. When using the Limiter, you should adjust the input level
so that the ■ symbol at the position in the illustration appears only occasionally.
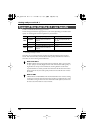
Remaining recording time
A
B
A
B
R-1_egfis1.book 36ページ 2005年11月11日 金曜日 午後5時13分