


19
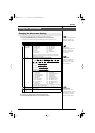
Using the RMP-5 with Additional Pads
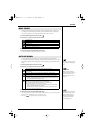
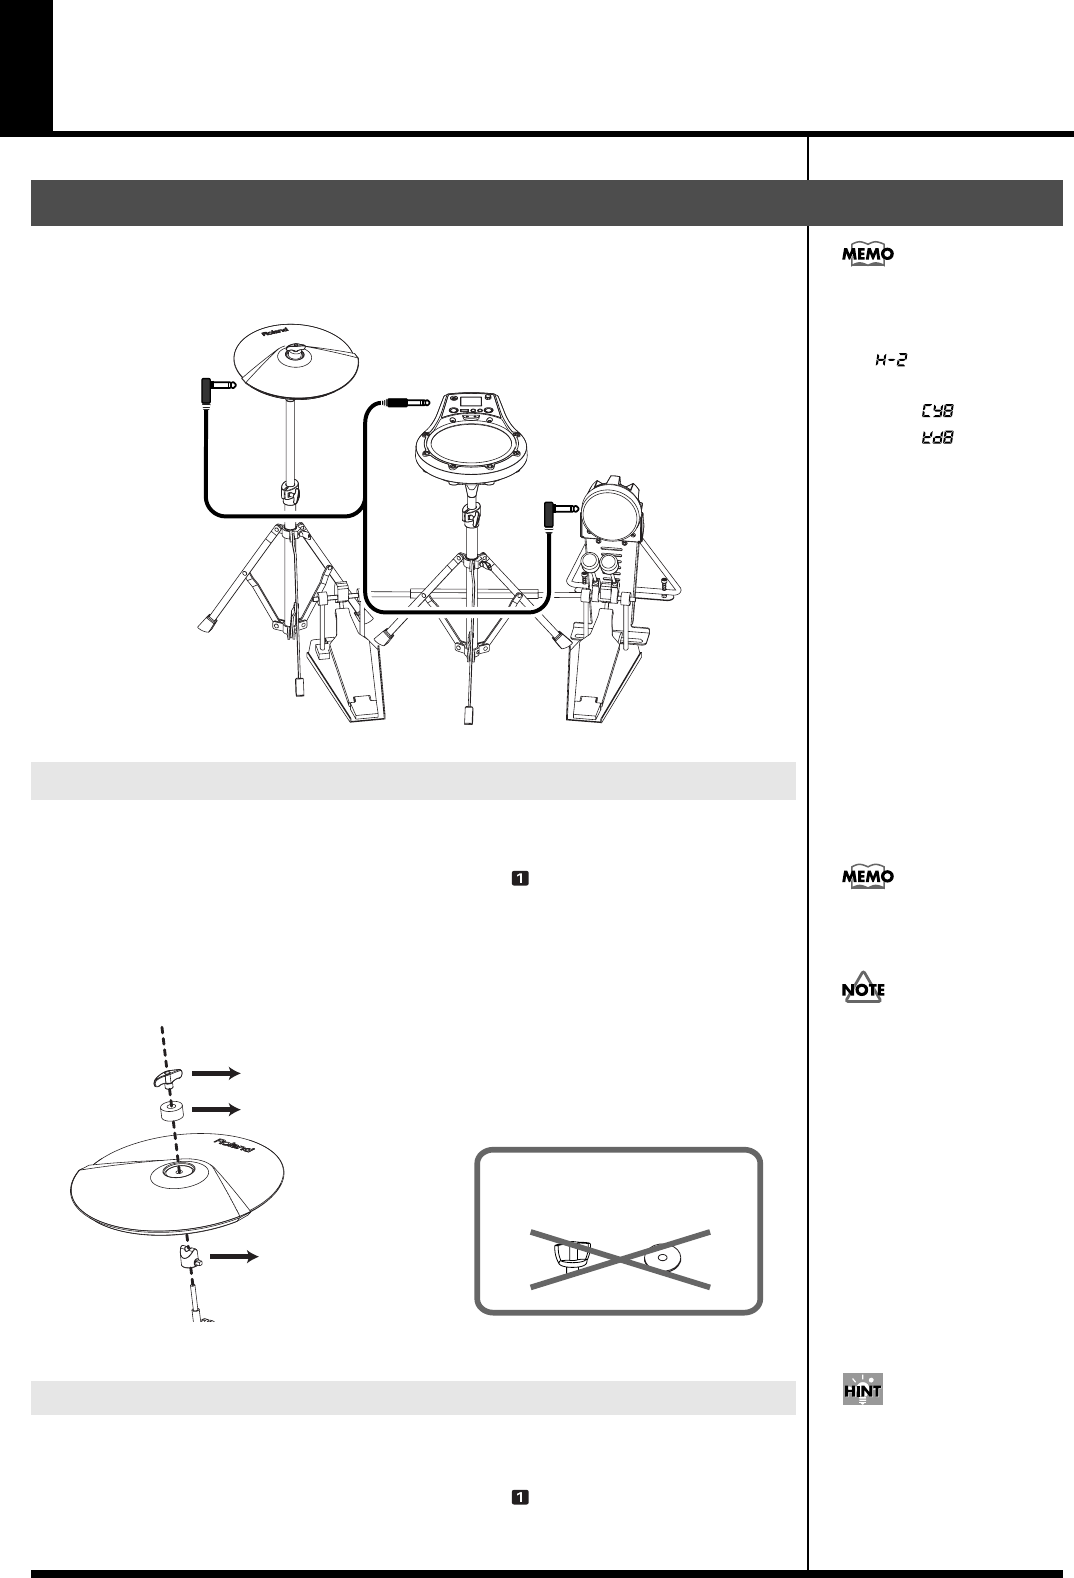
Using an optional PCS-31L cable you can connect cymbal and kick pads to the EXT TRIG IN jack.
Here’s an example using the CY-8 and KD-8 pads.
fig.setup
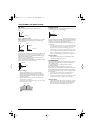
1.
Connect the left (black) plug of the cable to the cymbal pad’s output jack.
When you strike the pad, “EXT1” lights up.
* Press the [METRONOME] button a number of times to select “ ” (PAD SOUND), and use the [+] or
[-] buttons to select the sound.
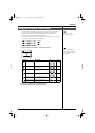
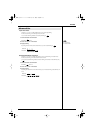
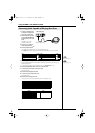
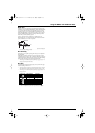
Precautions When Mounting the CY-8 on PDS-2
* You can also use a normal cymbal stand
Attach as follows.
fig.CY-PDS_j.eps
1.
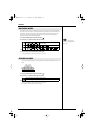
Connect the right (red) plug of the cable to the kick trigger pad’s output jack.
When you strike the pad, “EXT2” lights up.
* Press the [METRONOME] button a number of times to select “ ” (PAD SOUND), and use the [+] or
[-] buttons to select the sound.
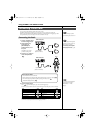
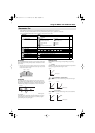
Setup Examples
Connecting a Cymbal Pad
Connecting a Kick Trigger Pad
The RMP-5 must be set to the
following settings.
Input Mode (p. 20)
Trigger Type (p. 21)
EXT1:
EXT2:
* The above are default factory
settings.
CY-8
RMP-5
KD-8
PCS-31L
(sold separately)
PDS-2
(black)
(red)
Wing screw included with PDS-2
Do not use the wing nut included
with the CY-8 or the washer included
with the PDS-2.
PDS-2
CY-8
Felt washer included with CY-8
Stopper included with CY-8
Use the L-shaped cable to
connect the cymbal pad.
If connecting rim-shot-capable
pads such as the PD-85 or PD-
8, refer to “Connecting Pads
Capable of Playing Rim
Shots” (p. 22).
Cymbal pad edge shots and
chokes cannot be played when
b
oth a cymbal pad and a kick
trigger pad are connected to
the External Trigger In jack.
RMP-5_e.book 19 ページ 2005年8月11日 木曜日 午後2時47分